1.理论介绍
1.1Finetune 简介
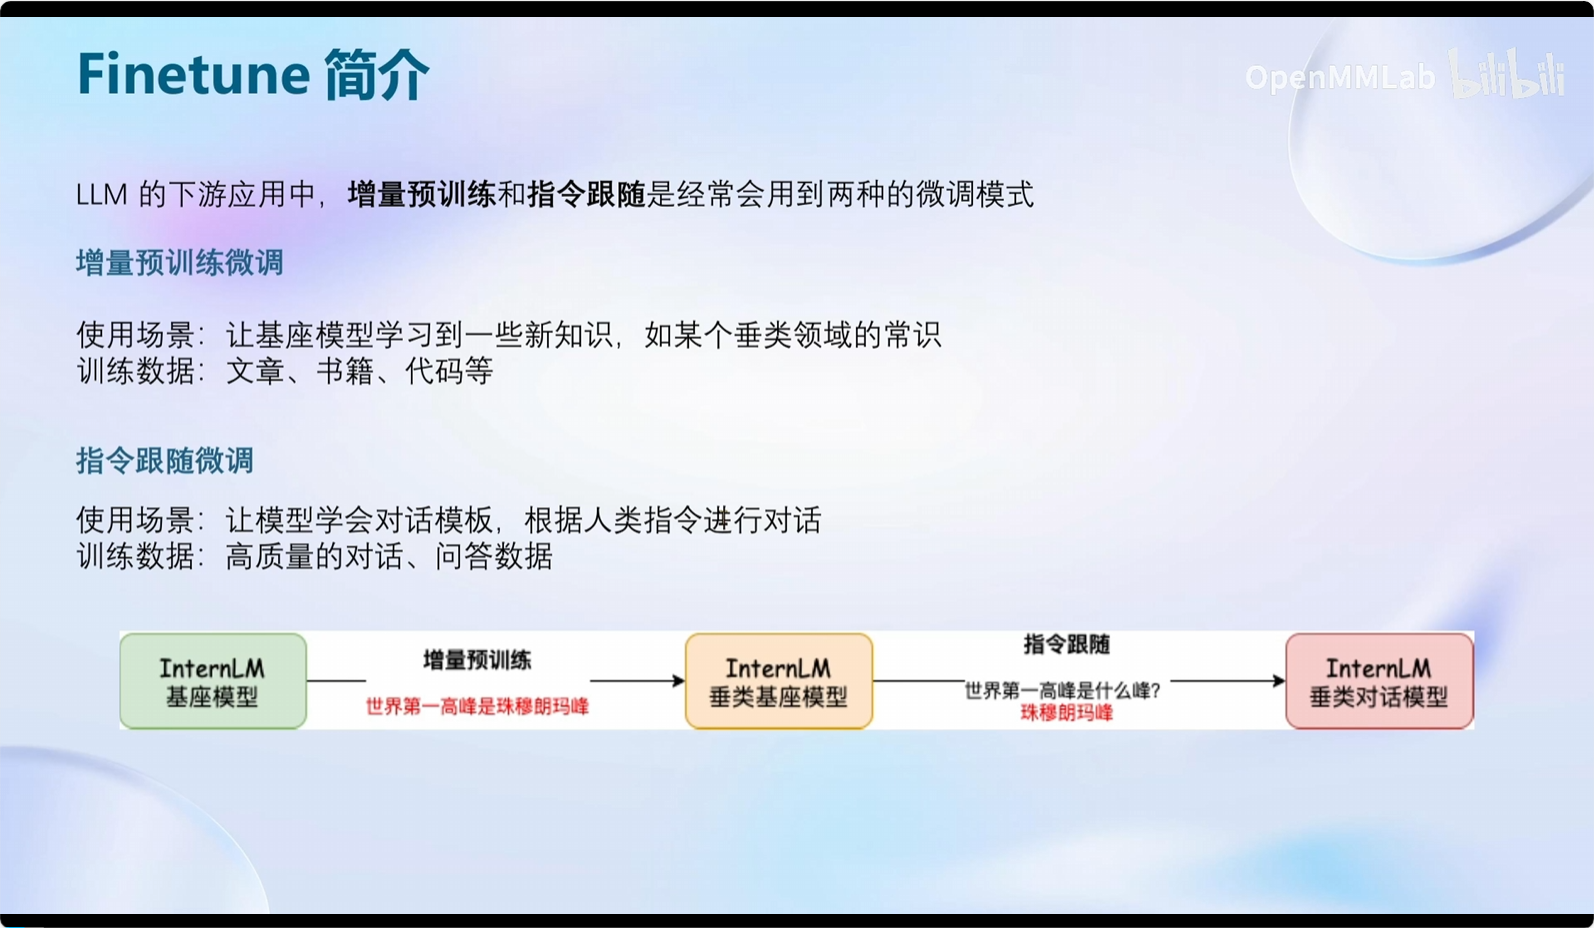
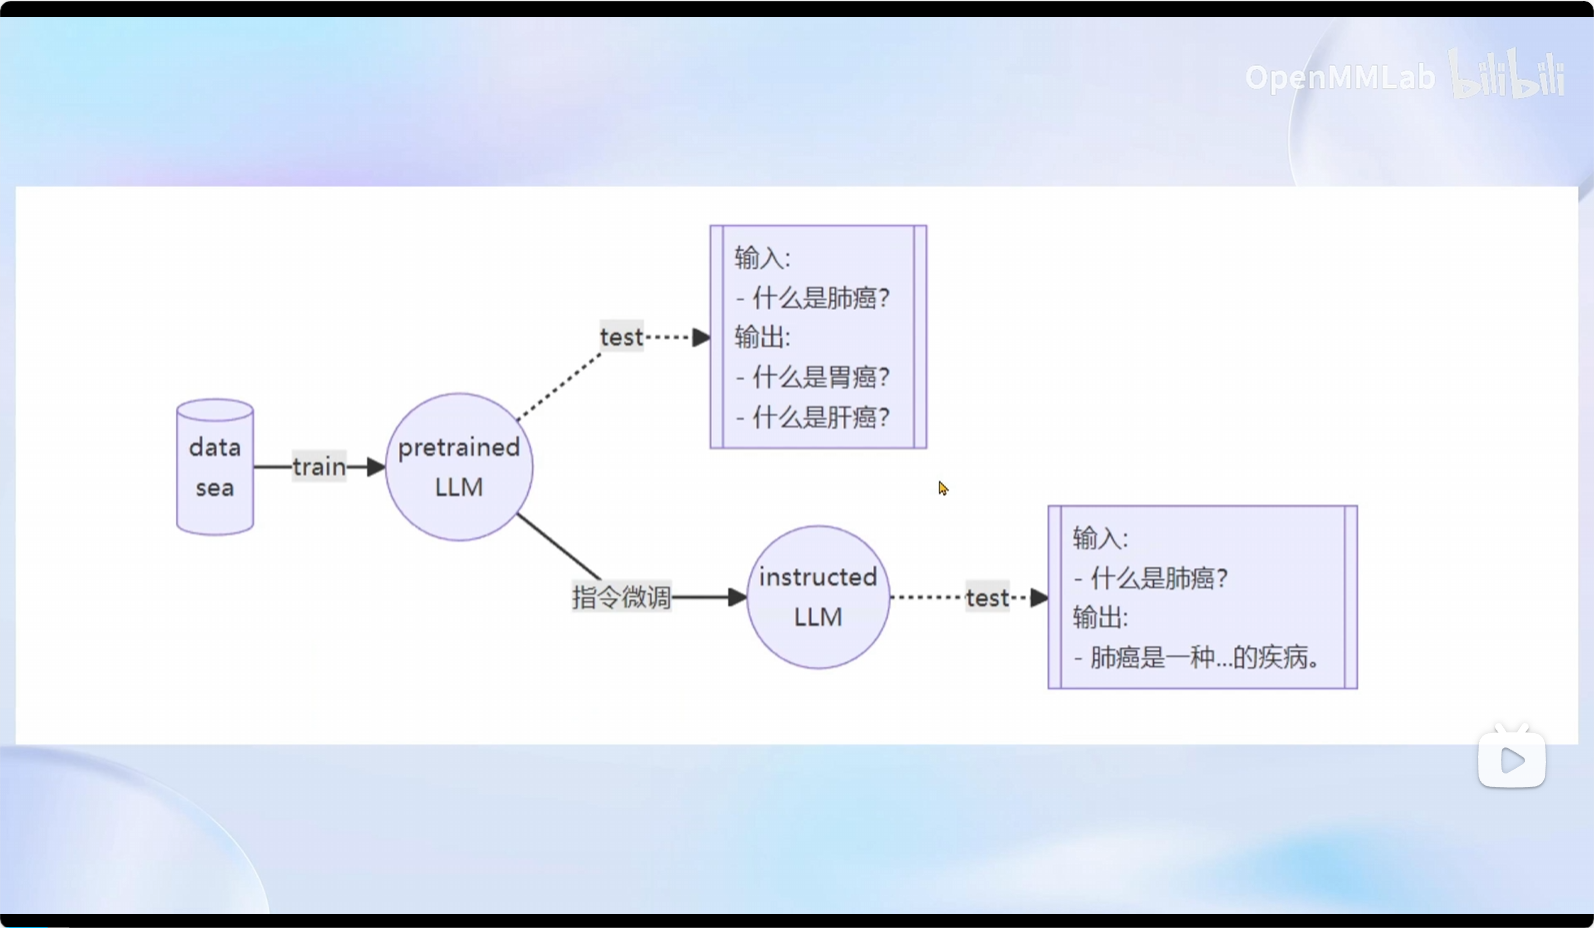
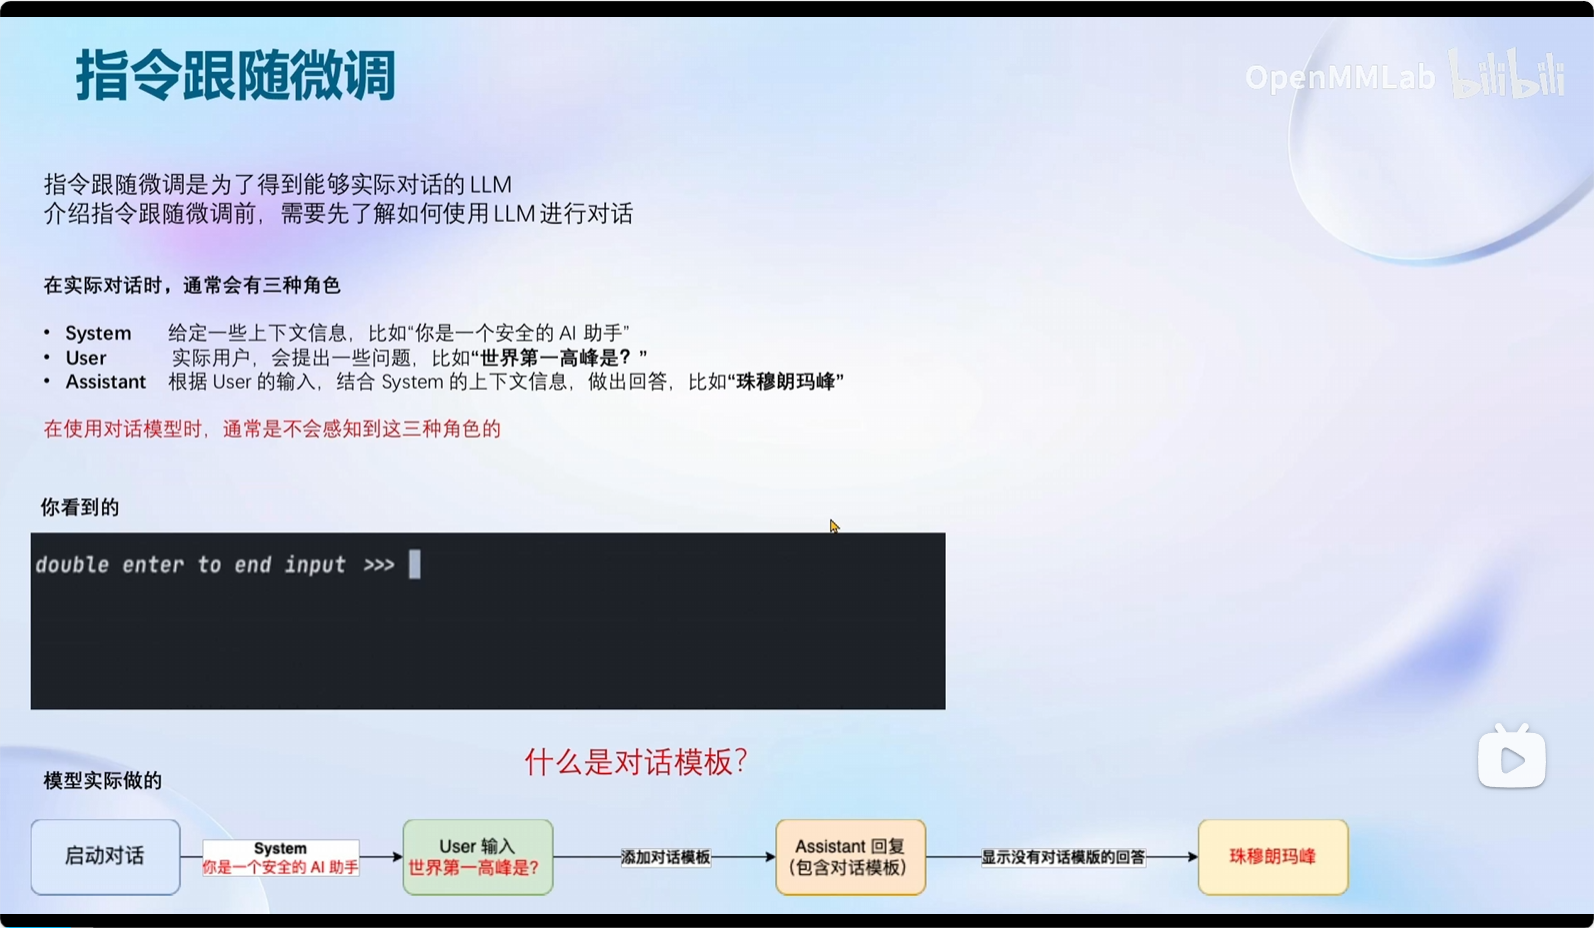
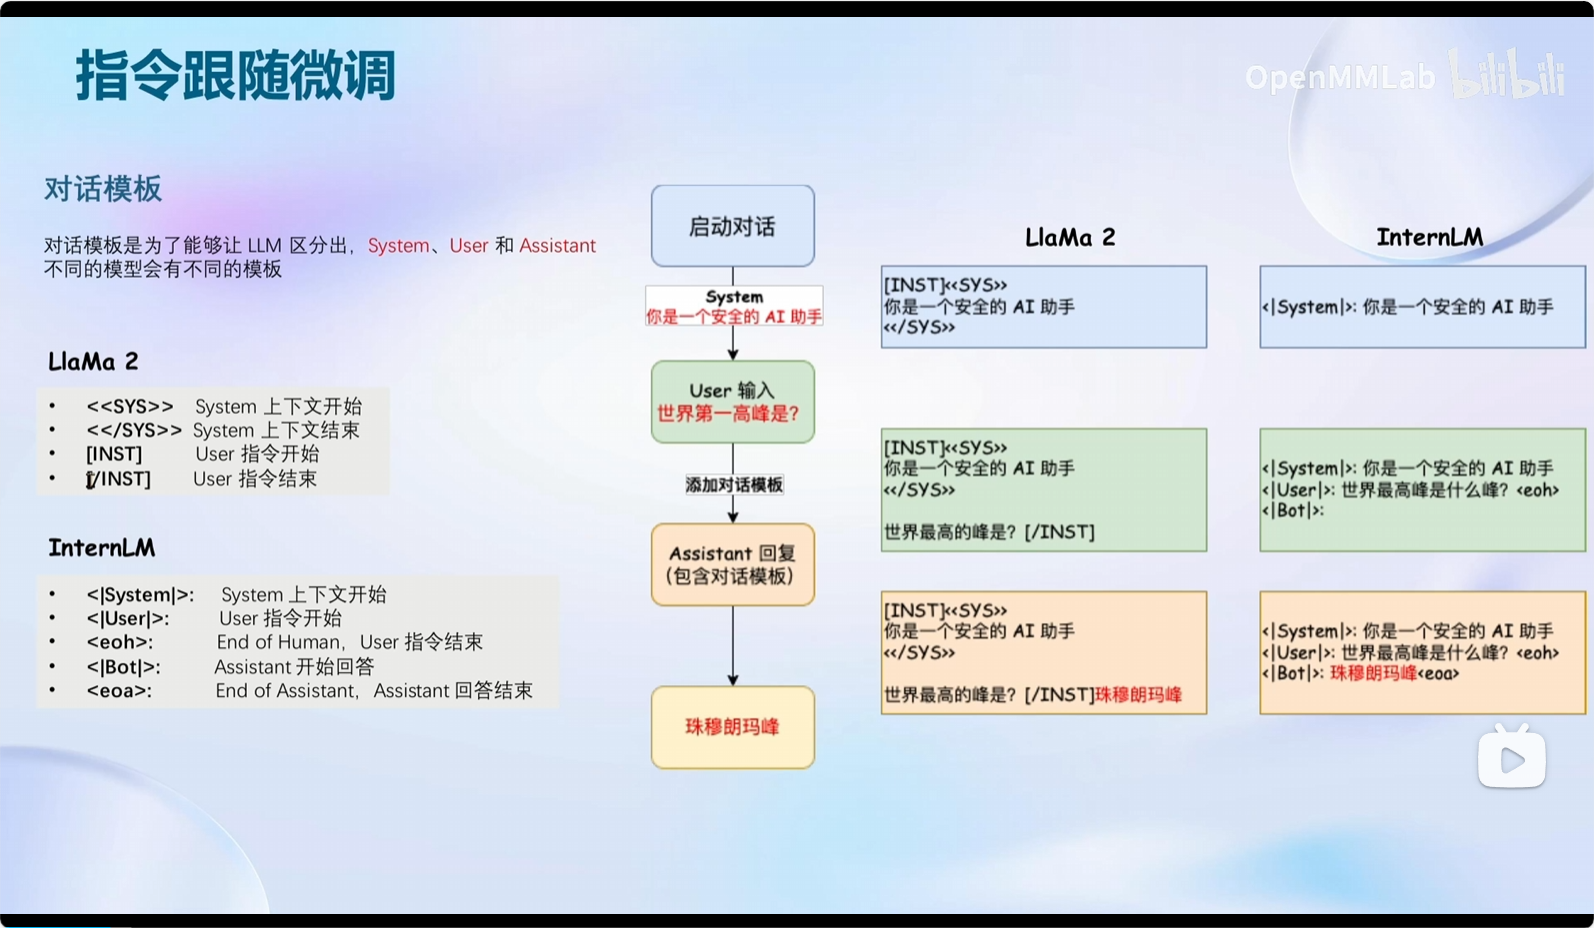
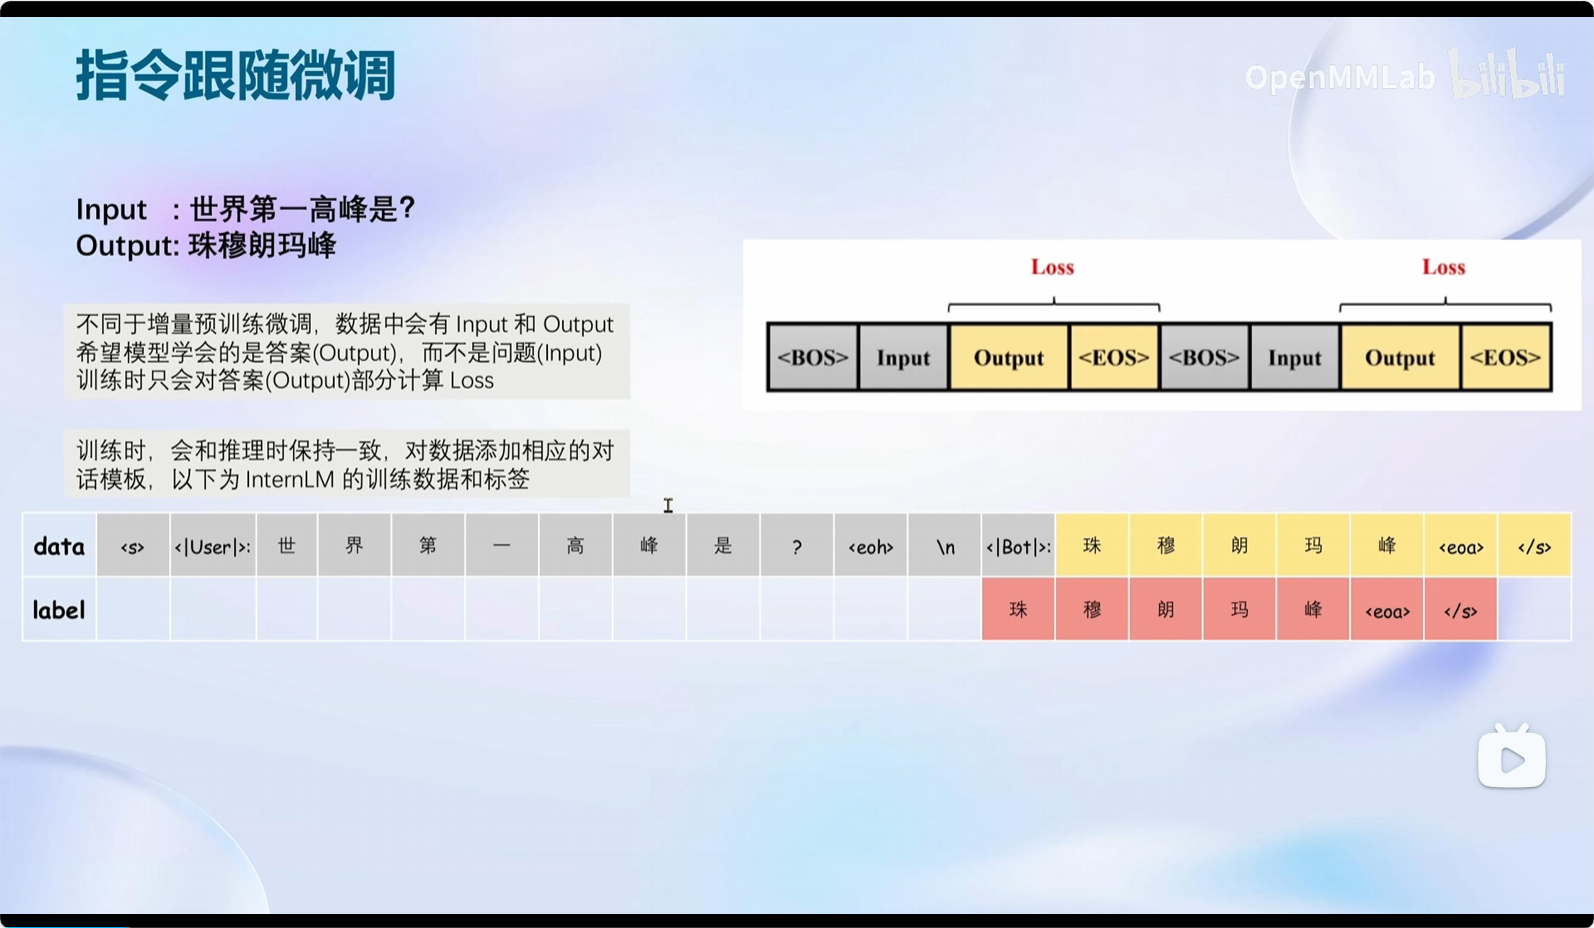
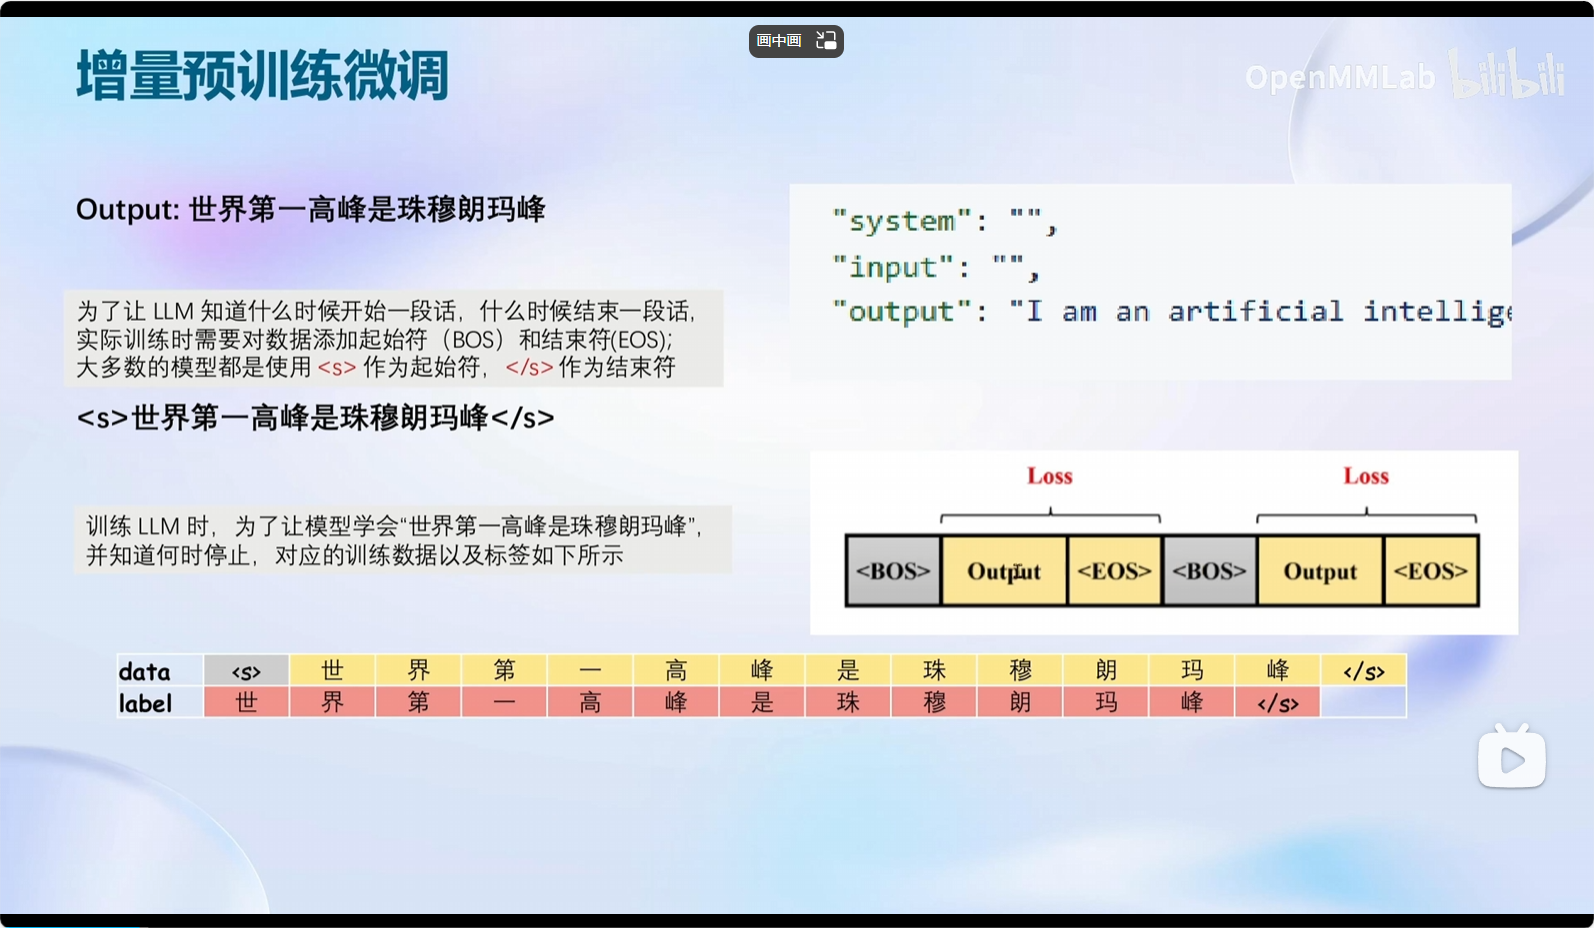
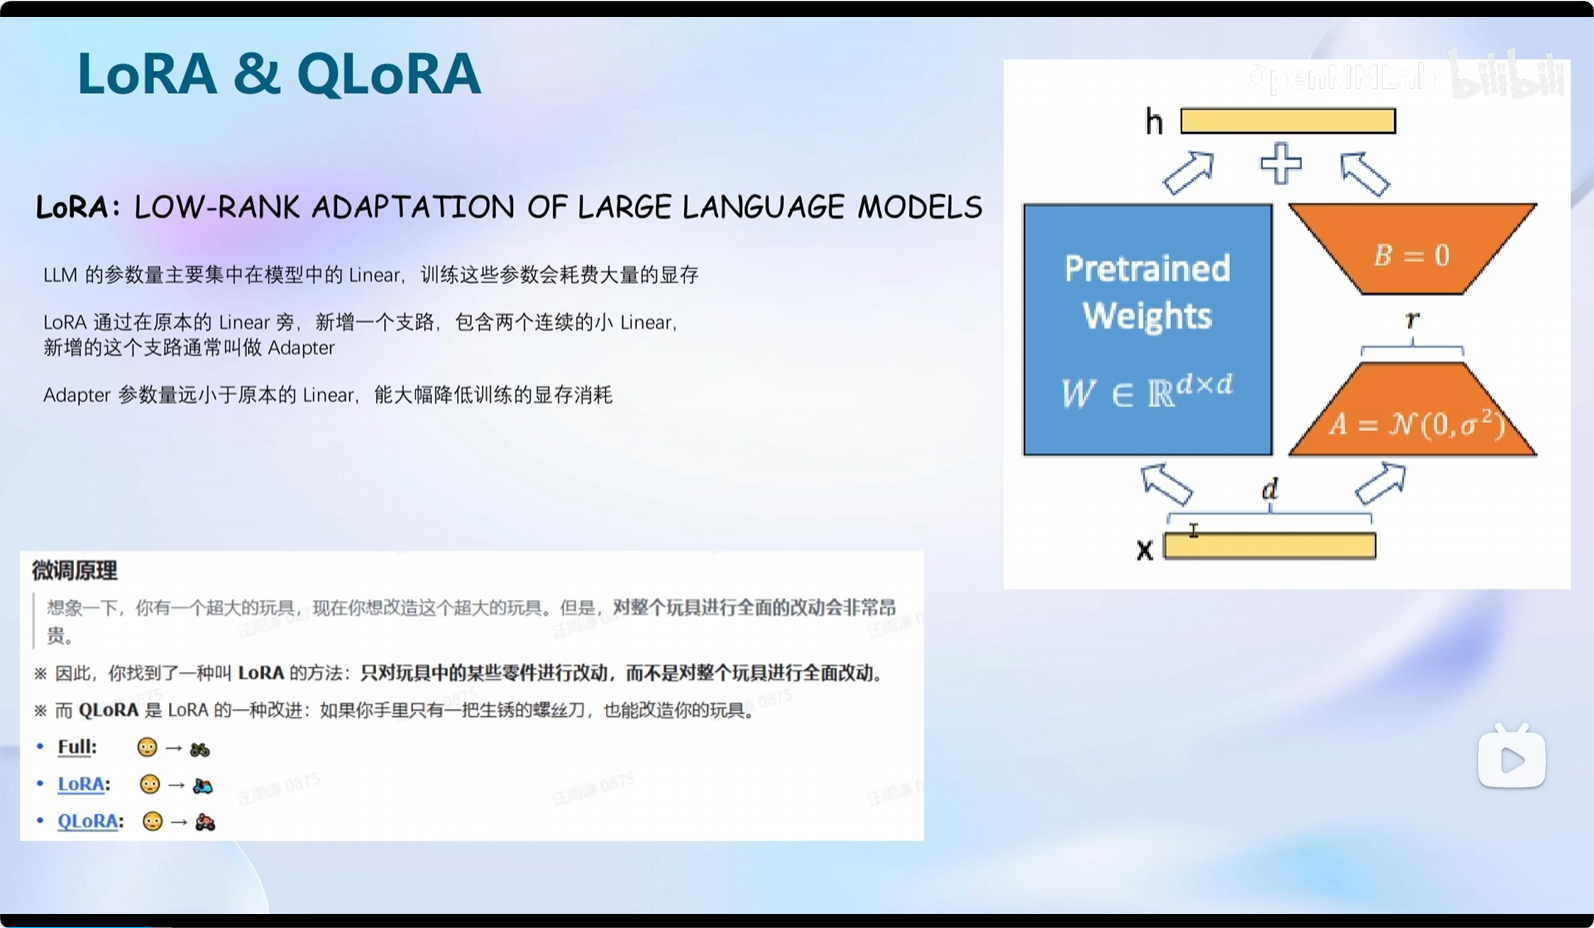
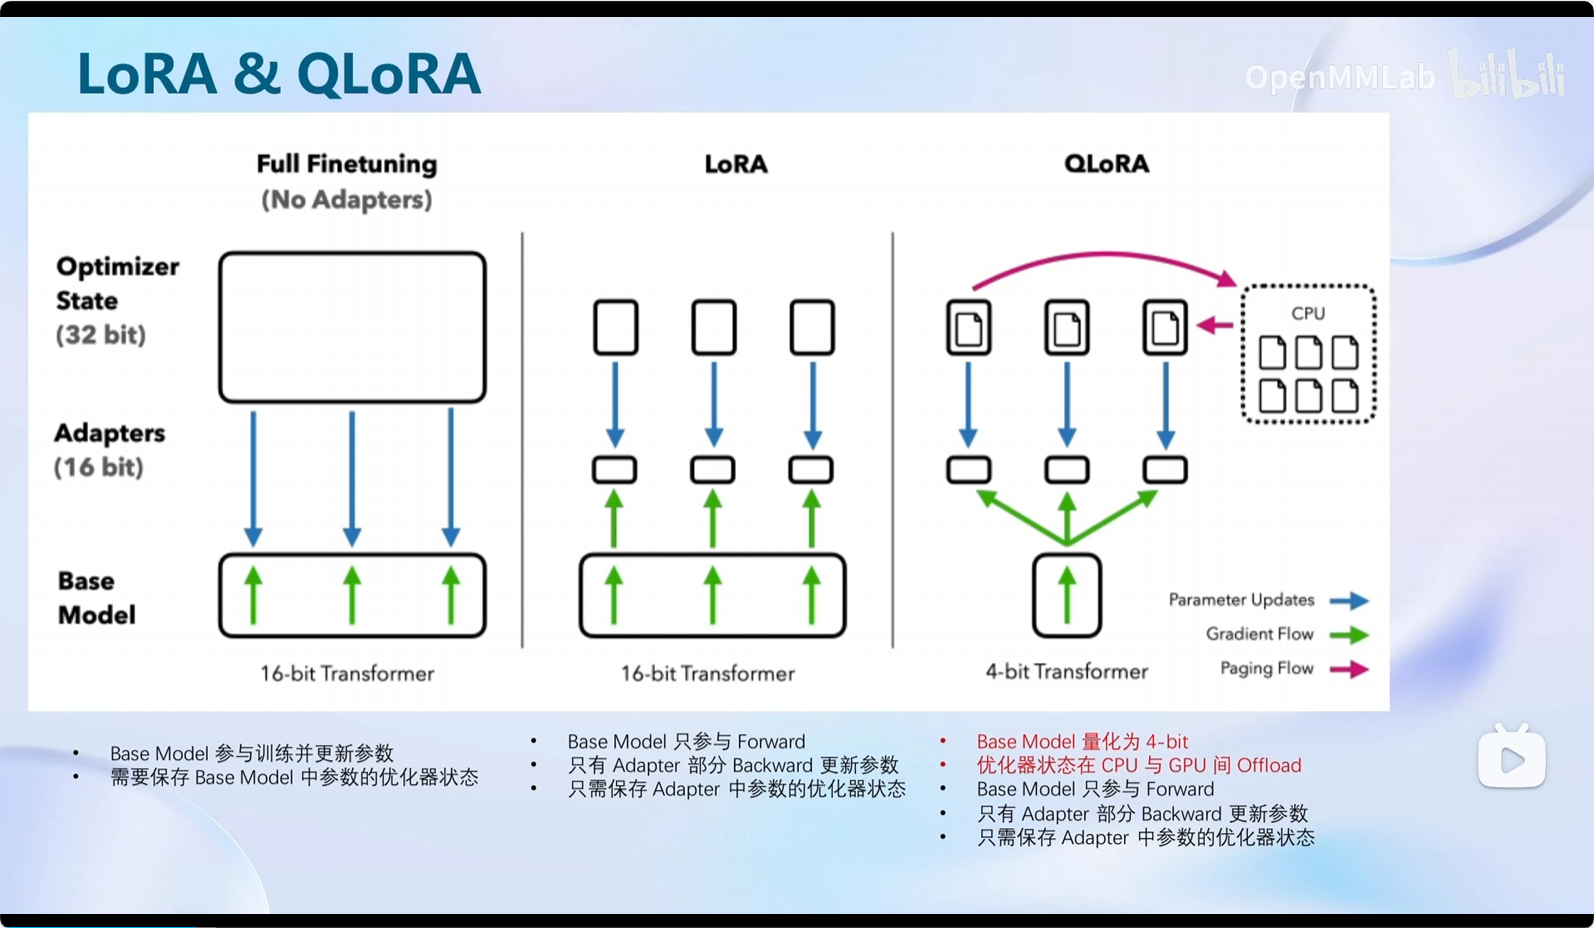
全参数微调:
- 整个模型全部加载到显存中
- 所有模型参数的优化器同样加载到显存中
LoRA微调:
- 整个模型全部加载到显存中
- 仅需LoRA参数的优化器加载到显存中
QLoRA微调:
- 使用4bit量化方式加载模型
- QLoRA部分模型参数的优化器可以在GPU与CPU之间调度
1.2 XTuner
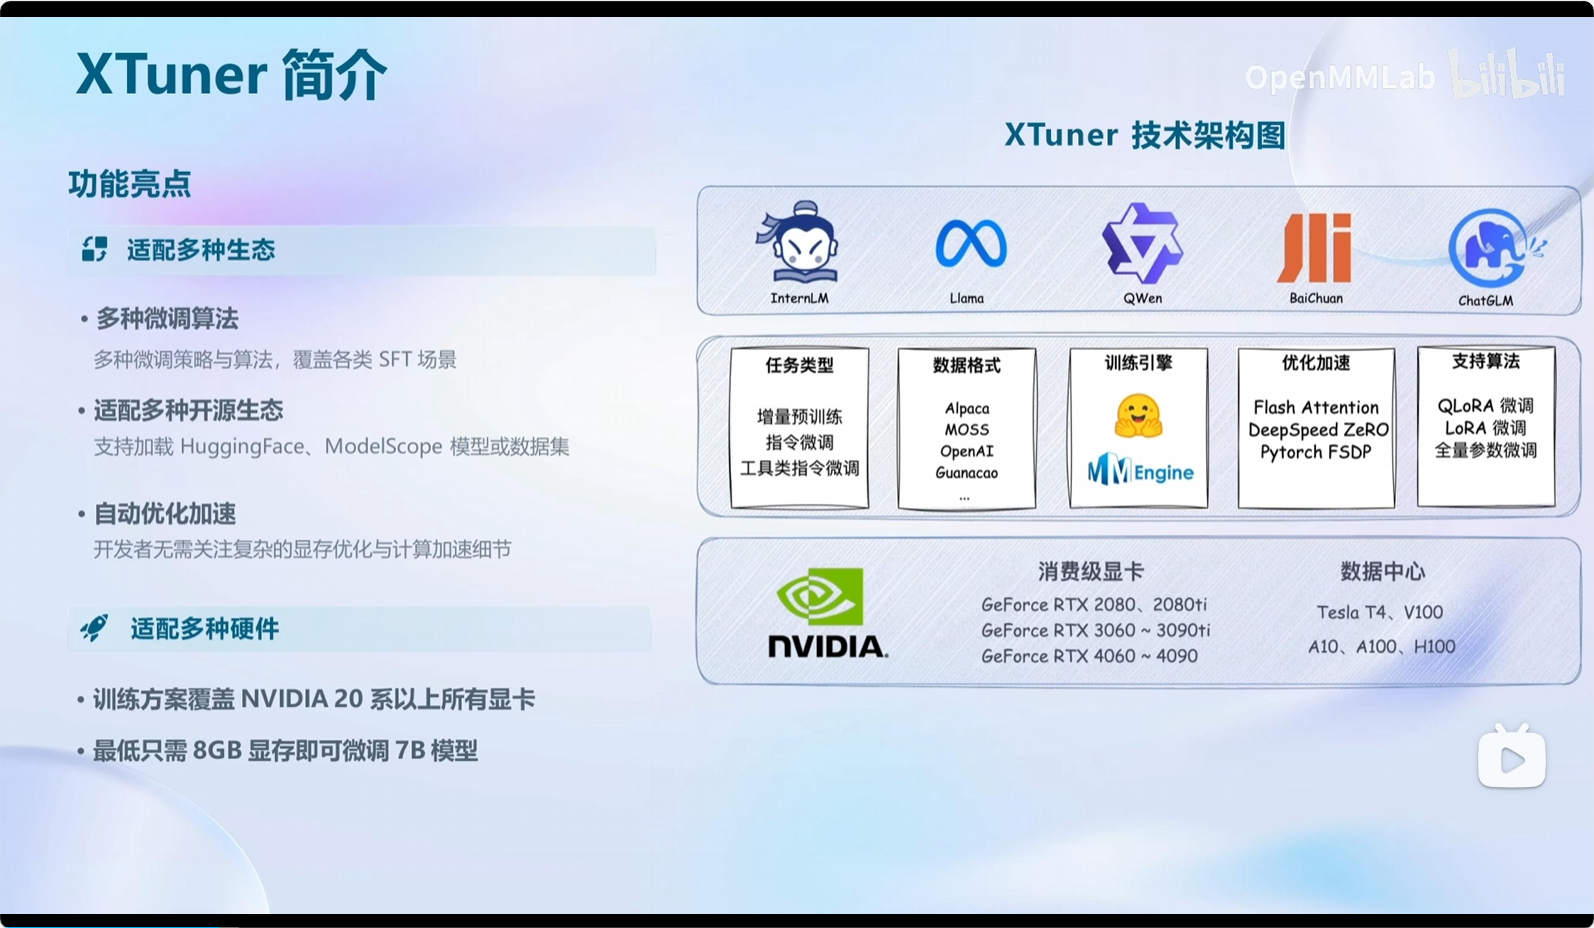
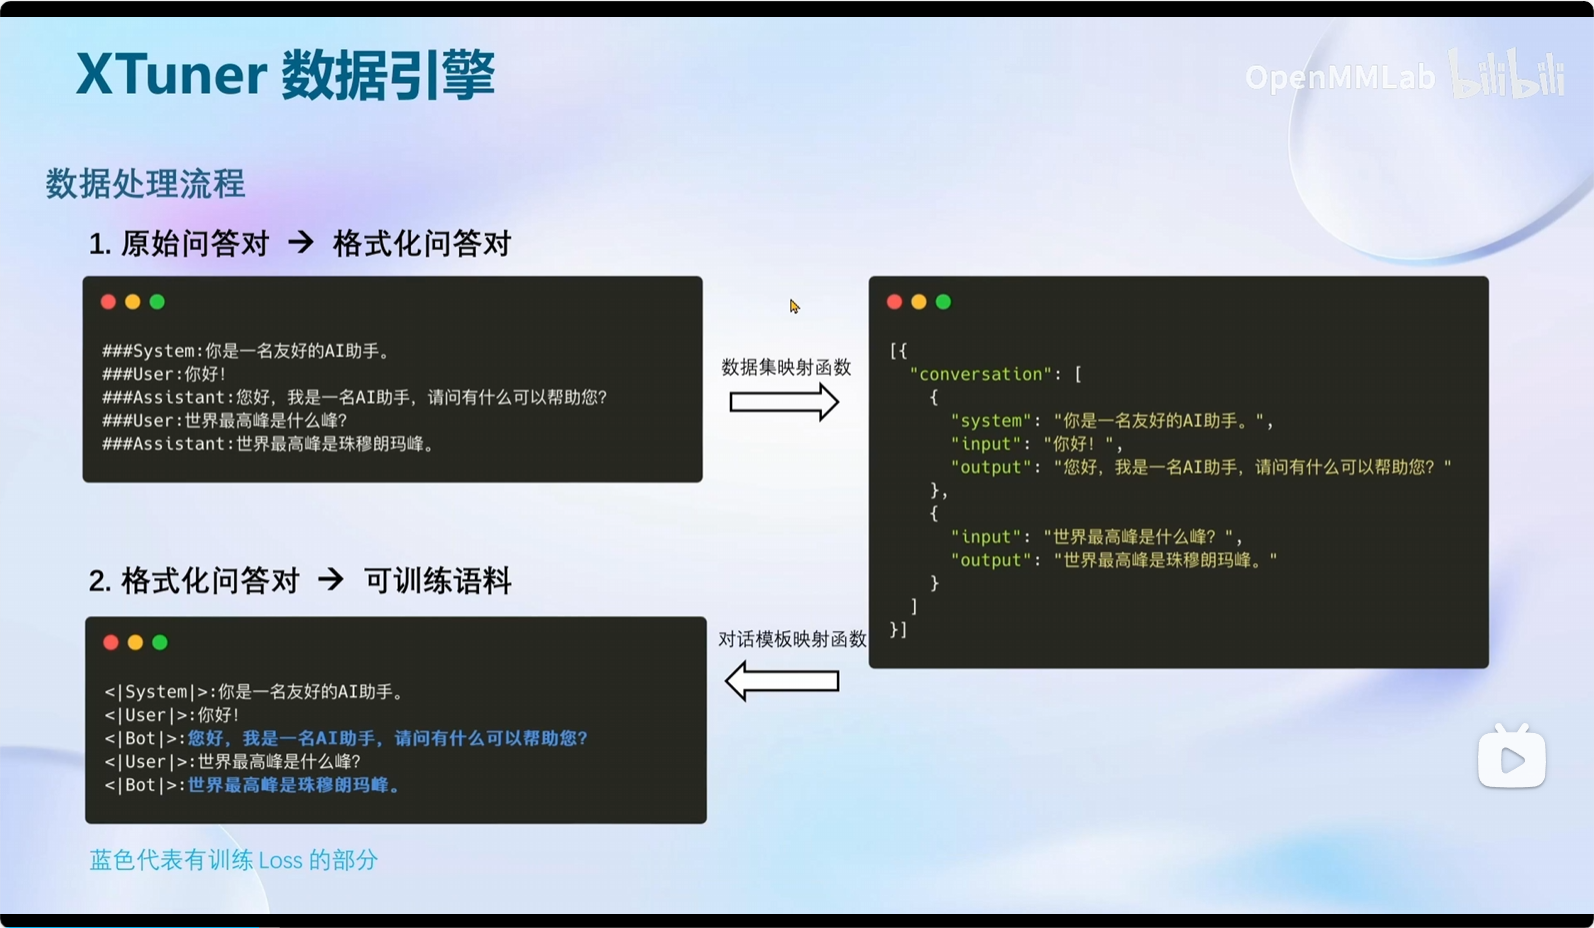
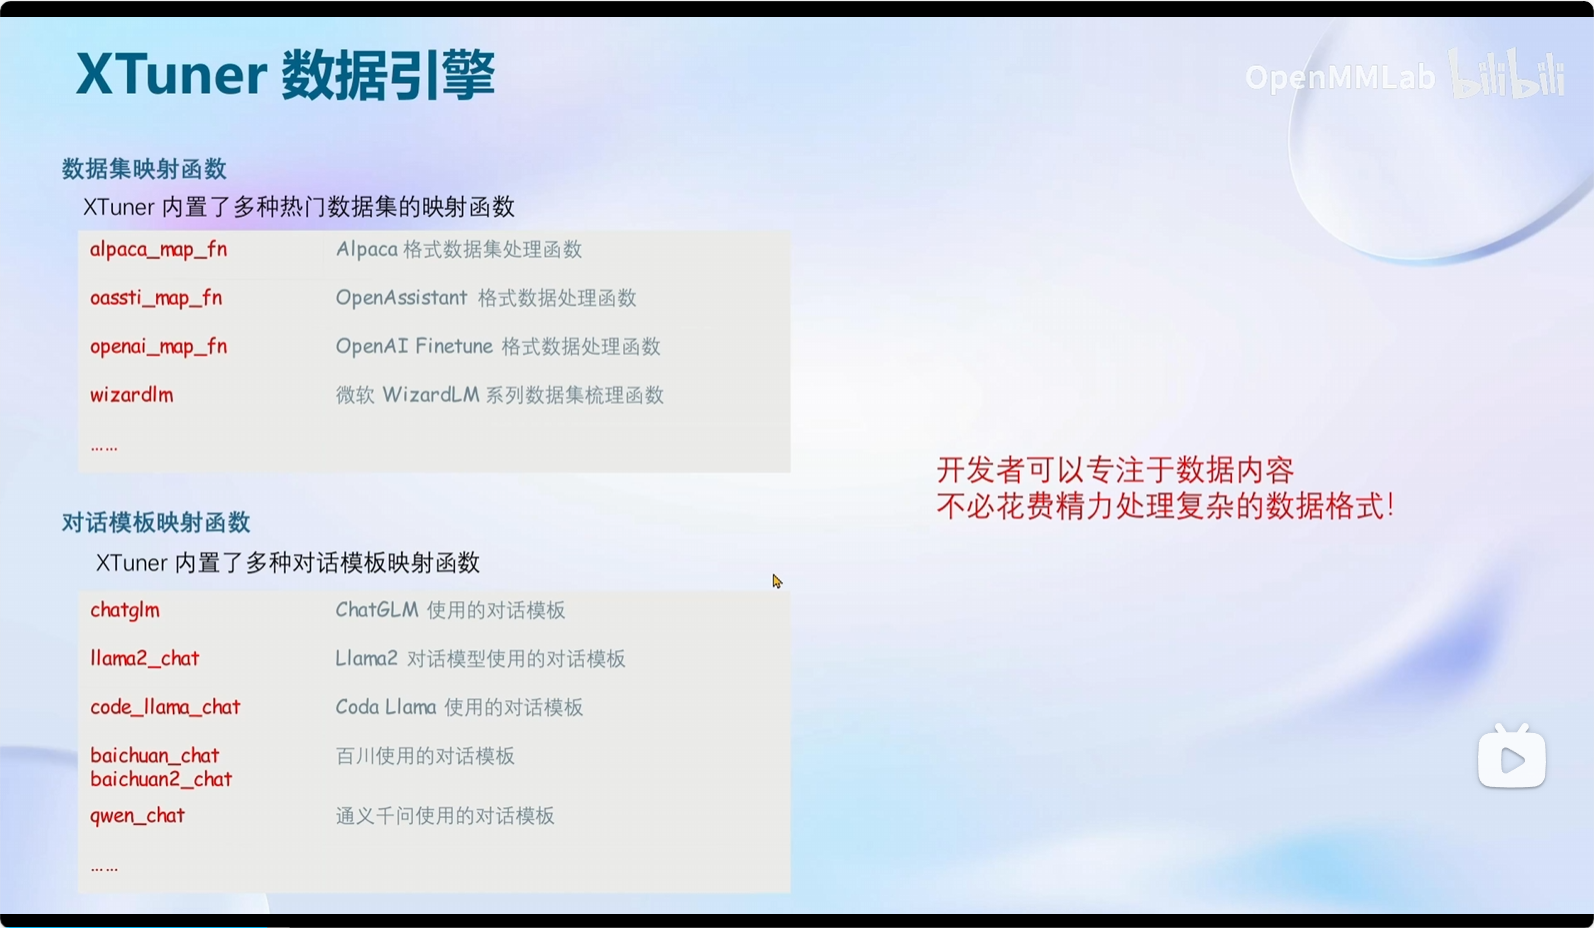
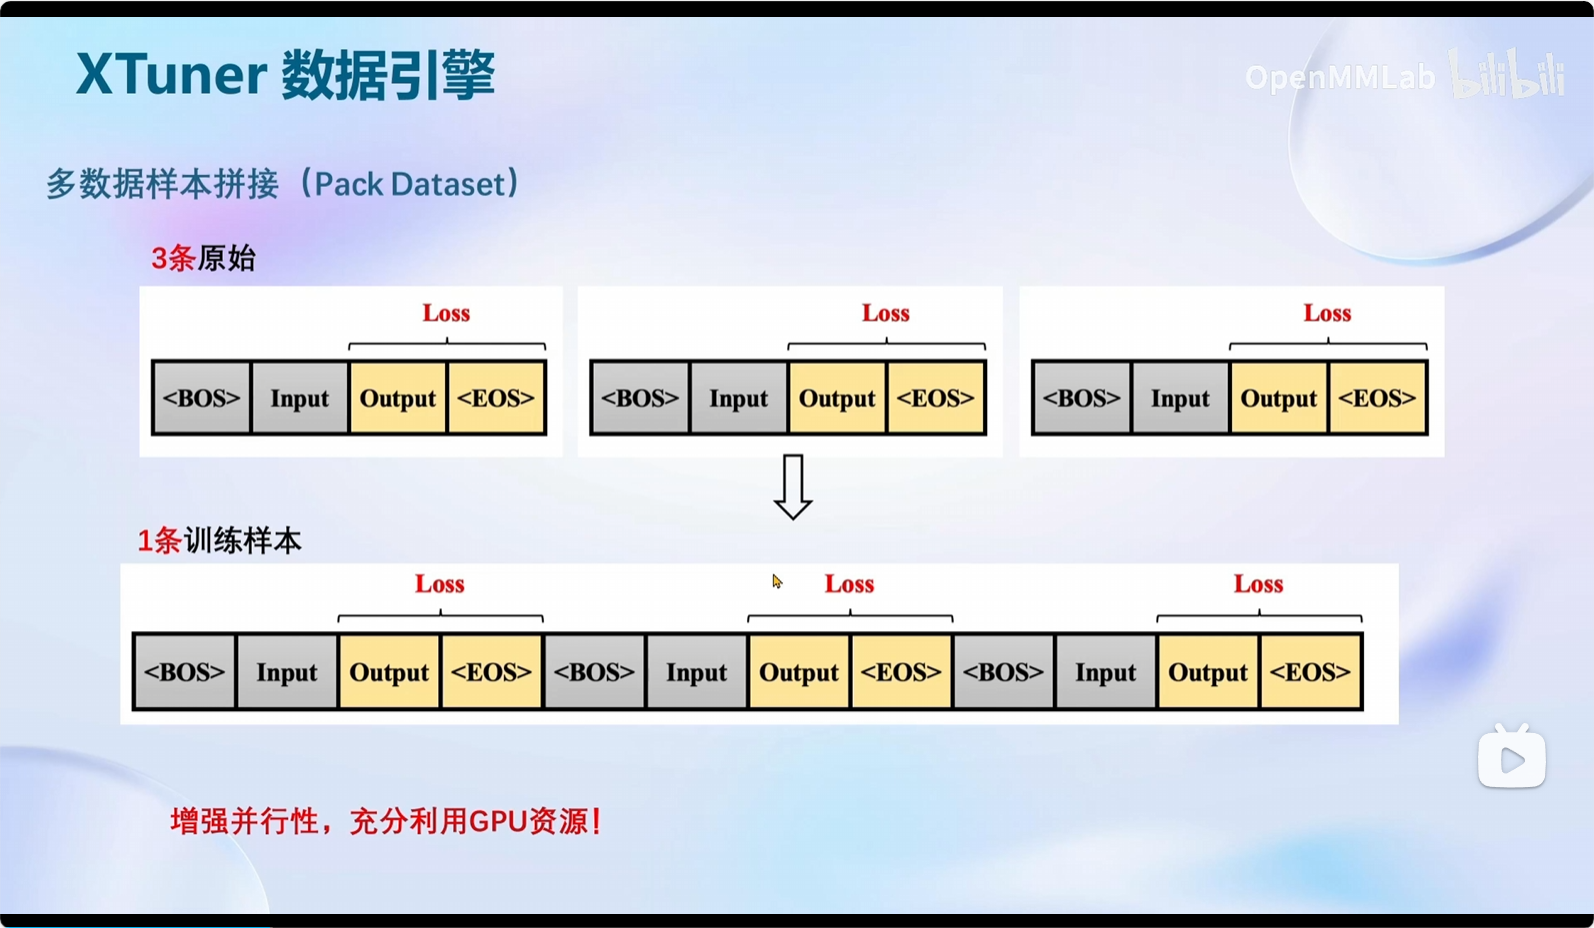
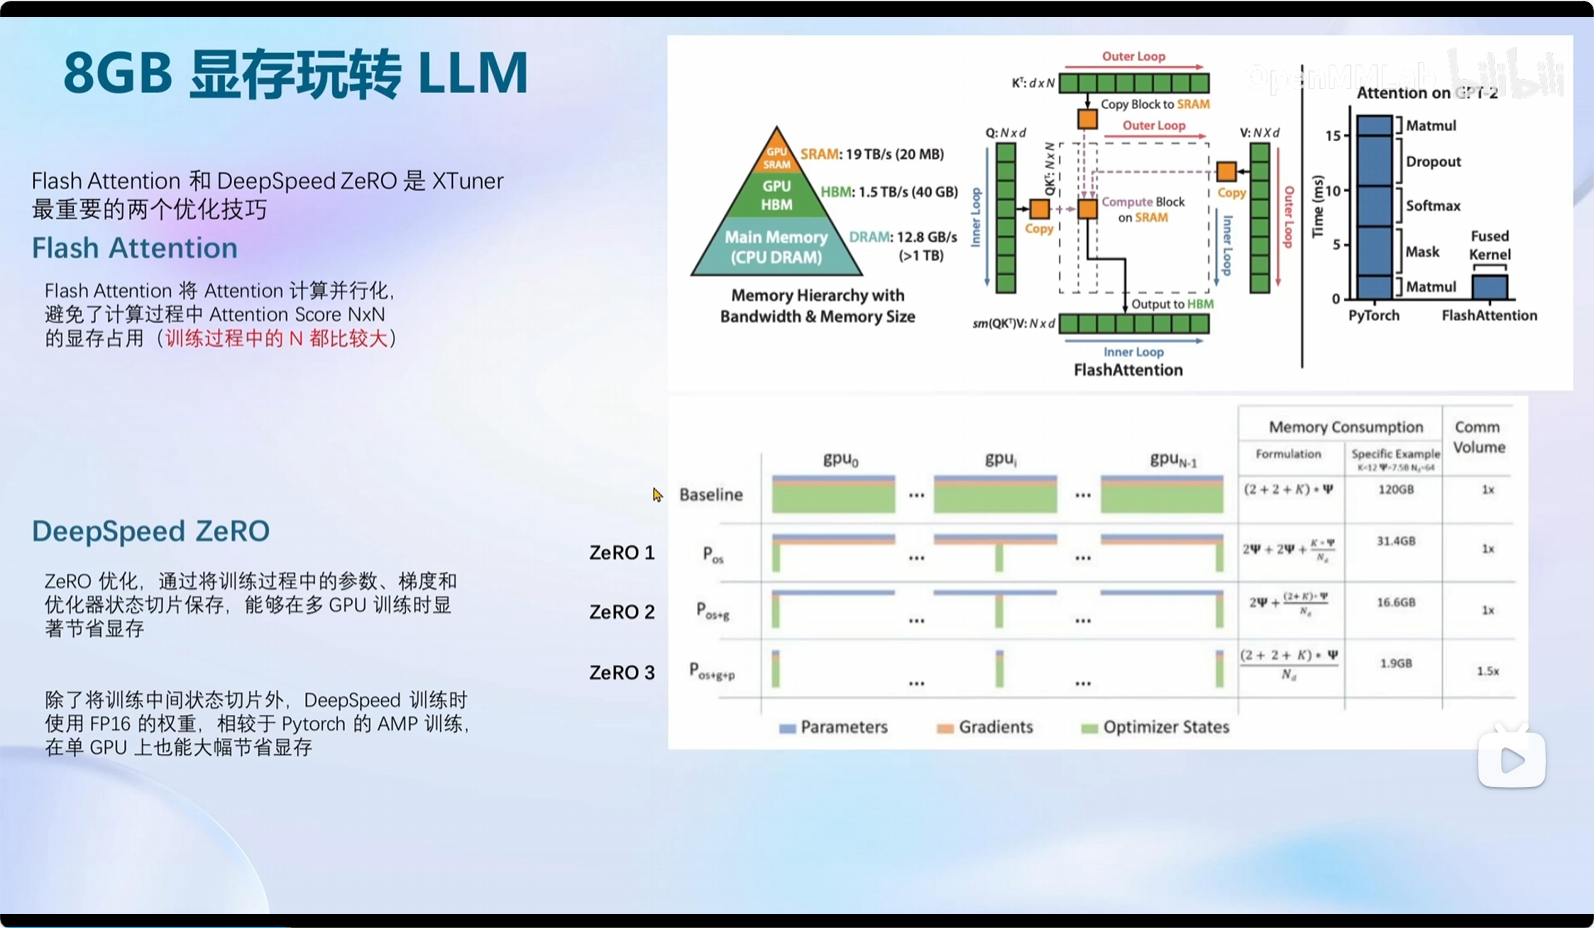
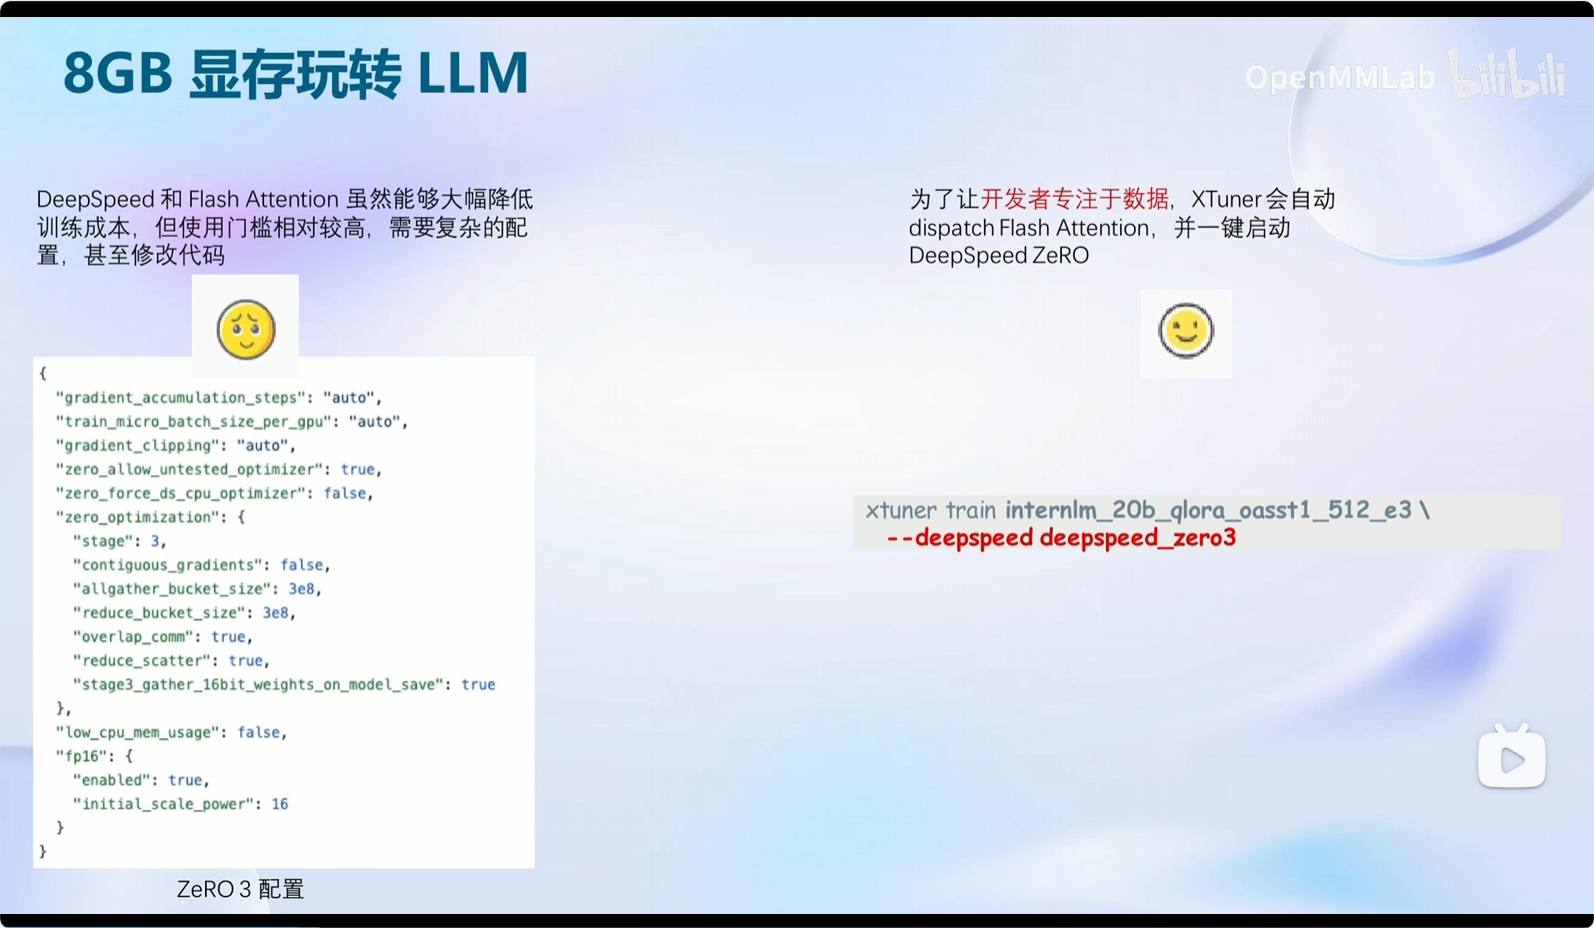
1.3 8GB 显存玩转 LLM
2 快速上手
2.1 平台
Ubuntu + Anaconda + CUDA/CUDNN + 8GB nvidia显卡
2.2 安装
新建一个环境
# 如果你是在 InternStudio 平台,则从本地 clone 一个已有 pytorch 2.0.1 的环境:
/root/share/install_conda_env_internlm_base.sh xtuner0.1.9
# 如果你是在其他平台:
conda create --name xtuner0.1.9 python=3.10 -y

# 激活环境
conda activate xtuner0.1.9
# 进入家目录 (~的意思是 “当前用户的home路径”)
cd ~
# 创建版本文件夹并进入,以跟随本教程
mkdir xtuner019 && cd xtuner019


# 拉取 0.1.9 的版本源码
git clone -b v0.1.9  https://github.com/InternLM/xtuner
# 无法访问github的用户请从 gitee 拉取:
# git clone -b v0.1.9 https://gitee.com/Internlm/xtuner

# 进入源码目录
cd xtuner

# 从源码安装 XTuner
pip install -e '.[all]'
2.3 微调
2.3.1 准备配置文件
XTuner 提供多个开箱即用的配置文件,用户可以通过下列命令查看:
# 列出所有内置配置
xtuner list-cfg
拷贝一个配置文件到当前目录:
cd ~/ft-oasst1
xtuner copy-cfg internlm_chat_7b_qlora_oasst1_e3 .
配置文件名的解释:
xtuner copy-cfg internlm_chat_7b_qlora_oasst1_e3 .
| 模型名 | internlm_chat_7b |
|---|---|
| 使用算法 | qlora |
| 数据集 | oasst1 |
| 把数据集跑几次 | 跑3次:e3 (epoch 3 ) |
*无 chat比如 internlm-7b 代表是基座(base)模型
2.3.2 模型下载
由于下载模型很慢,用教学平台的同学可以直接复制模型。(这里使用软链接)
ln -s /share/temp/model_repos/internlm-chat-7b ~/ft-oasst1/2.3.3 数据集下载
由于 huggingface 网络问题,咱们已经给大家提前下载好了,复制到正确位置即可:
cd ~/ft-oasst1
# ...-guanaco 后面有个空格和英文句号啊
cp -r /root/share/temp/datasets/openassistant-guanaco .
2.3.4 修改配置文件
修改其中的模型和数据集为 本地路径
~/ft-oasst1/internlm_chat_7b_qlora_oasst1_e3_copy.py中进行修改
减号代表要删除的行,加号代表要增加的行。
# 修改模型为本地路径
- pretrained_model_name_or_path = 'internlm/internlm-chat-7b'
+ pretrained_model_name_or_path = './internlm-chat-7b'

# 修改训练数据集为本地路径
- data_path = 'timdettmers/openassistant-guanaco'
+ data_path = './openassistant-guanaco'
常用超参
| 参数名 | 解释 |
|---|---|
| data_path | 数据路径或 HuggingFace 仓库名 |
| max_length | 单条数据最大 Token 数,超过则截断 |
| pack_to_max_length | 是否将多条短数据拼接到 max_length,提高 GPU 利用率 |
| accumulative_counts | 梯度累积,每多少次 backward 更新一次参数 |
| evaluation_inputs | 训练过程中,会根据给定的问题进行推理,便于观测训练状态 |
| evaluation_freq | Evaluation 的评测间隔 iter 数 |
| …… | …… |
如果想把显卡的现存吃满,充分利用显卡资源,可以将
max_length和batch_size这两个参数调大。
2.3.5 开始微调
训练:
xtuner train ${CONFIG_NAME_OR_PATH}
也可以增加 deepspeed 进行训练加速:
xtuner train ${CONFIG_NAME_OR_PATH} --deepspeed deepspeed_zero2
例如,我们可以利用 QLoRA 算法在 oasst1 数据集上微调 InternLM-7B:
# 单卡
## 用刚才改好的config文件训练
xtuner train ./internlm_chat_7b_qlora_oasst1_e3_copy.py

# 多卡
NPROC_PER_NODE=${GPU_NUM} xtuner train ./internlm_chat_7b_qlora_oasst1_e3_copy.py

# 若要开启 deepspeed 加速,增加 --deepspeed deepspeed_zero2 即可
微调得到的 PTH 模型文件和其他杂七杂八的文件都默认在当前的
./work_dirs中。
跑完训练后,当前路径应该长这样:
|-- internlm-chat-7b
|-- internlm_chat_7b_qlora_oasst1_e3_copy.py
|-- openassistant-guanaco
|   |-- openassistant_best_replies_eval.jsonl
|   `-- openassistant_best_replies_train.jsonl
`-- work_dirs
    `-- internlm_chat_7b_qlora_oasst1_e3_copy
        |-- 20231101_152923
        |   |-- 20231101_152923.log
        |   `-- vis_data
        |       |-- 20231101_152923.json
        |       |-- config.py
        |       `-- scalars.json
        |-- epoch_1.pth
        |-- epoch_2.pth
        |-- epoch_3.pth
        |-- internlm_chat_7b_qlora_oasst1_e3_copy.py
        `-- last_checkpoint
2.3.6 将得到的 PTH 模型转换为 HuggingFace 模型,即:生成 Adapter 文件夹
xtuner convert pth_to_hf ${CONFIG_NAME_OR_PATH} ${PTH_file_dir} ${SAVE_PATH}示例:
mkdir hf
export MKL_SERVICE_FORCE_INTEL=1
export MKL_THREADING_LAYER=GNU
xtuner convert pth_to_hf ./internlm_chat_7b_qlora_oasst1_e3_copy.py ./work_dirs/internlm_chat_7b_qlora_oasst1_e3_copy/epoch_1.pth ./hf
2.4 部署与测试
2.4.1 将 HuggingFace adapter 合并到大语言模型:
xtuner convert merge ./internlm-chat-7b ./hf ./merged --max-shard-size 2GB
# xtuner convert merge \
#     ${NAME_OR_PATH_TO_LLM} \
#     ${NAME_OR_PATH_TO_ADAPTER} \
#     ${SAVE_PATH} \
#     --max-shard-size 2GB
2.4.2 与合并后的模型对话:
# 加载 Adapter 模型对话(Float 16)
xtuner chat ./merged --prompt-template internlm_chat

# 4 bit 量化加载
# xtuner chat ./merged --bits 4 --prompt-template internlm_chat
3 自定义微调
3.1 开始自定义微调
此时,我们重新建一个文件夹来玩“微调自定义数据集”
mkdir ~/ft-medqa && cd ~/ft-medqa把前面下载好的internlm-chat-7b模型文件夹拷贝过来。
cp -r ~/ft-oasst1/internlm-chat-7b .别忘了把自定义数据集,即几个 .jsonL,也传到服务器上。
cd ~
git clone https://github.com/InternLM/tutorial
cp ~/tutorial/xtuner/MedQA2019-structured-train.jsonl ~/ft-medqa/3.3.1 准备配置文件
# 复制配置文件到当前目录
xtuner copy-cfg internlm_chat_7b_qlora_oasst1_e3 .
# 改个文件名
mv internlm_chat_7b_qlora_oasst1_e3_copy.py internlm_chat_7b_qlora_medqa2019_e3.py

# 修改配置文件内容
vim internlm_chat_7b_qlora_medqa2019_e3.py
减号代表要删除的行,加号代表要增加的行。
# 修改import部分
- from xtuner.dataset.map_fns import oasst1_map_fn, template_map_fn_factory
+ from xtuner.dataset.map_fns import template_map_fn_factory

# 修改模型为本地路径
- pretrained_model_name_or_path = 'internlm/internlm-chat-7b'
+ pretrained_model_name_or_path = './internlm-chat-7b'

# 修改训练数据为 MedQA2019-structured-train.jsonl 路径
- data_path = 'timdettmers/openassistant-guanaco'
+ data_path = 'MedQA2019-structured-train.jsonl'

# 修改 train_dataset 对象
train_dataset = dict(
    type=process_hf_dataset,
-   dataset=dict(type=load_dataset, path=data_path),
+   dataset=dict(type=load_dataset, path='json', data_files=dict(train=data_path)),
    tokenizer=tokenizer,
    max_length=max_length,
-   dataset_map_fn=alpaca_map_fn,
+   dataset_map_fn=None,
    template_map_fn=dict(
        type=template_map_fn_factory, template=prompt_template),
    remove_unused_columns=True,
    shuffle_before_pack=True,
    pack_to_max_length=pack_to_max_length)
3.3.2 XTuner!启动!
xtuner train internlm_chat_7b_qlora_medqa2019_e3.py --deepspeed deepspeed_zero2


Comments NOTHING