一.环境架构
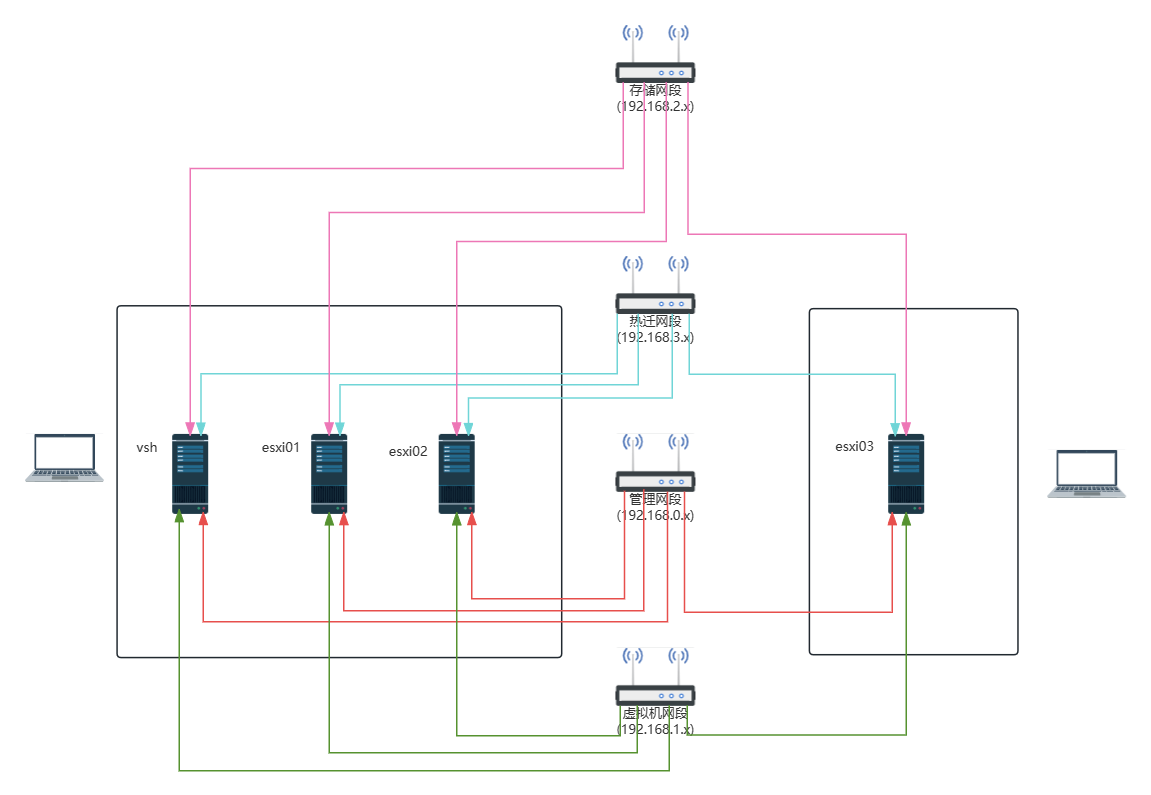
管理网络ip地址划分(192.168.0.X/24)
| 所在物理机 | 服务 | ip地址 | 网卡模式 |
|---|---|---|---|
| PC01 | vsphere | 192.168.0.140/24 | 桥接 |
| PC01 | esxi01 | 192.168.0.141/24 | 桥接 |
| PC01 | esxi02 | 192.168.0.142/24 | 桥接 |
| PC02 | esxi03 | 192.168.0.143/24 | 桥接 |

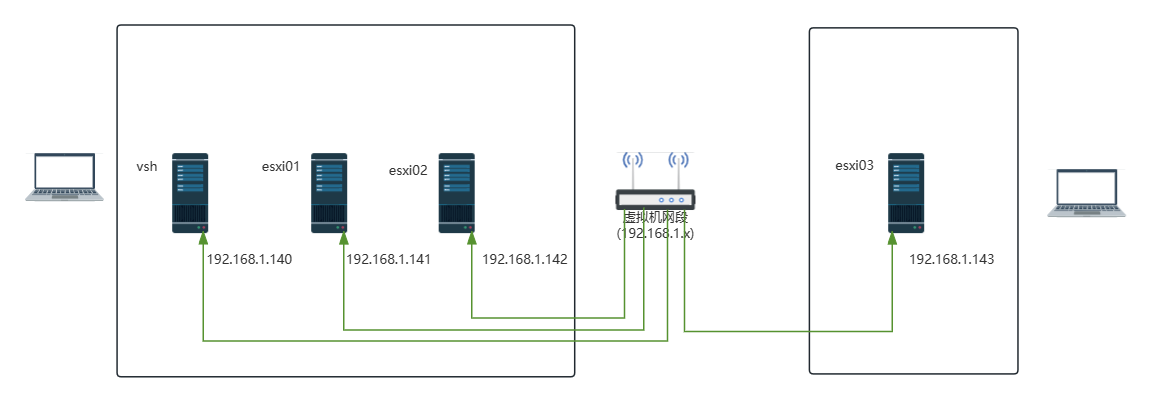
虚拟机网络ip地址划分(192.168.1.X/24)
| 所在物理机 | 服务 | ip地址 | 网卡模式 |
|---|---|---|---|
| PC01 | vsphere | 192.168.1.140/24 | 桥接 |
| PC01 | esxi01 | 192.168.1.141/24 | 桥接 |
| PC01 | esxi02 | 192.168.1.142/24 | 桥接 |
| PC02 | esxi03 | 192.168.1.143/24 | 桥接 |
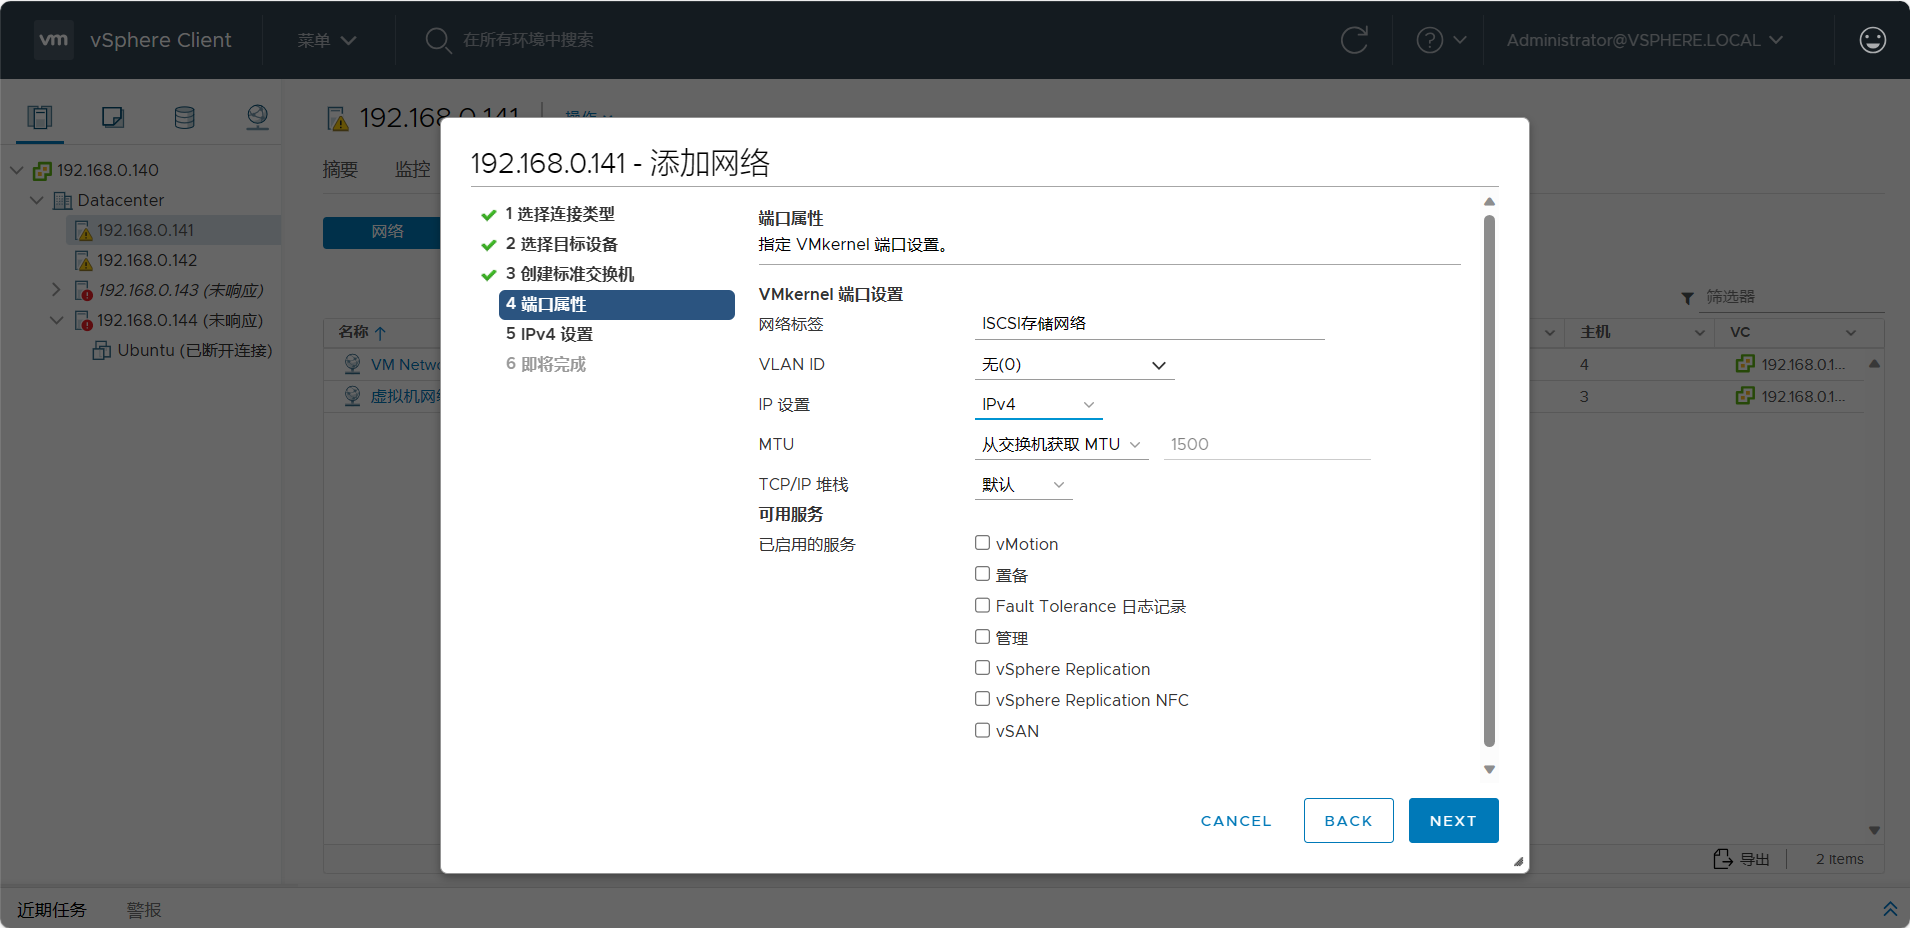
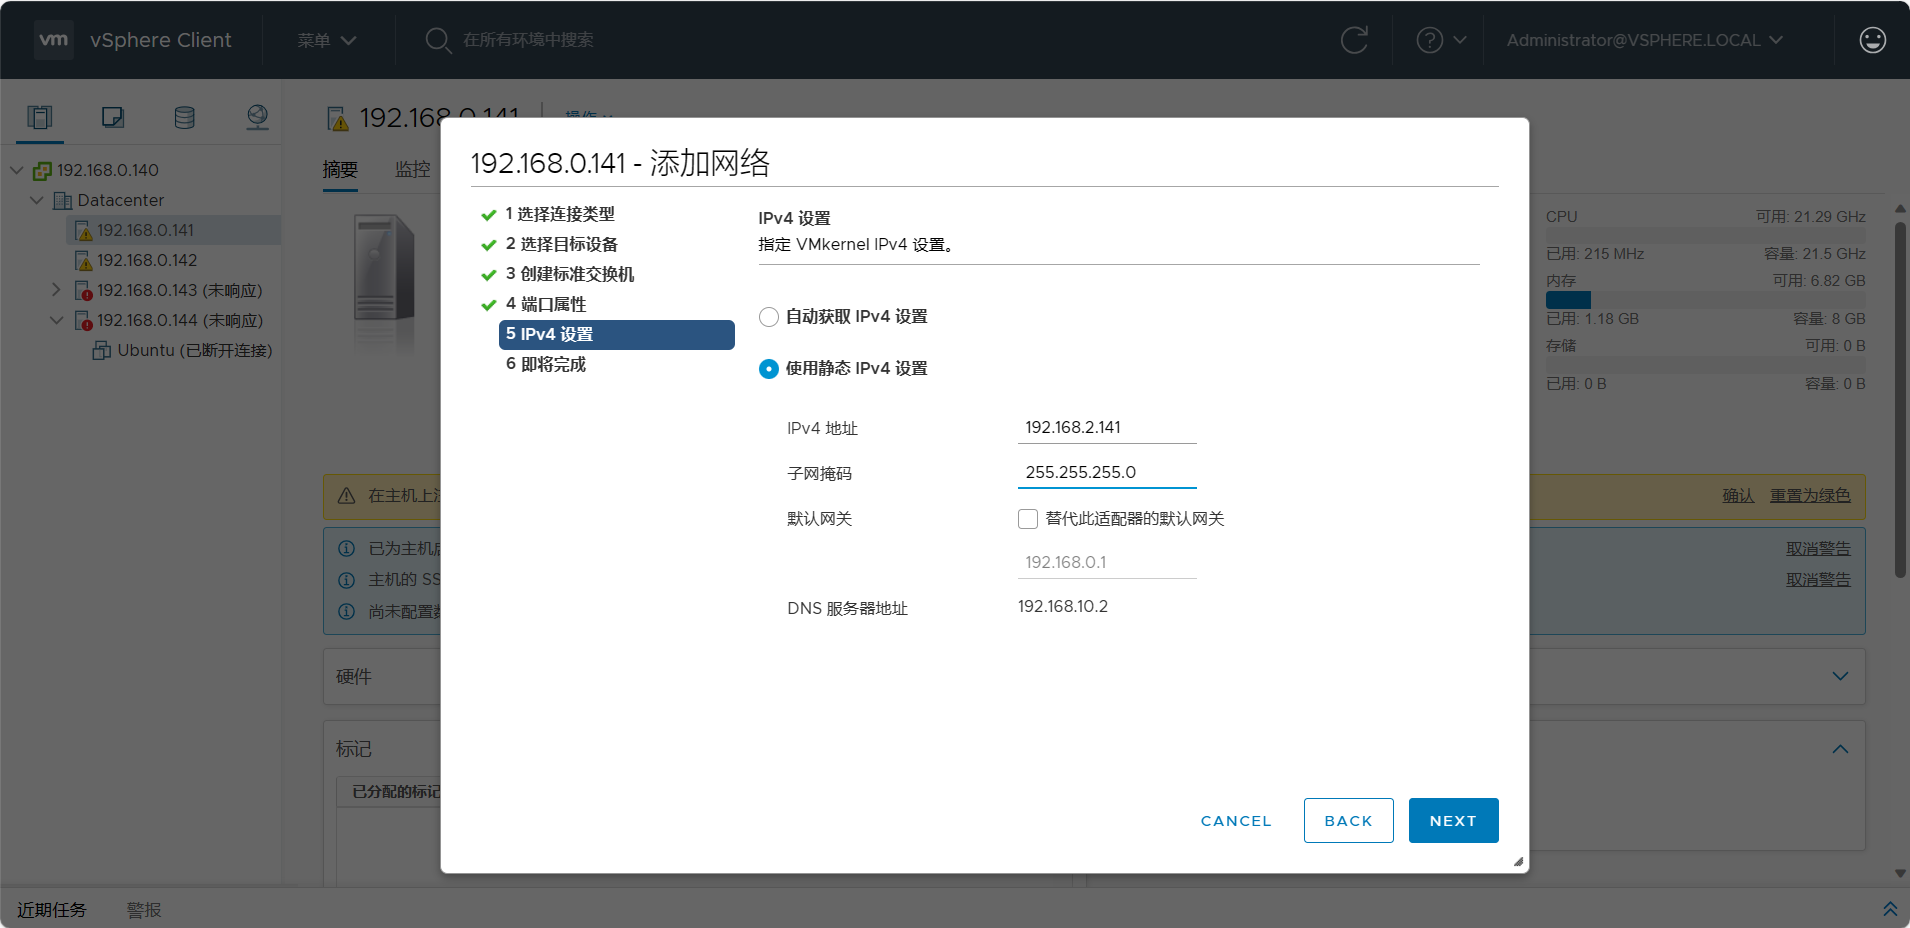
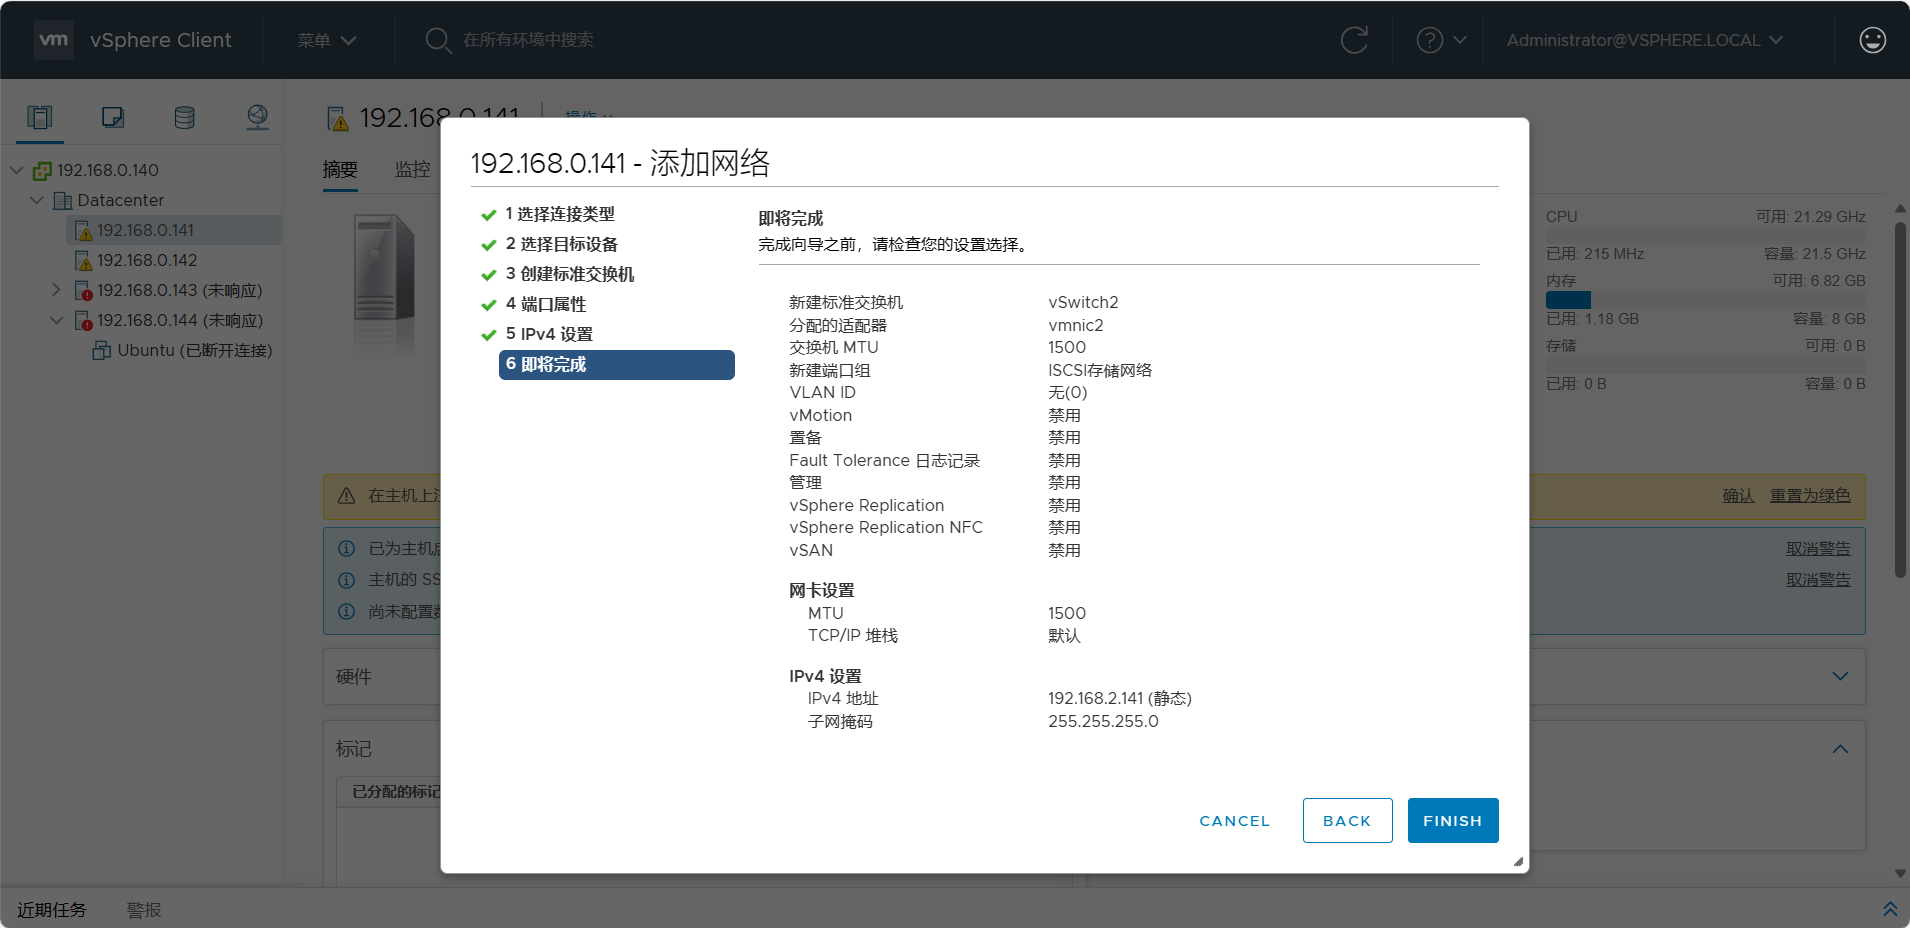
存储网络ip地址划分(192.168.2.X/24)
(存储网络架构图同管理网络,省略)
| 所在物理机 | 服务 | ip地址 | 网卡模式 |
|---|---|---|---|
| PC01 | vsphere | 192.168.2.140/24 | 桥接 |
| PC01 | esxi01 | 192.168.2.141/24 | 桥接 |
| PC01 | esxi02 | 192.168.2.142/24 | 桥接 |
| PC02 | esxi03 | 192.168.2.143/24 | 桥接 |
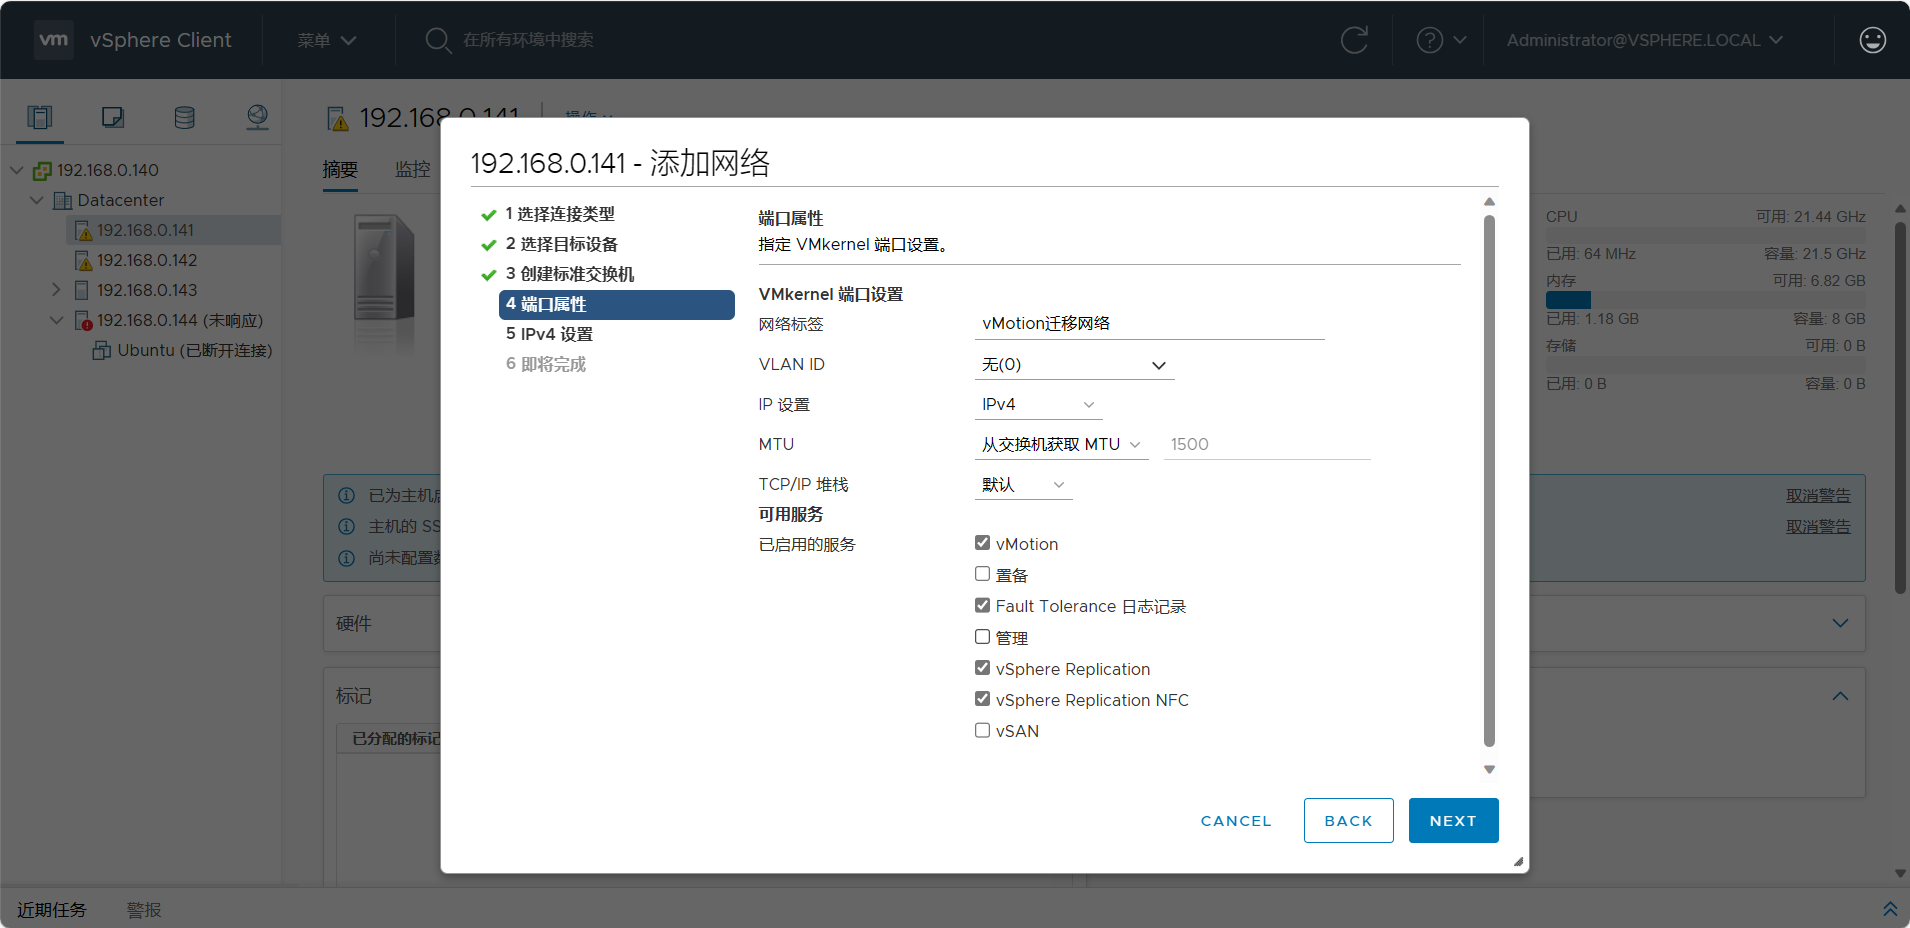
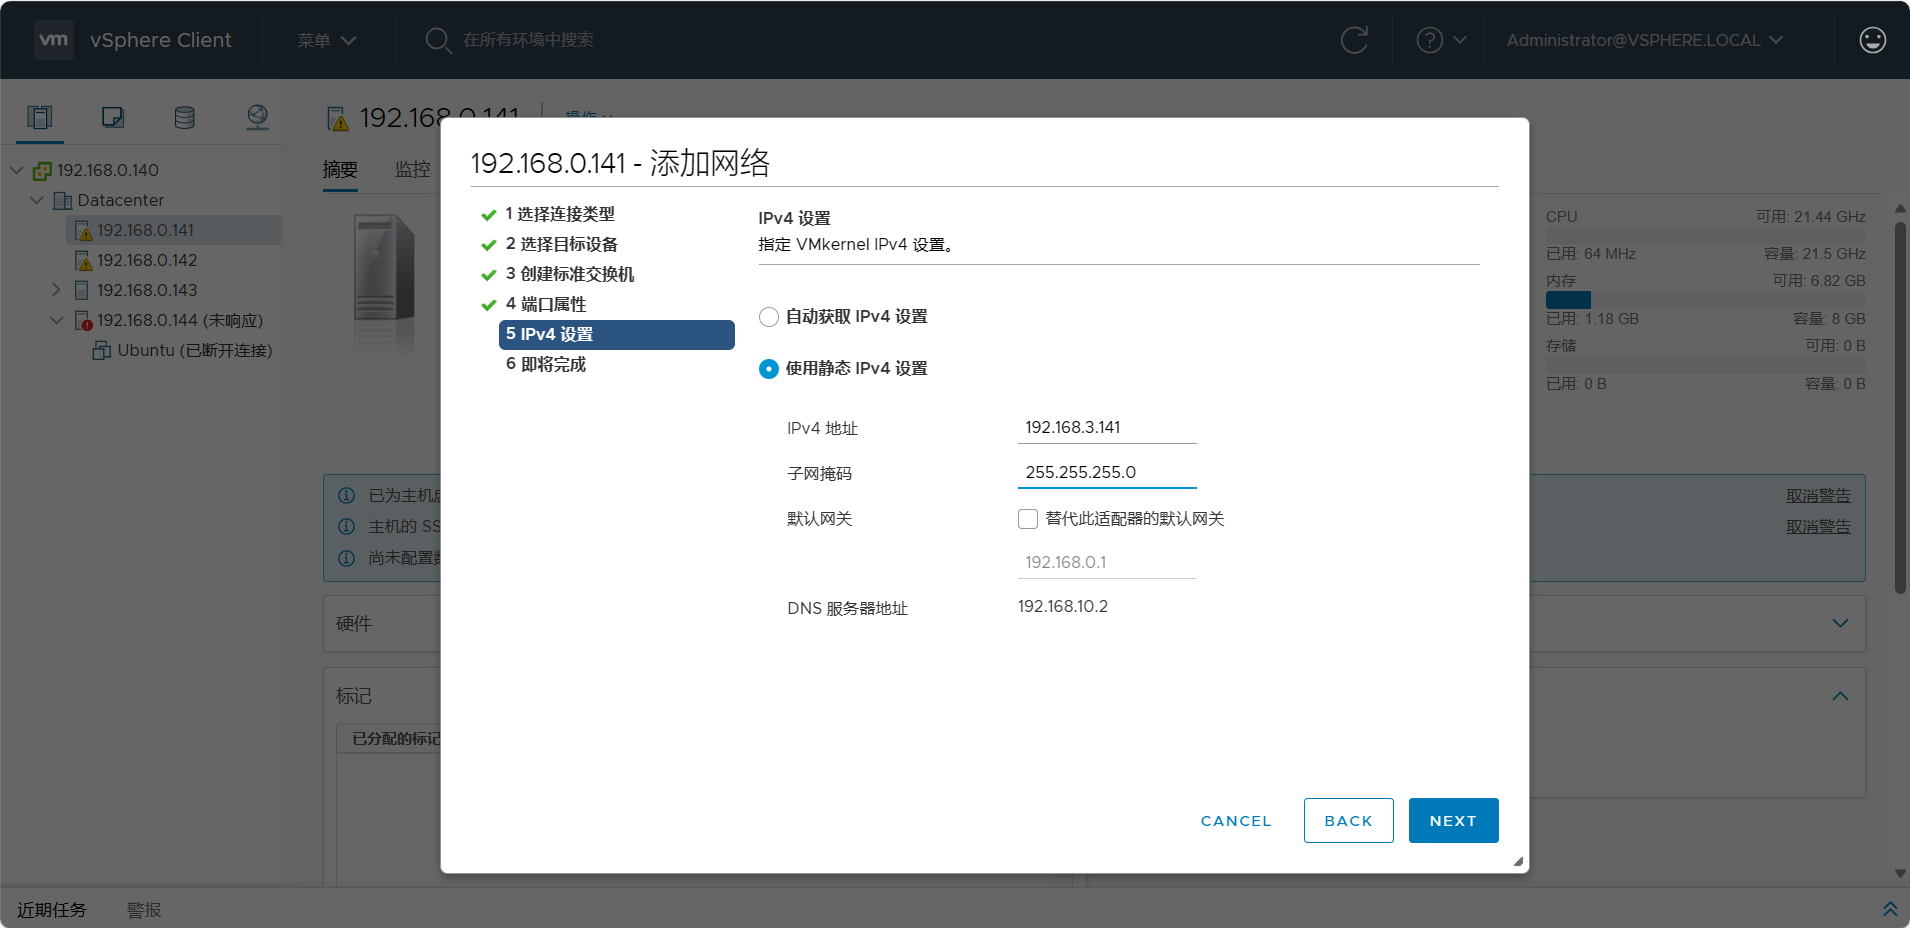
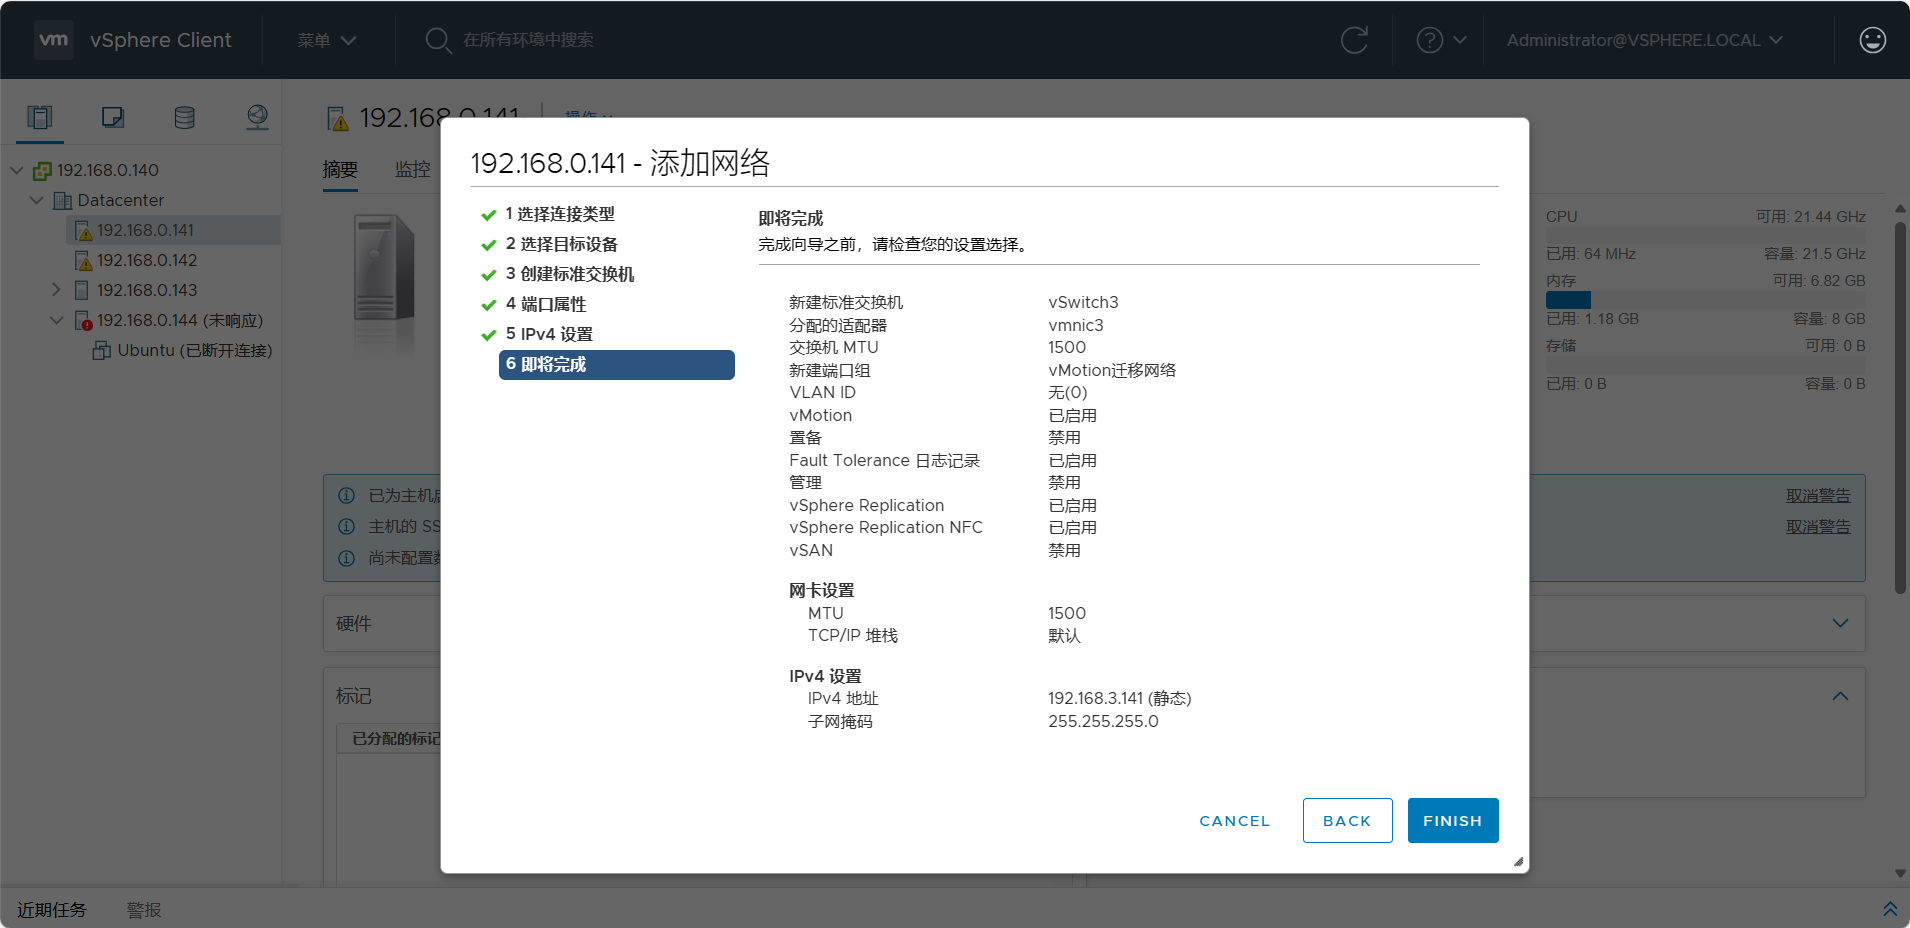
热迁网络ip地址划分(192.168.3.X/24)
(热迁网络架构图同管理网络,省略)
| 所在物理机 | 服务 | ip地址 | 网卡模式 |
|---|---|---|---|
| PC01 | vsphere | 192.168.3.140/24 | 桥接 |
| PC01 | esxi01 | 192.168.3.141/24 | 桥接 |
| PC01 | esxi02 | 192.168.3.142/24 | 桥接 |
| PC02 | esxi03 | 192.168.3.143/24 | 桥接 |
二.搭建过程
1.管理网络
1.1添加各esxi服务器
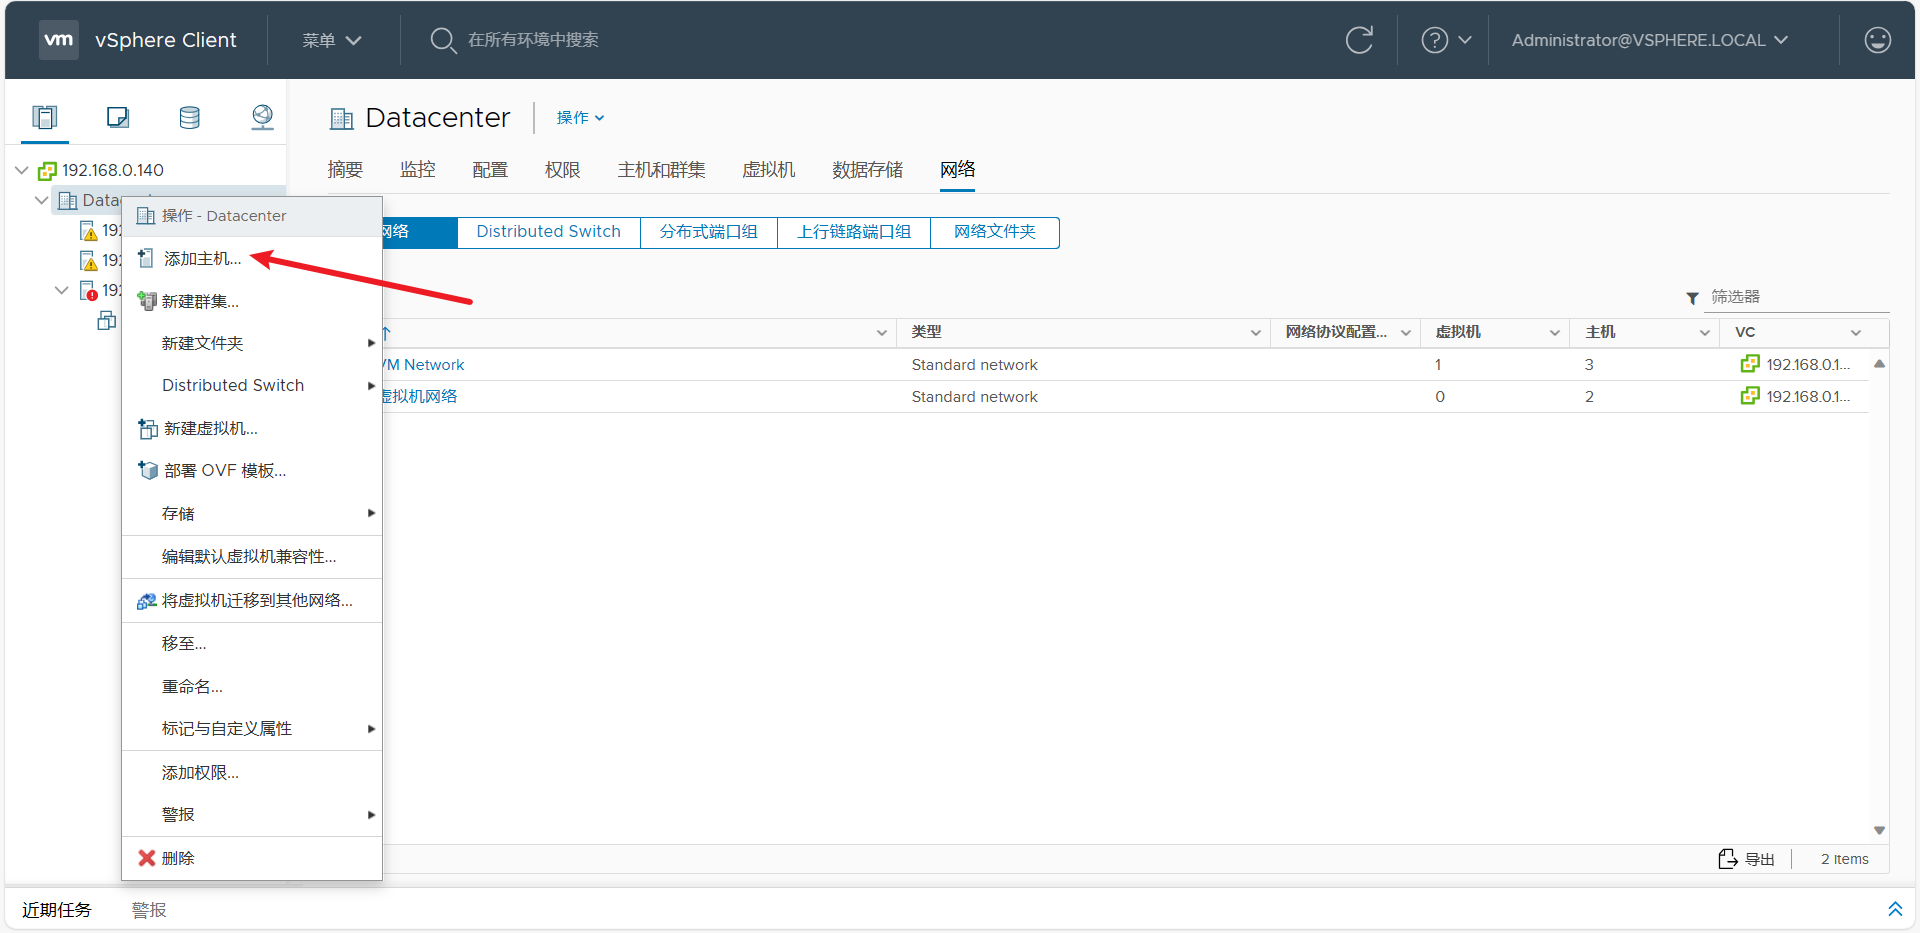
右键数据中心,选择"连接主机"
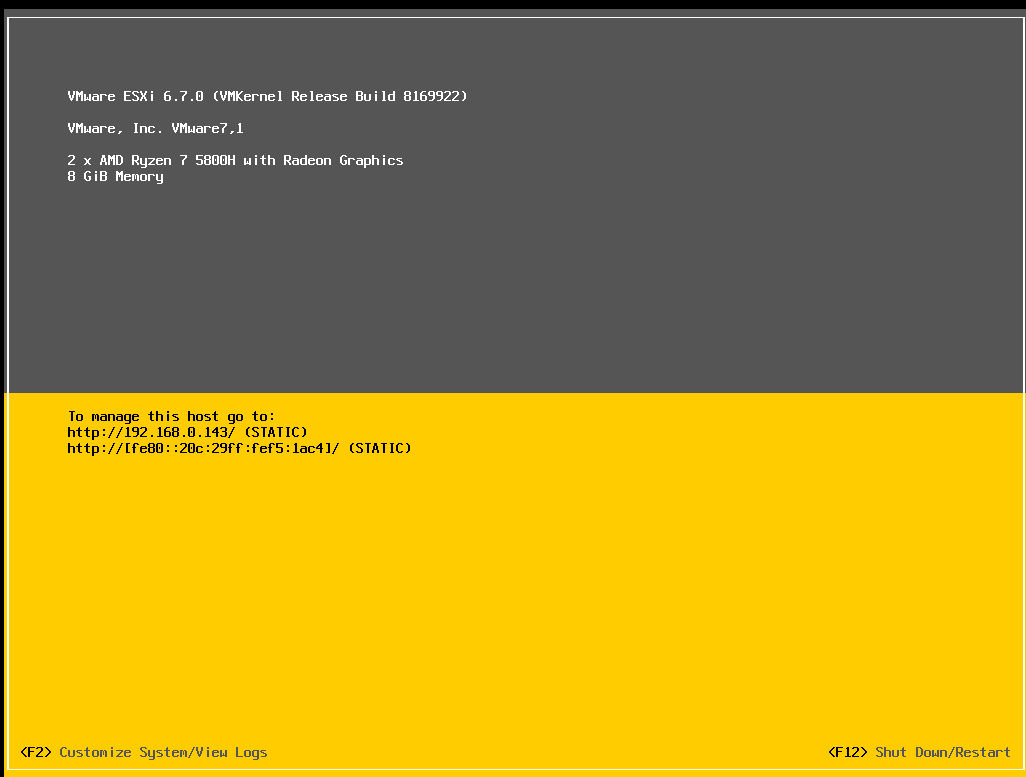
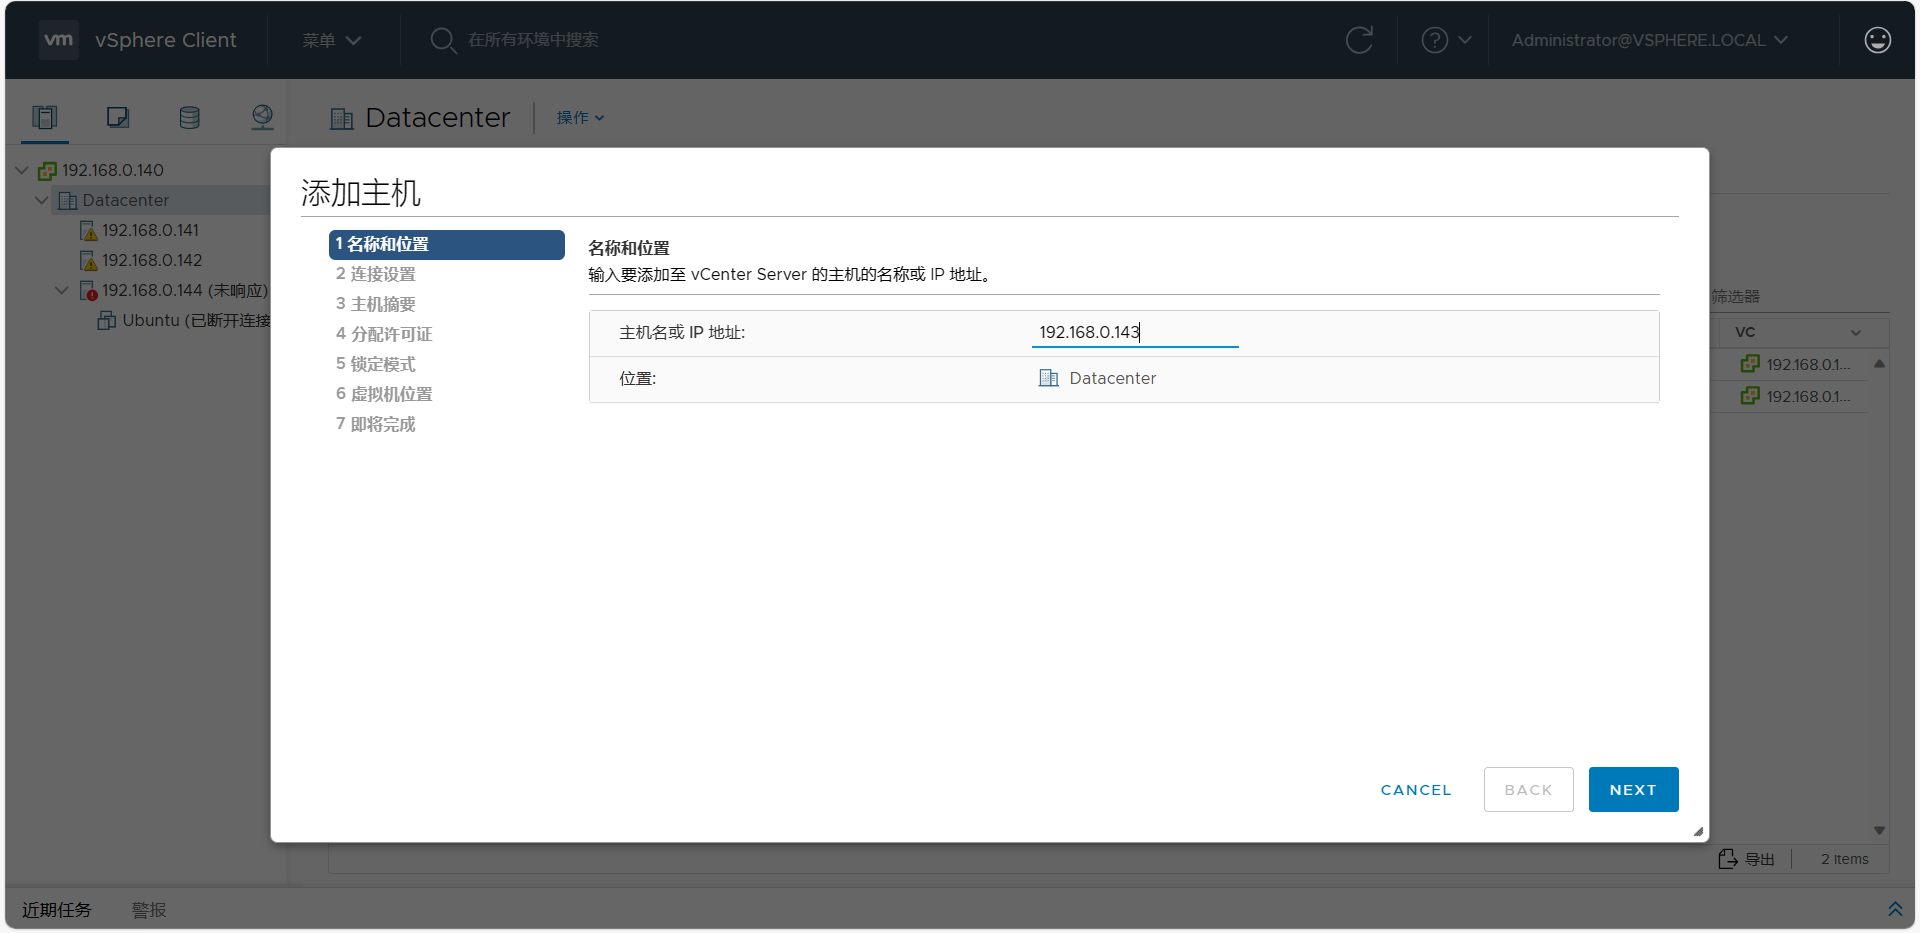
输入esxi服务器的IP
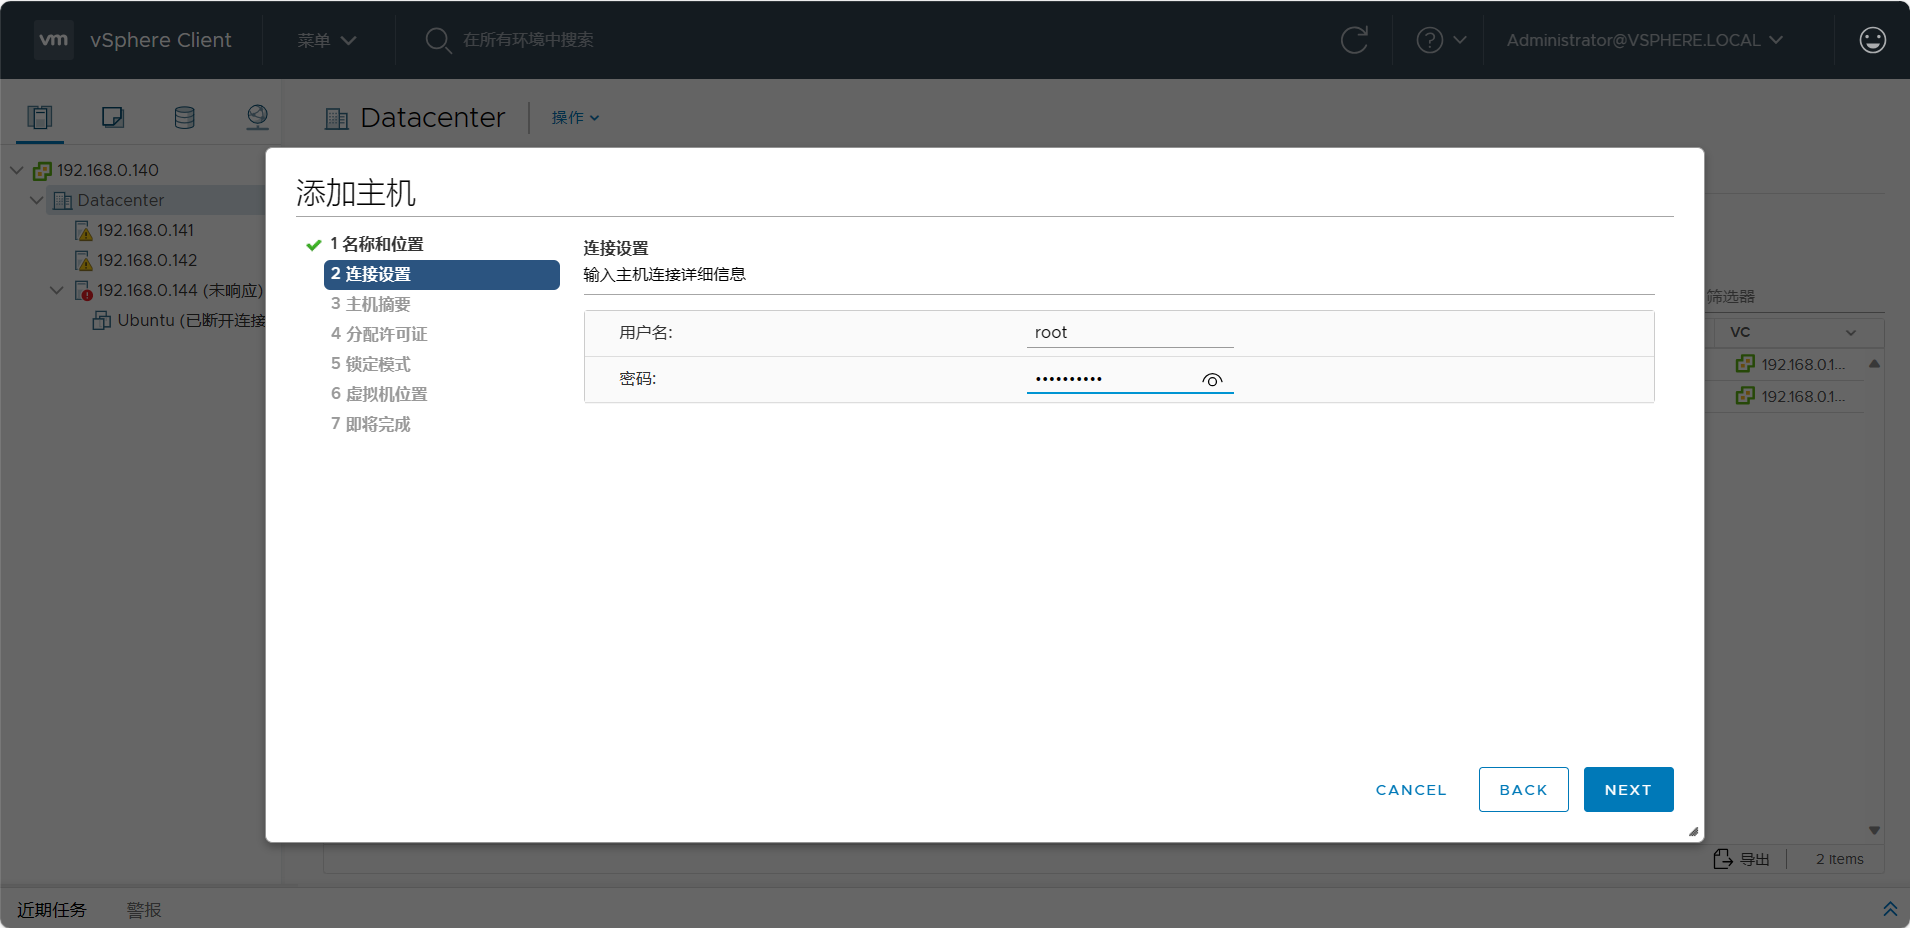
输入root账号密码
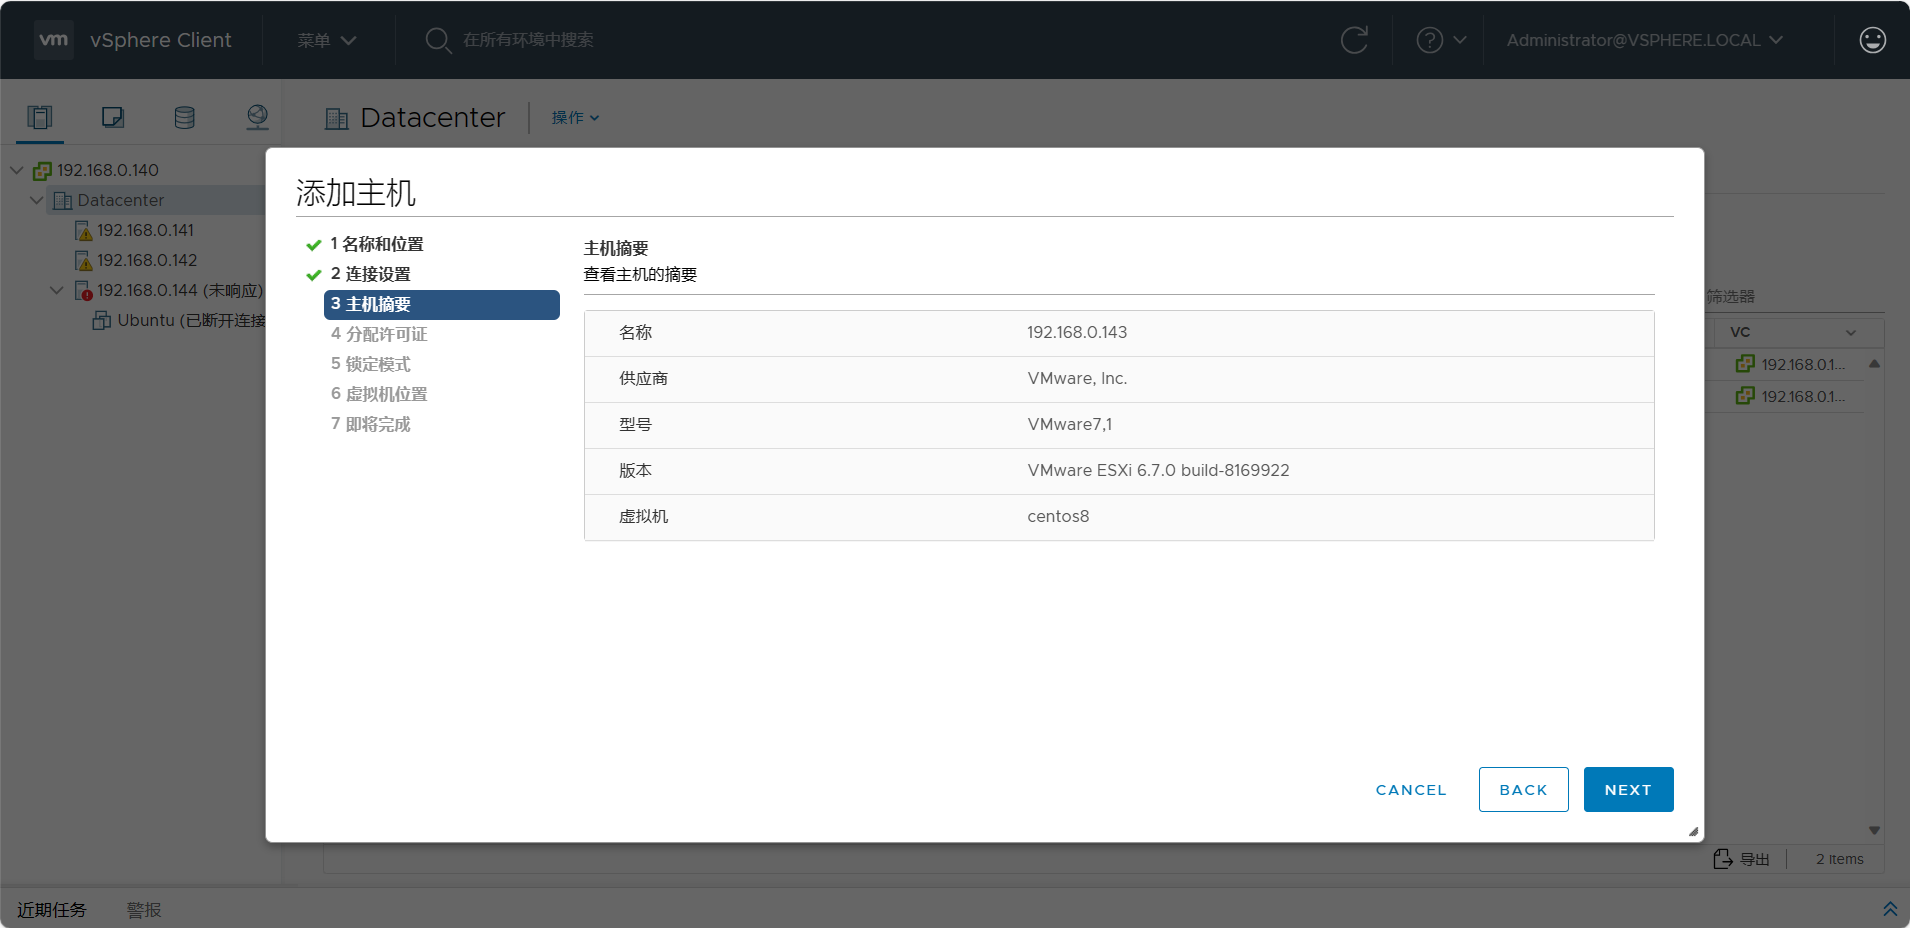
确认信息
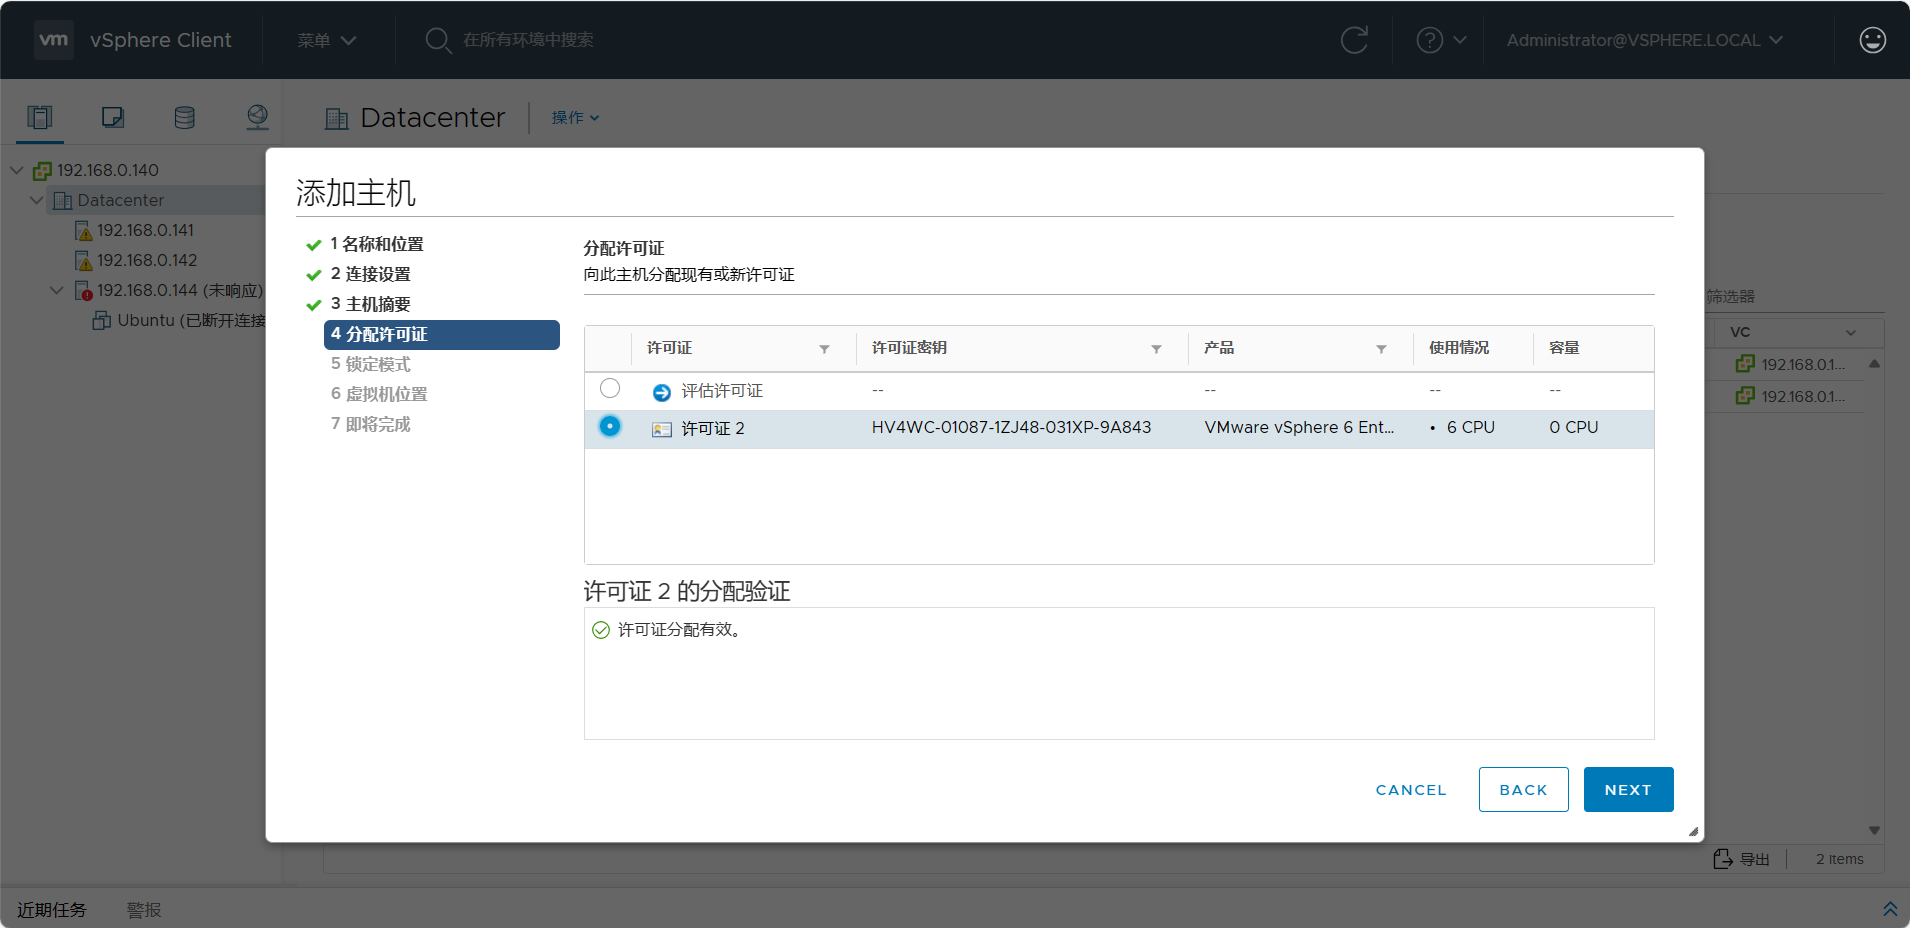
分配许可证

设置锁定模式(默认"禁用")
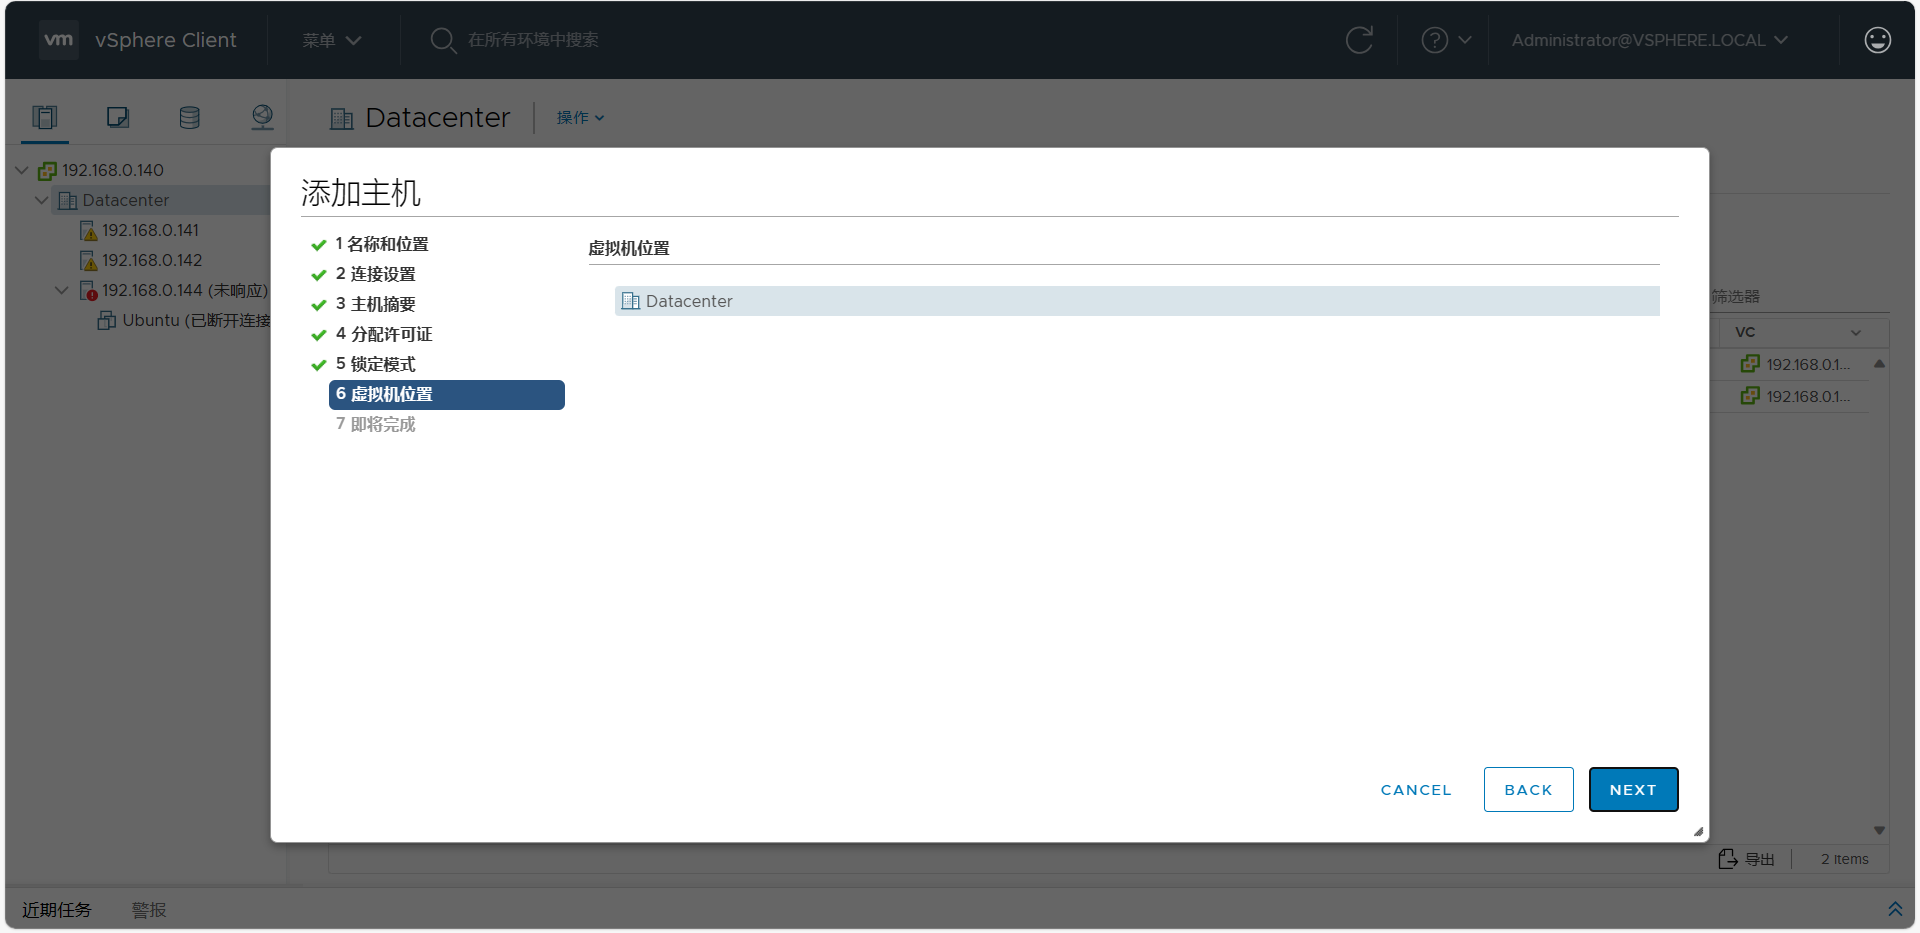
确认虚拟机位置
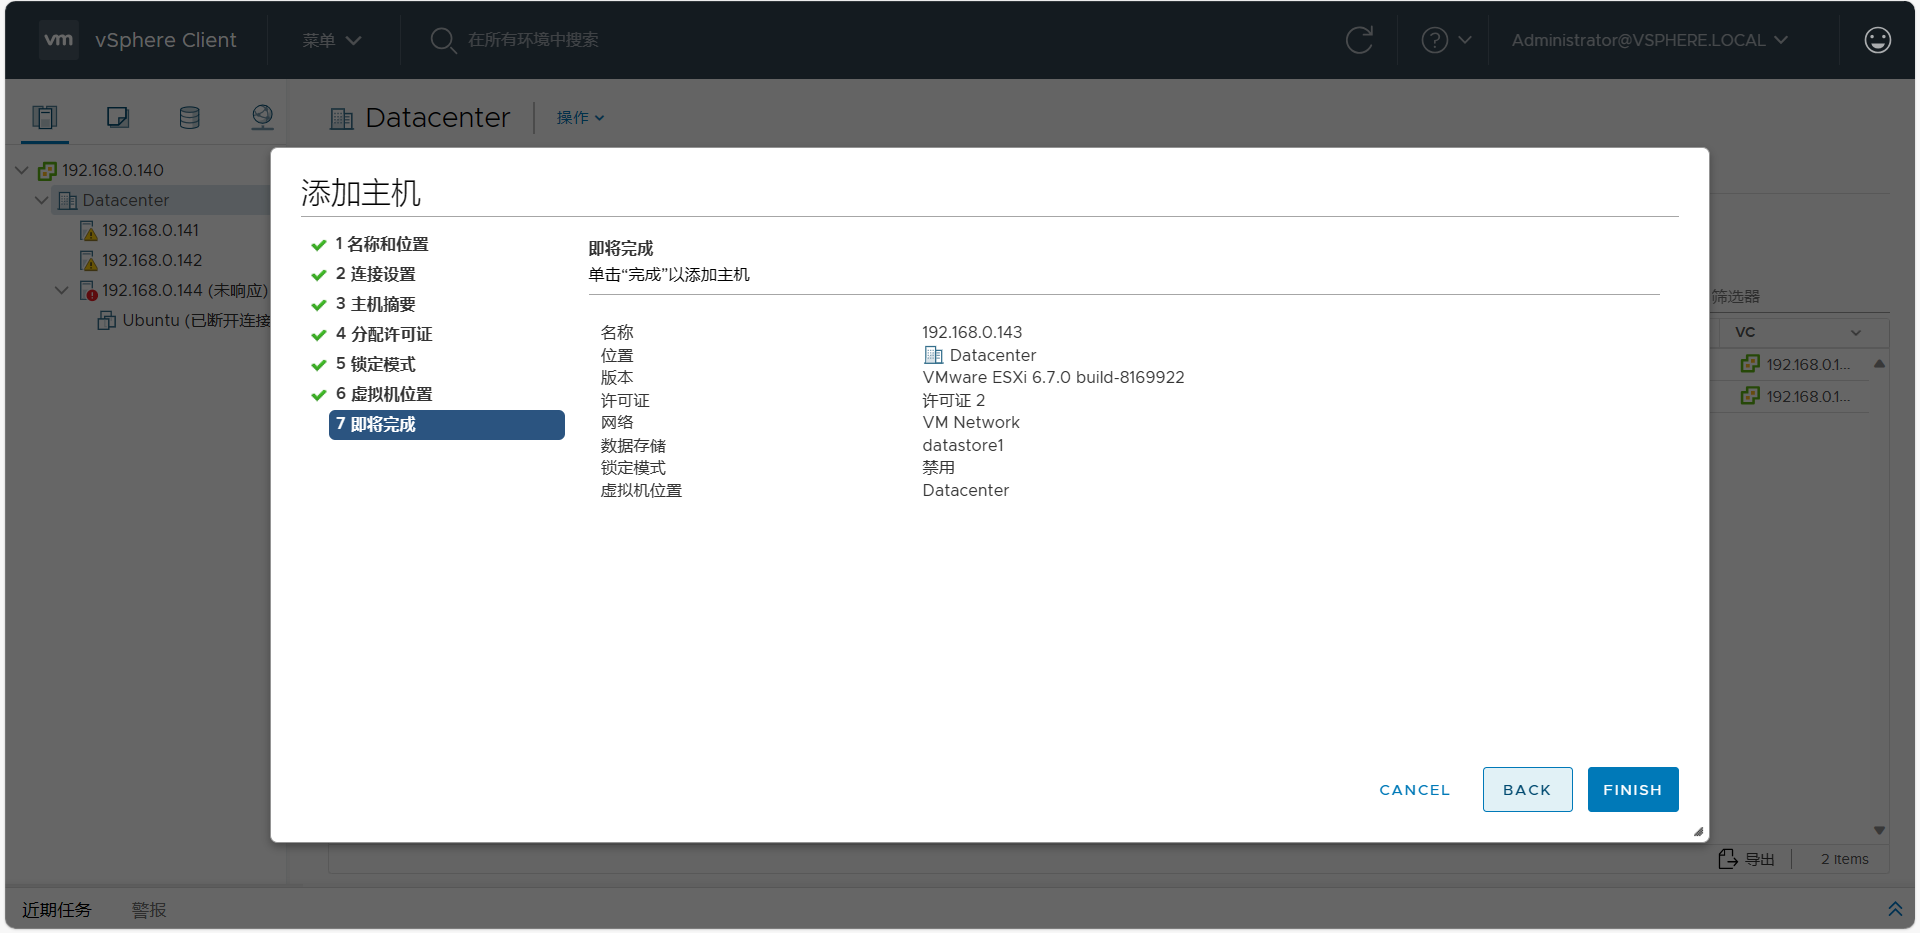
最后一步确认信息
其他esxi步骤相同,故省略!
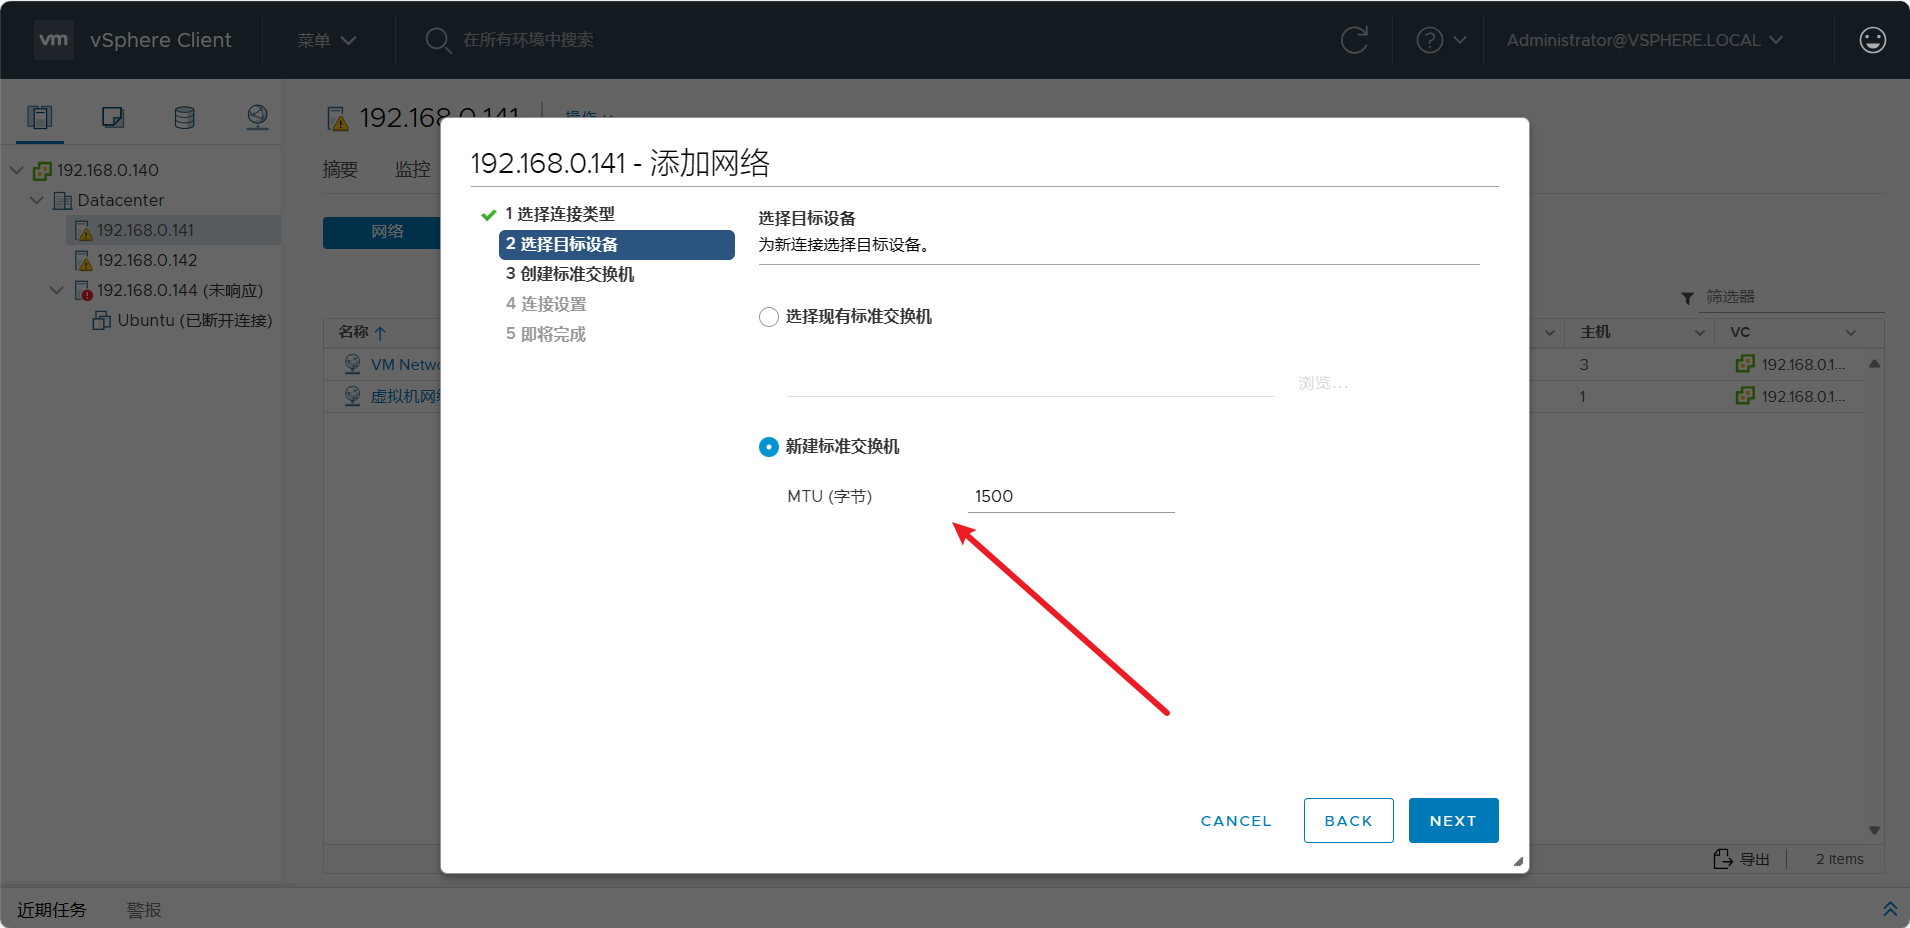
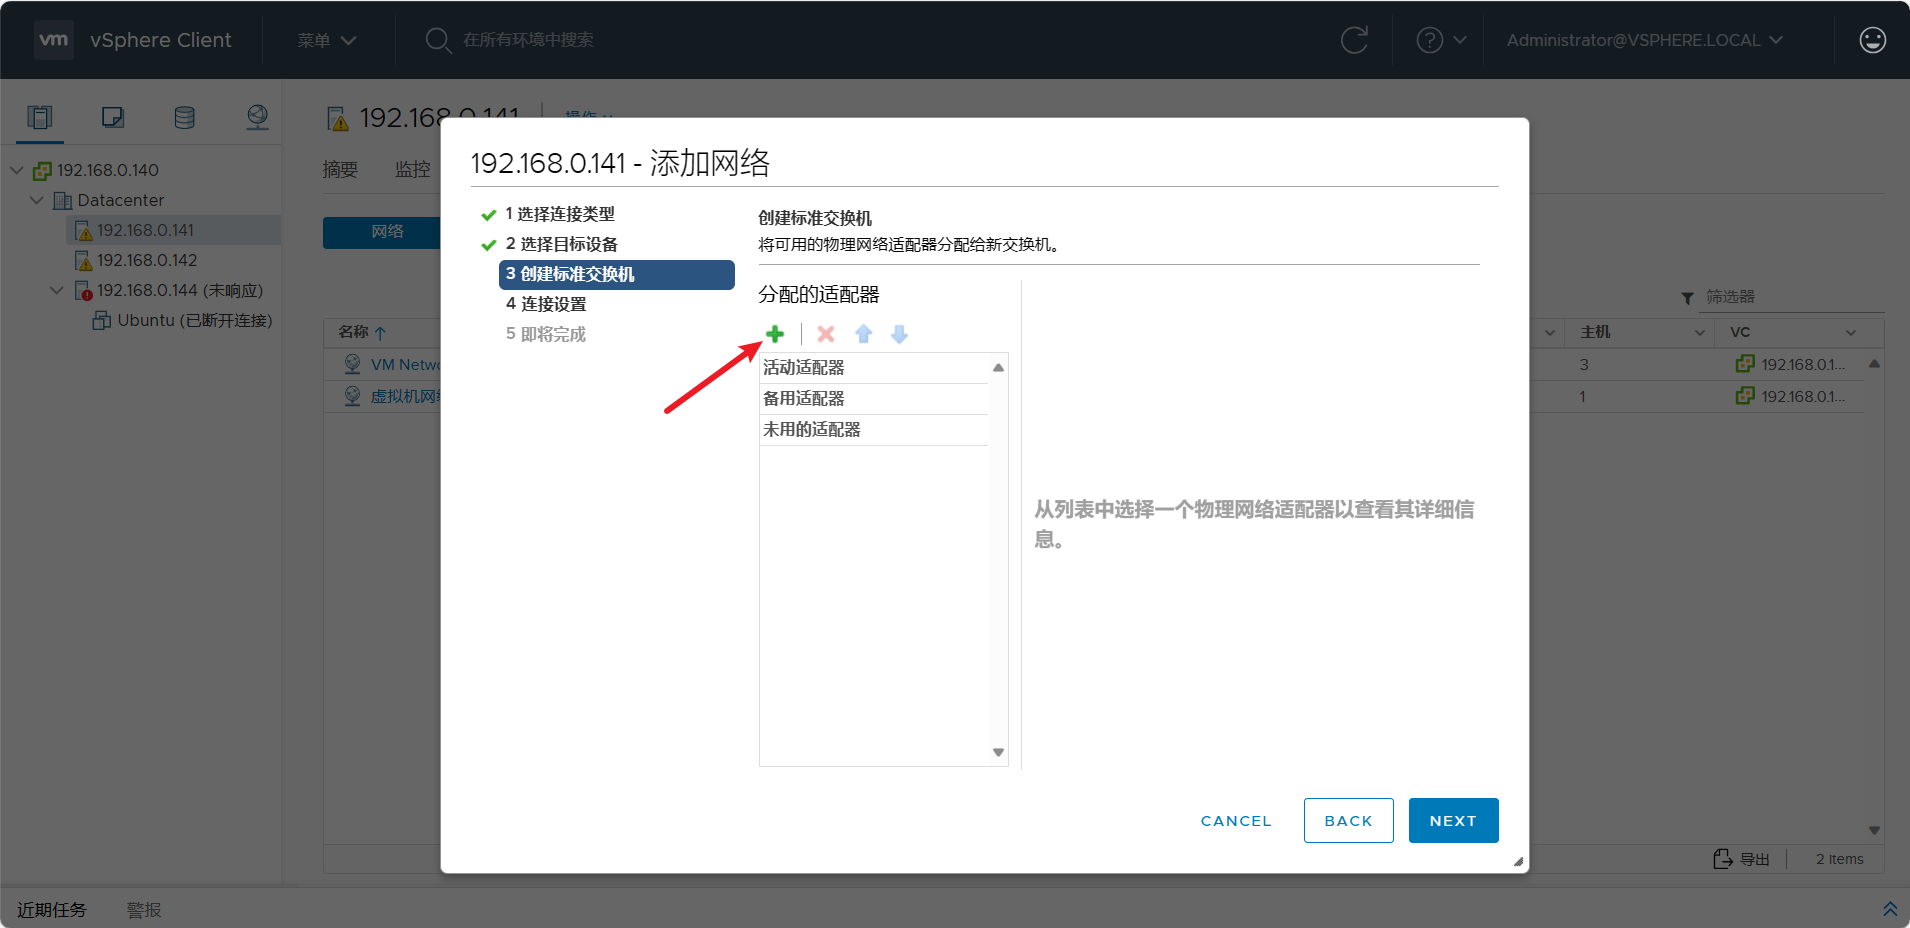
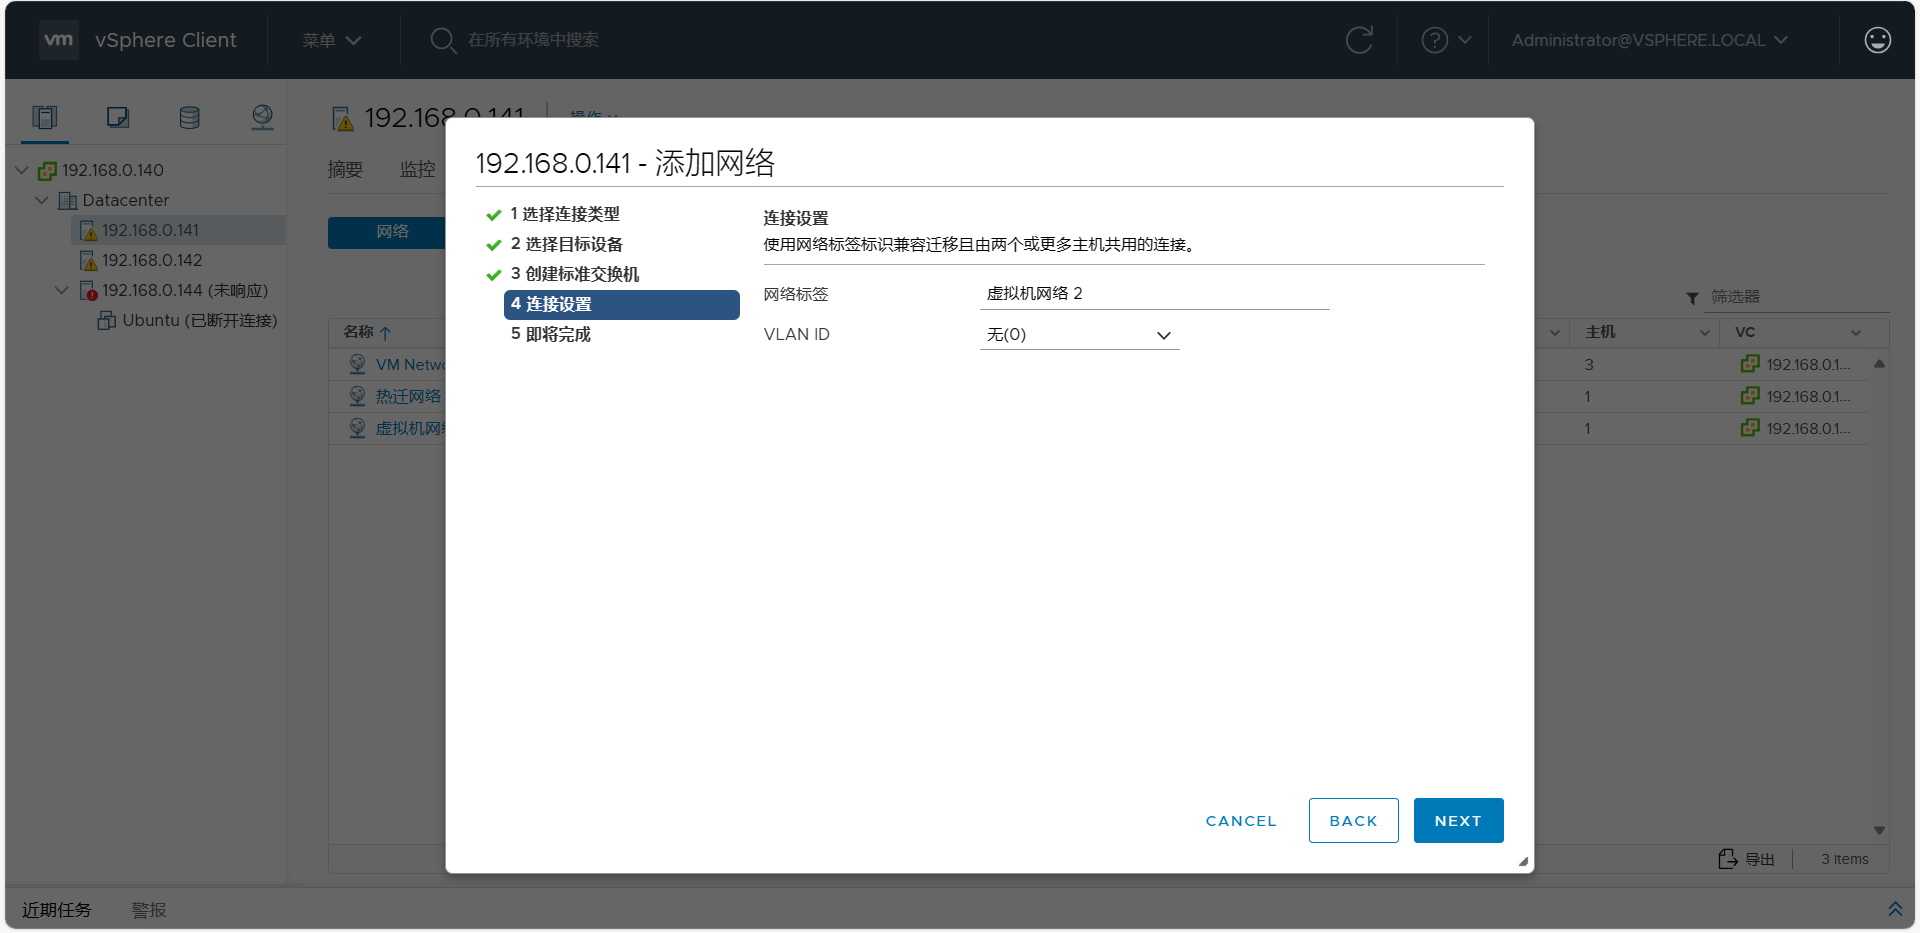
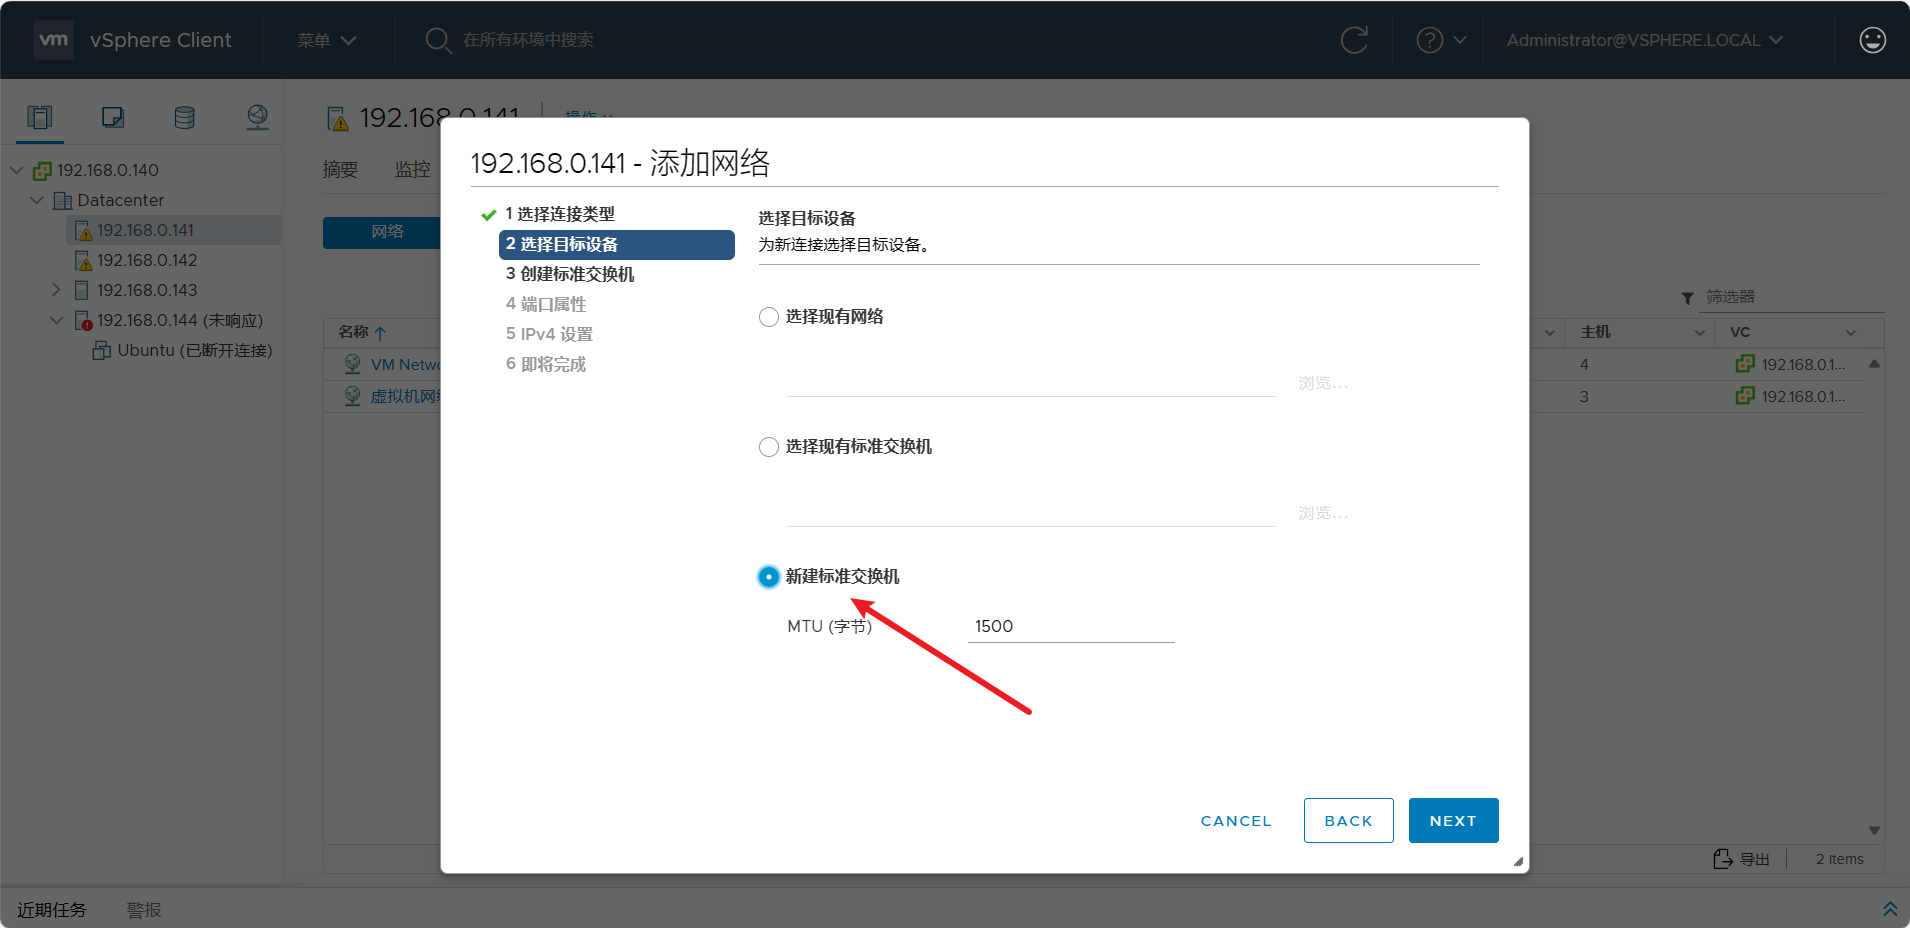
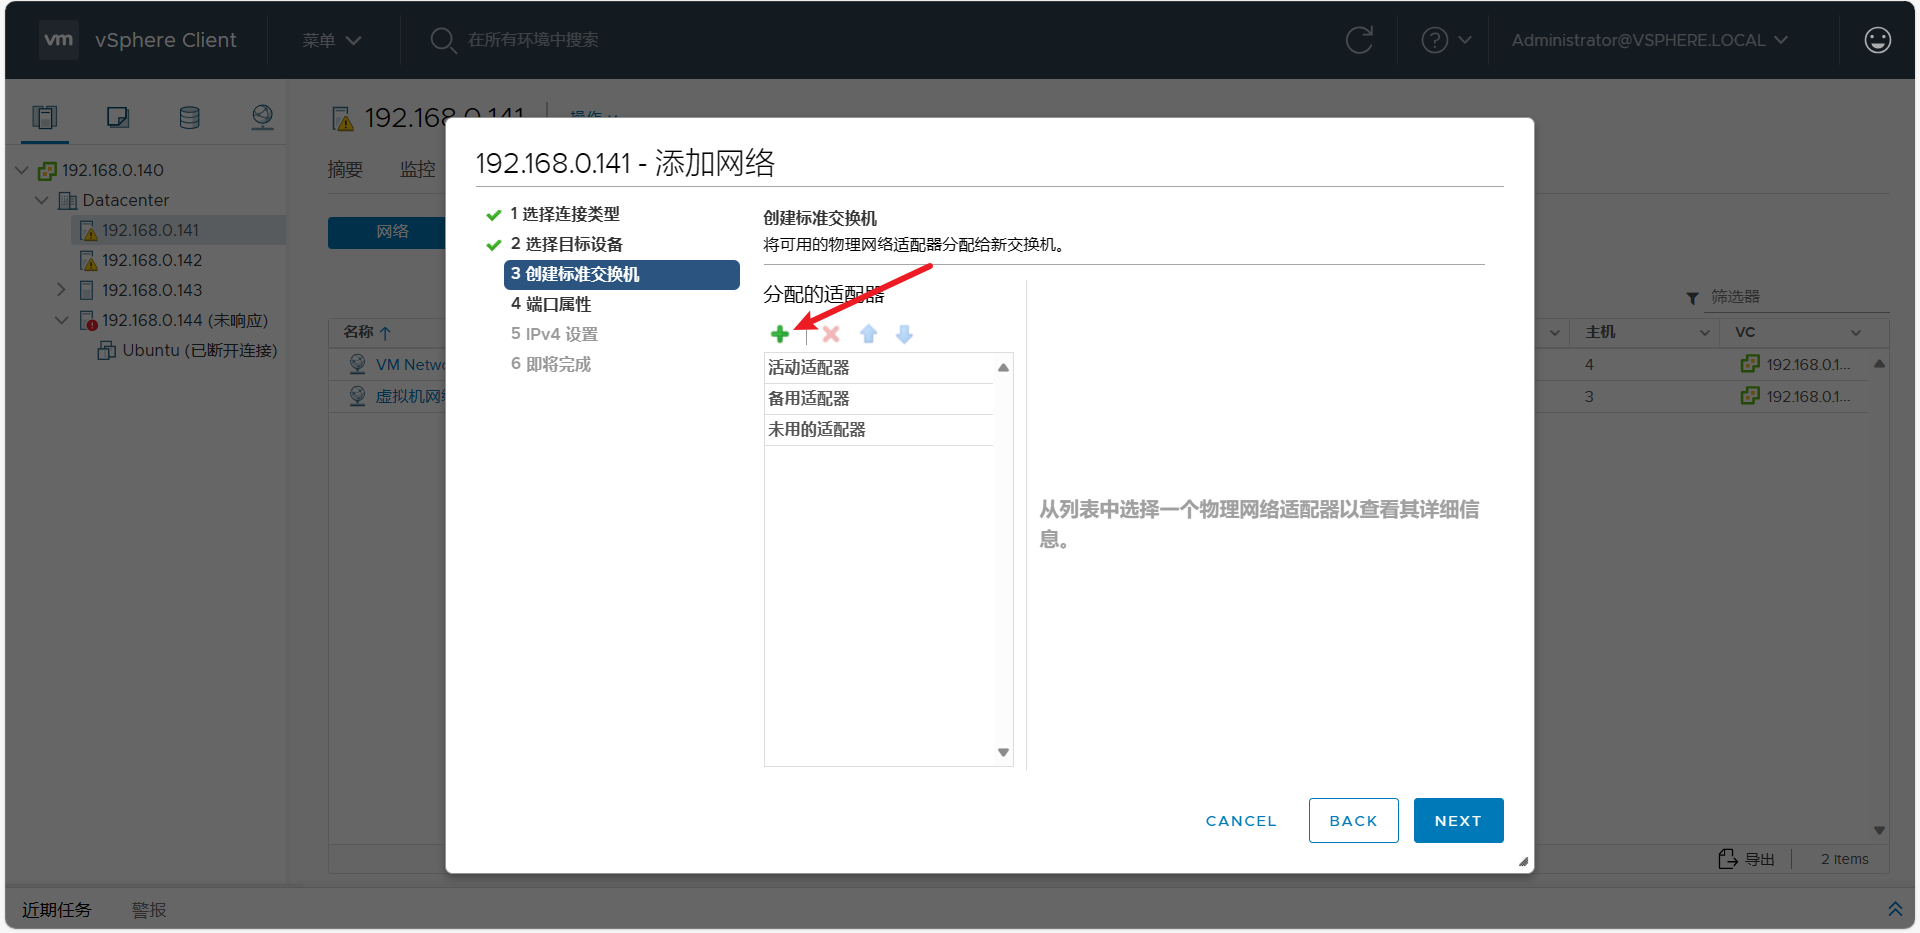
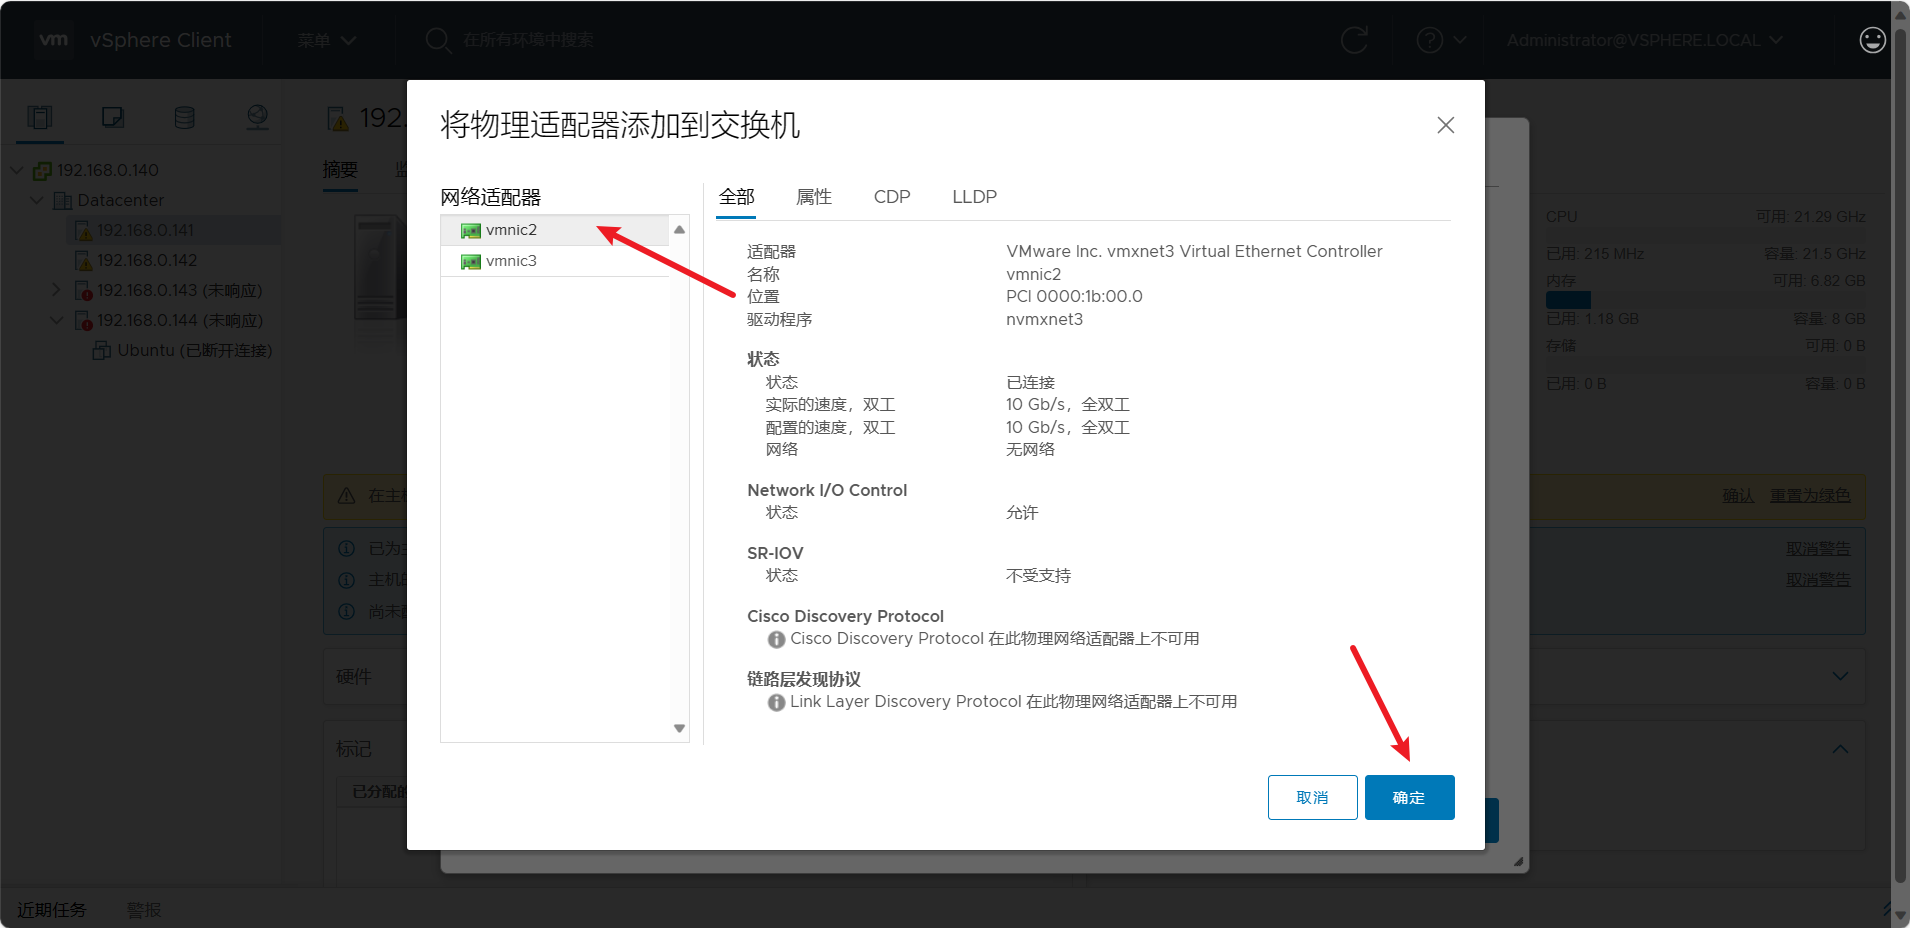
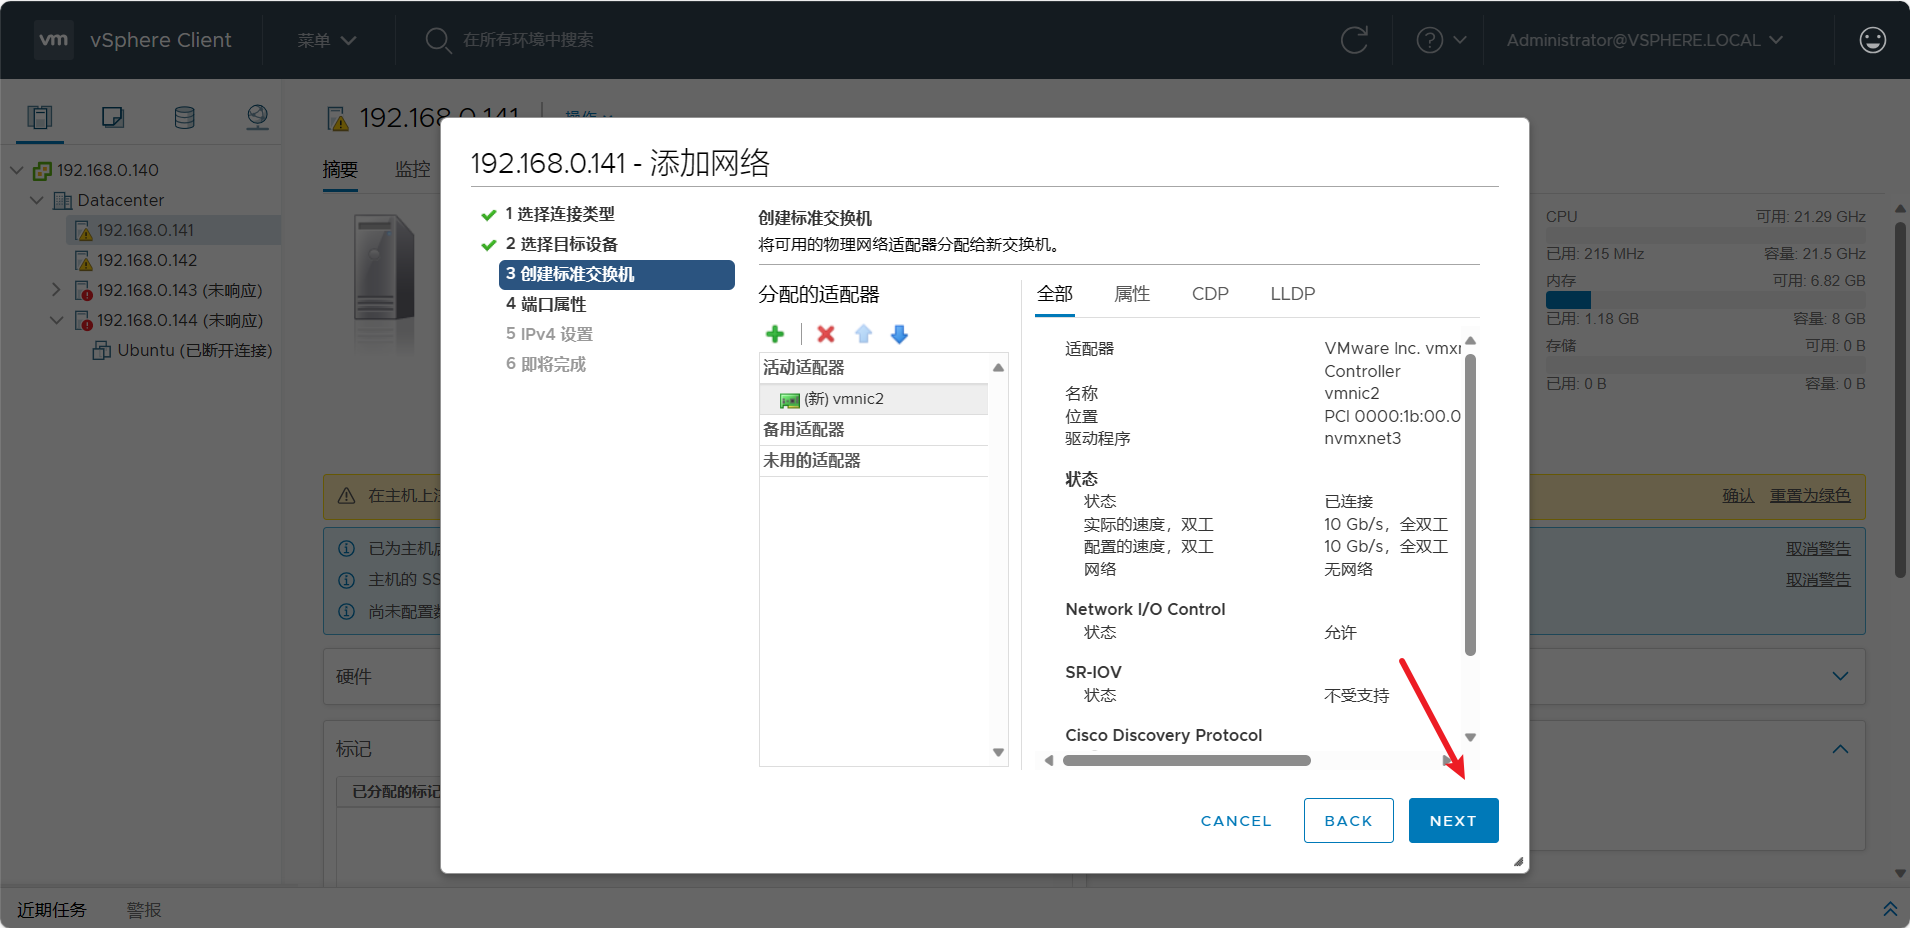
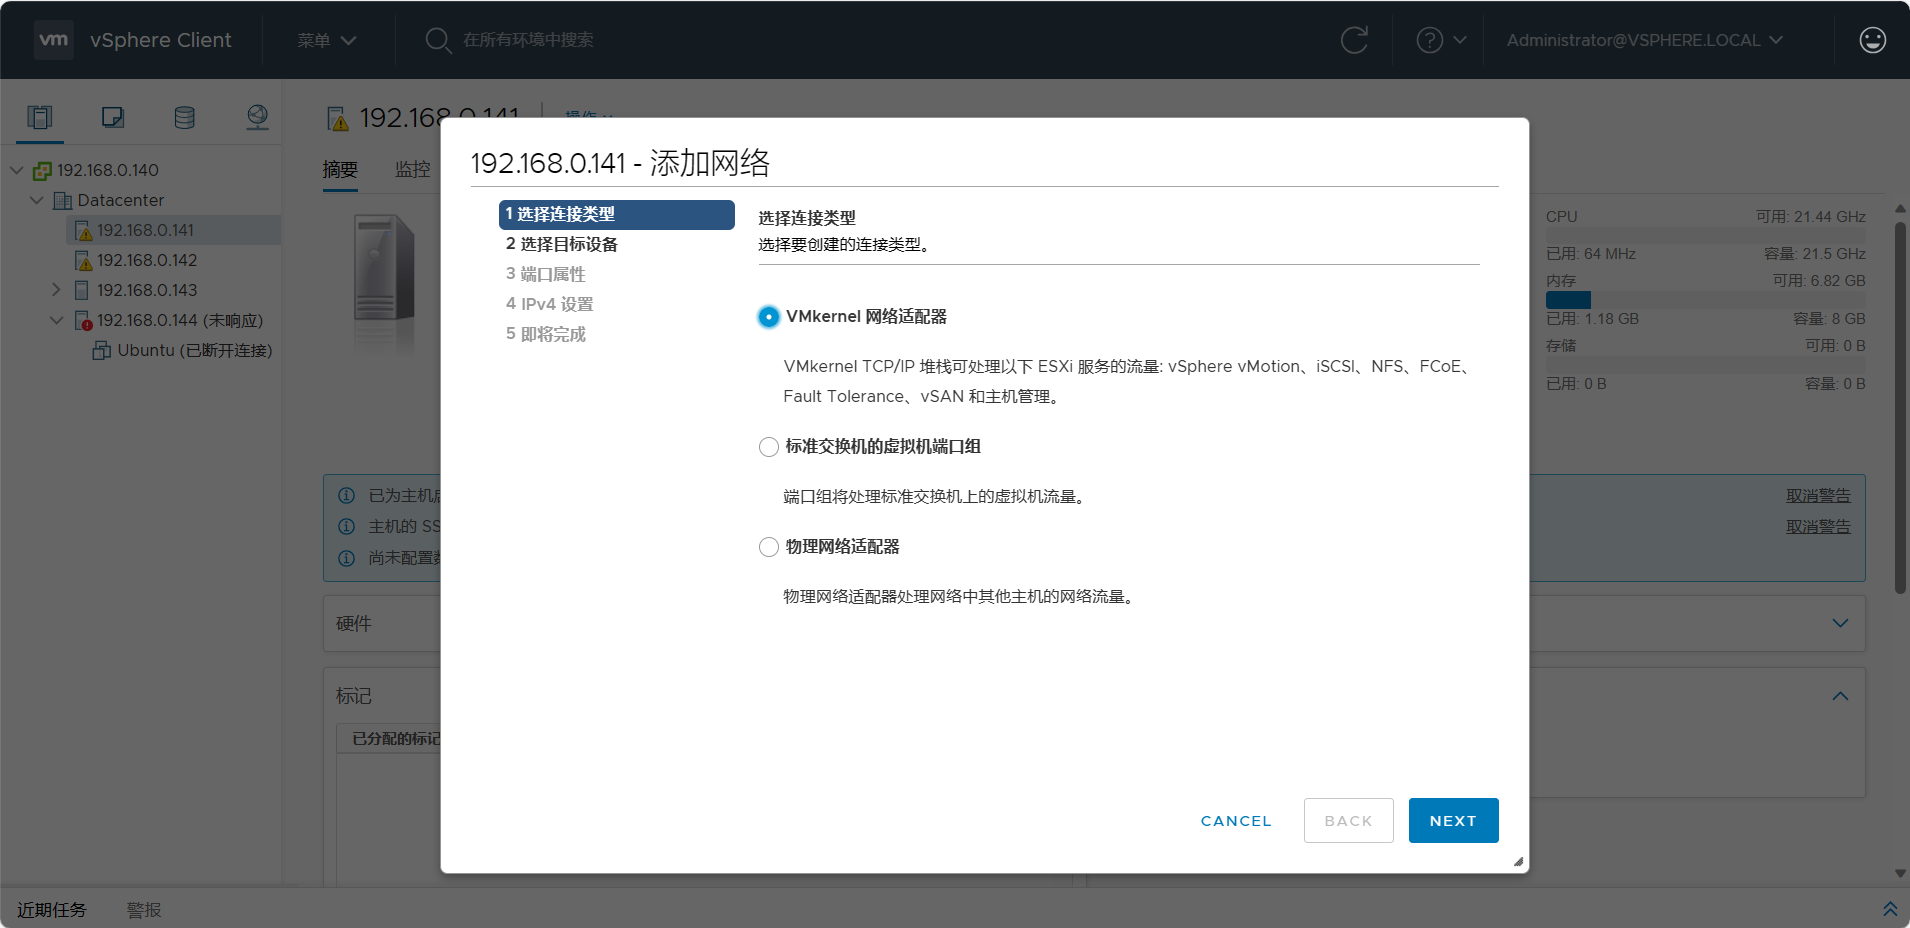
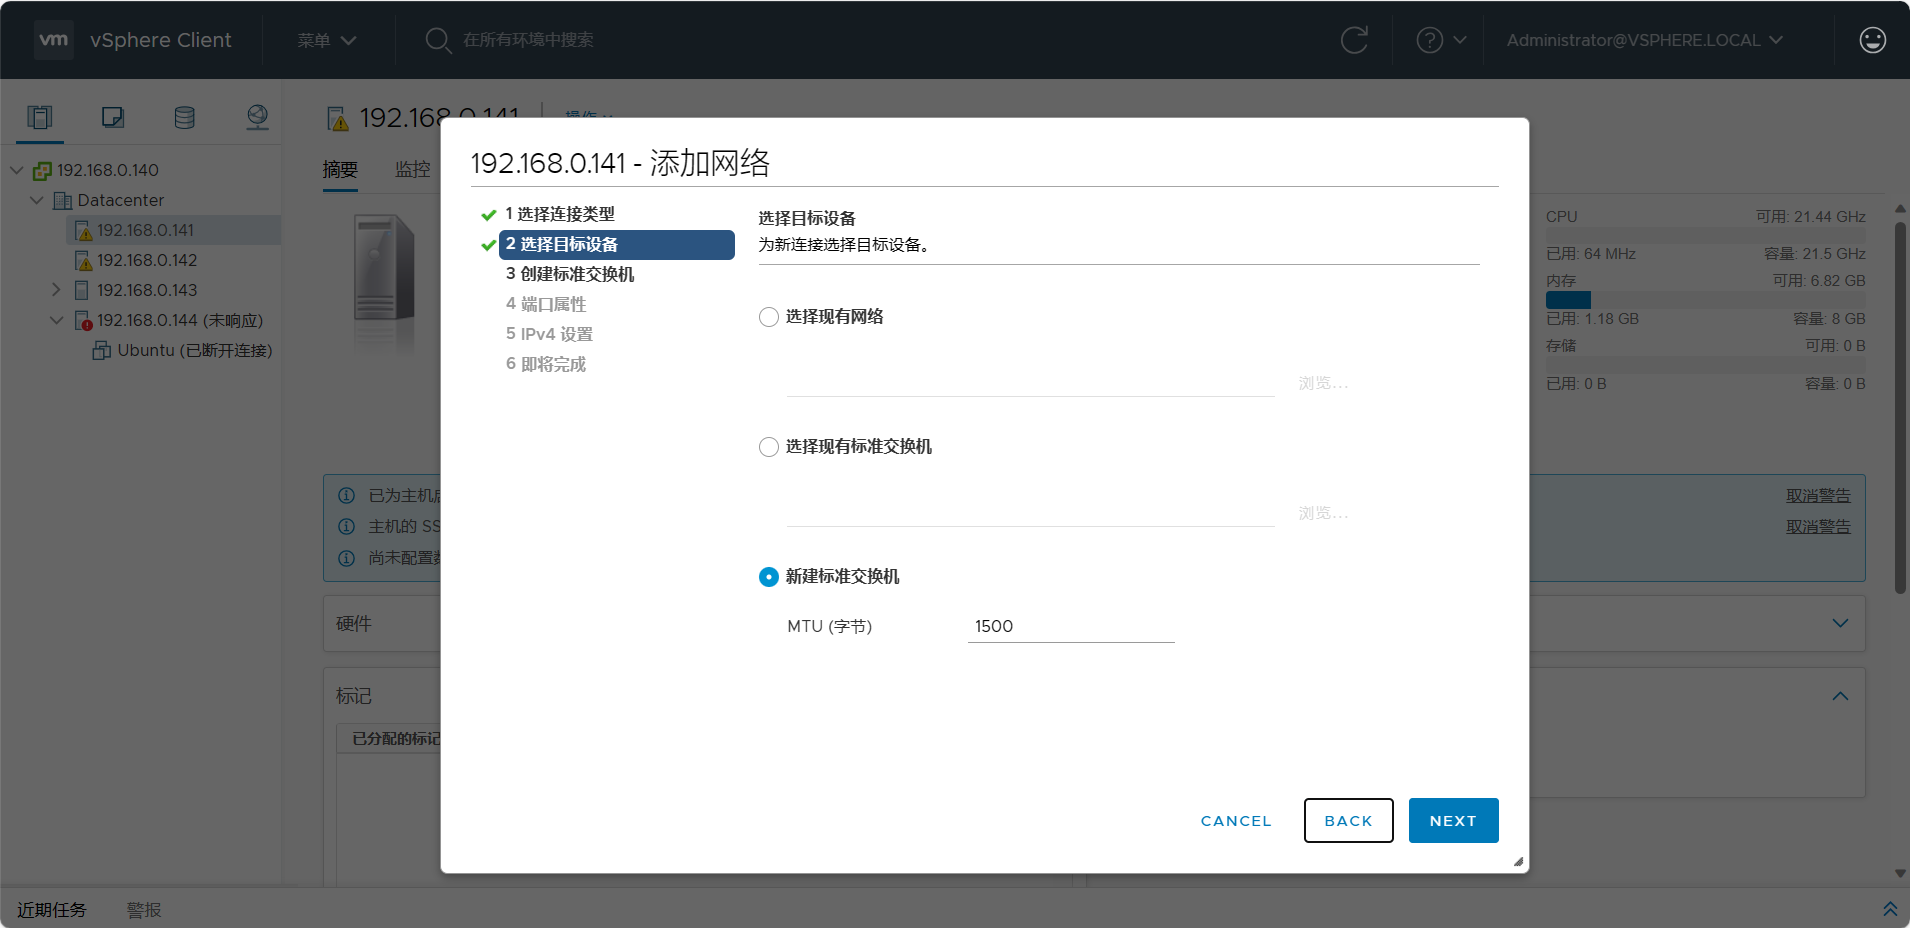
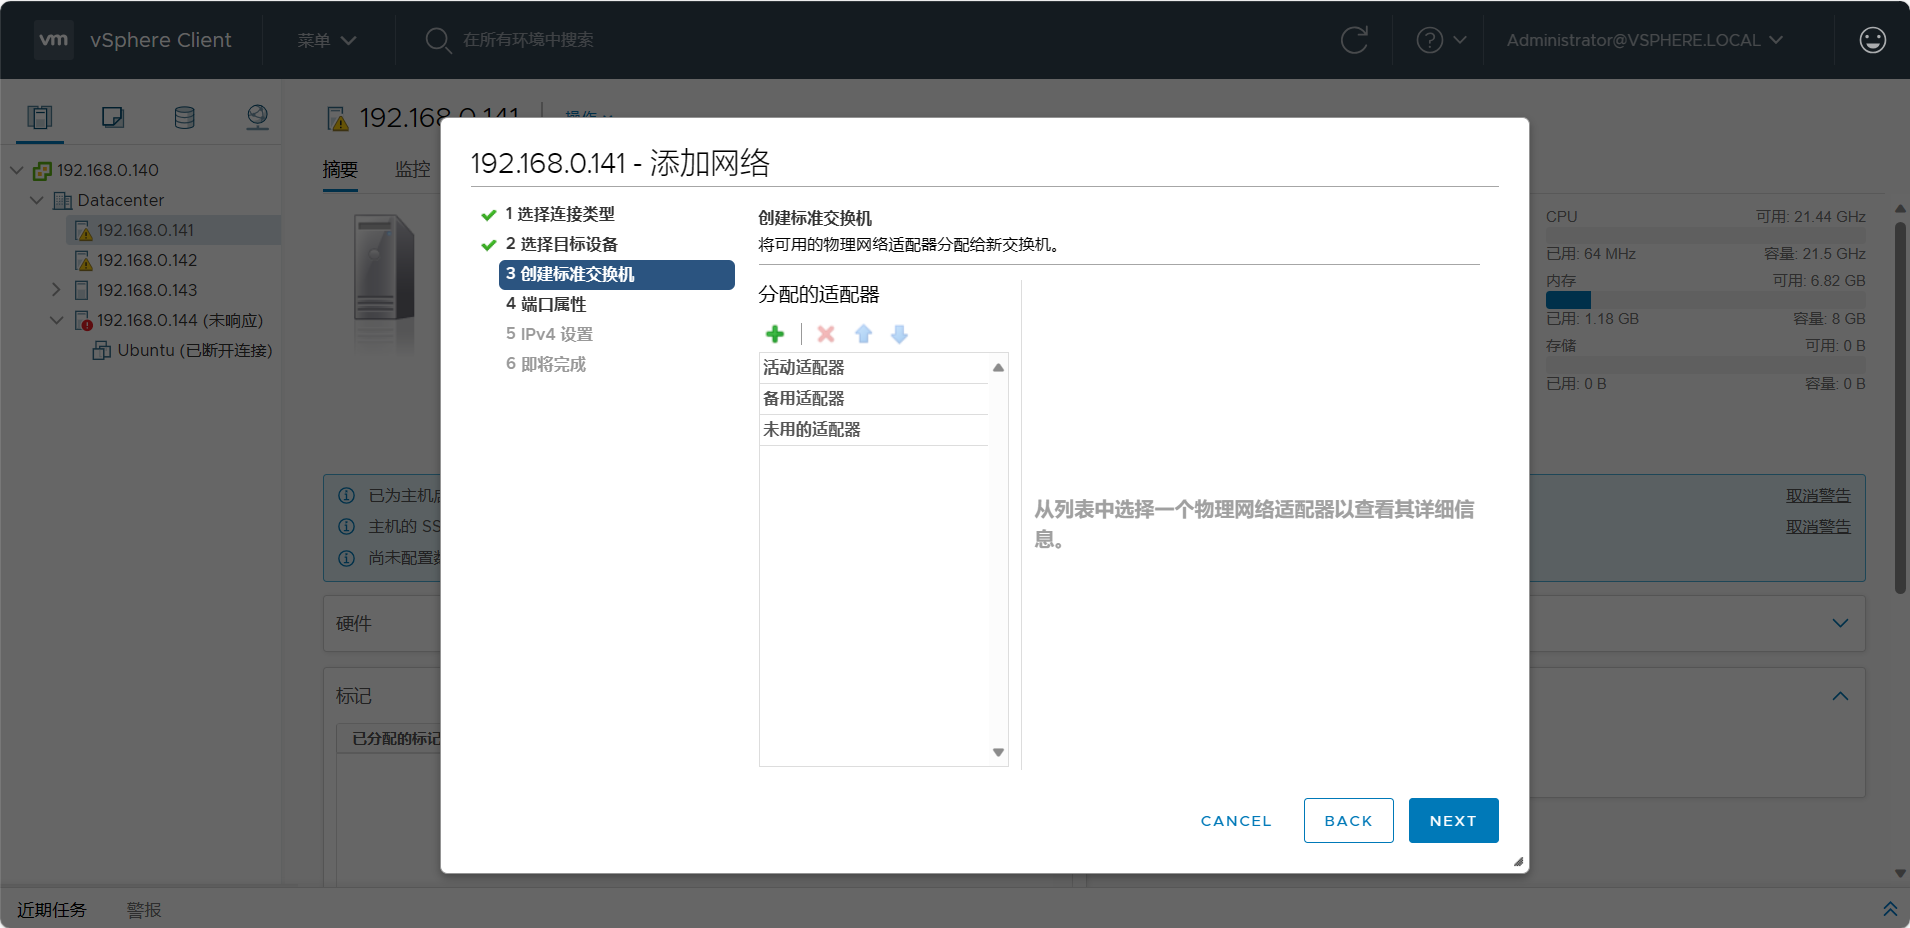
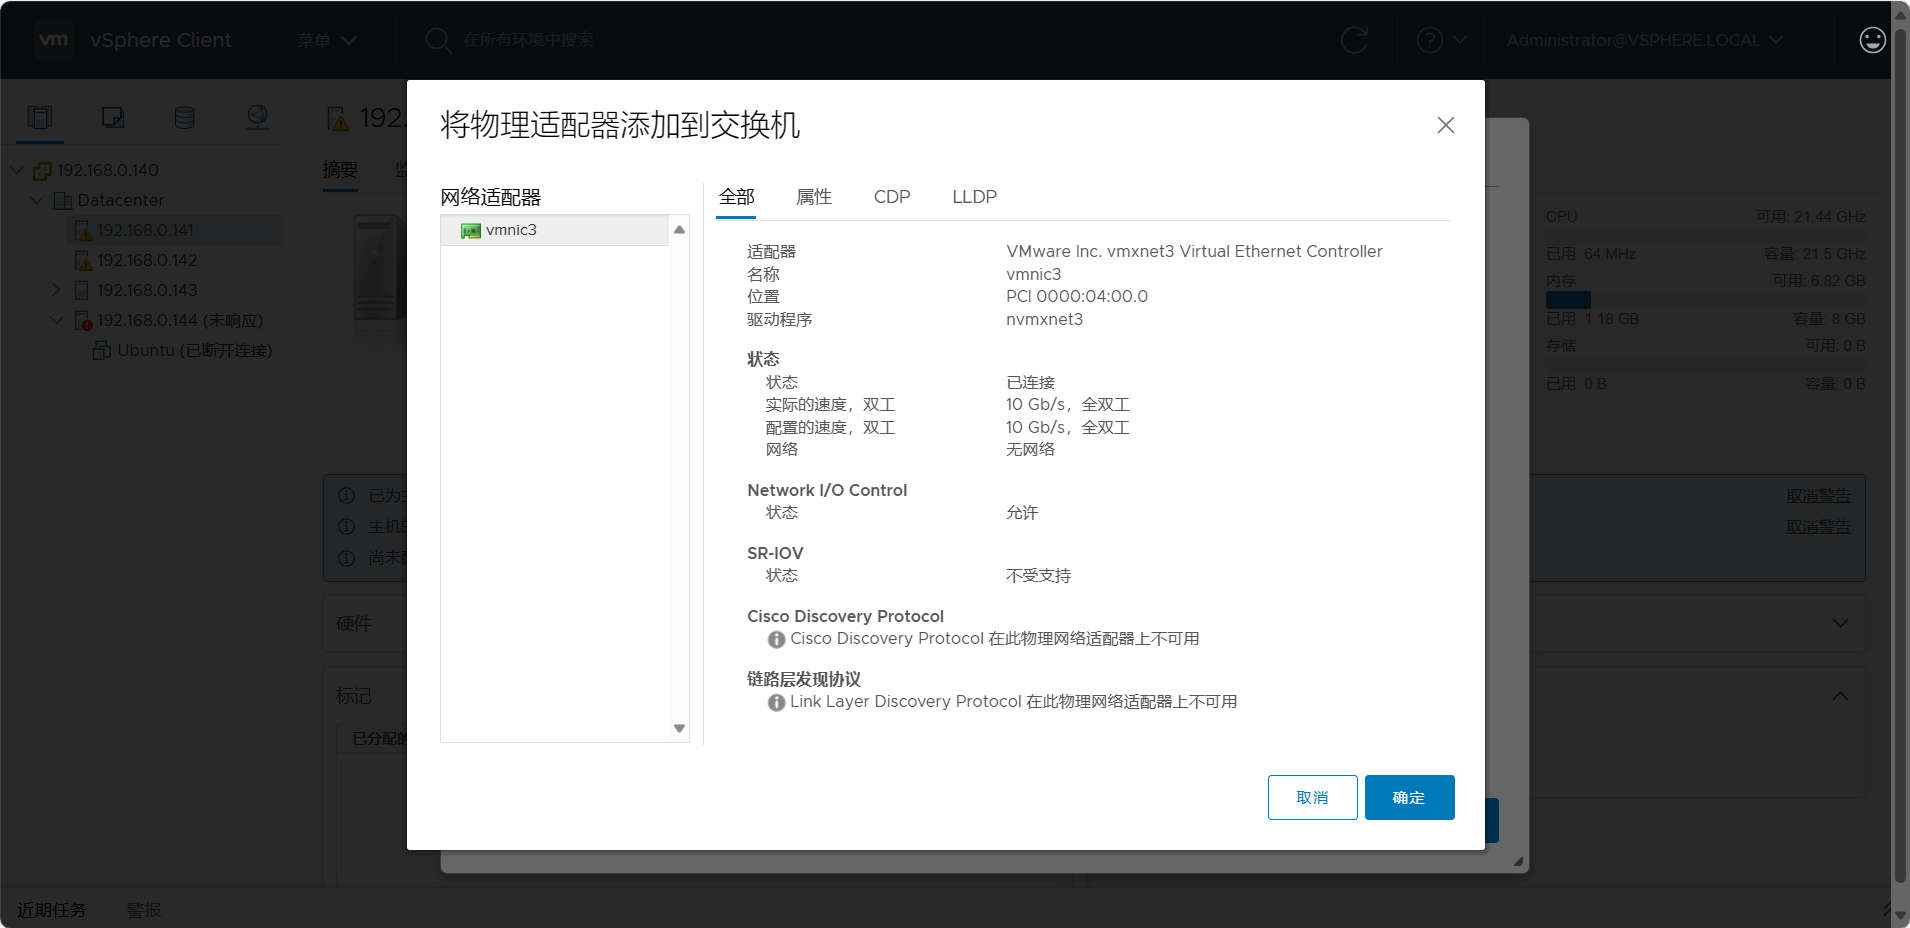
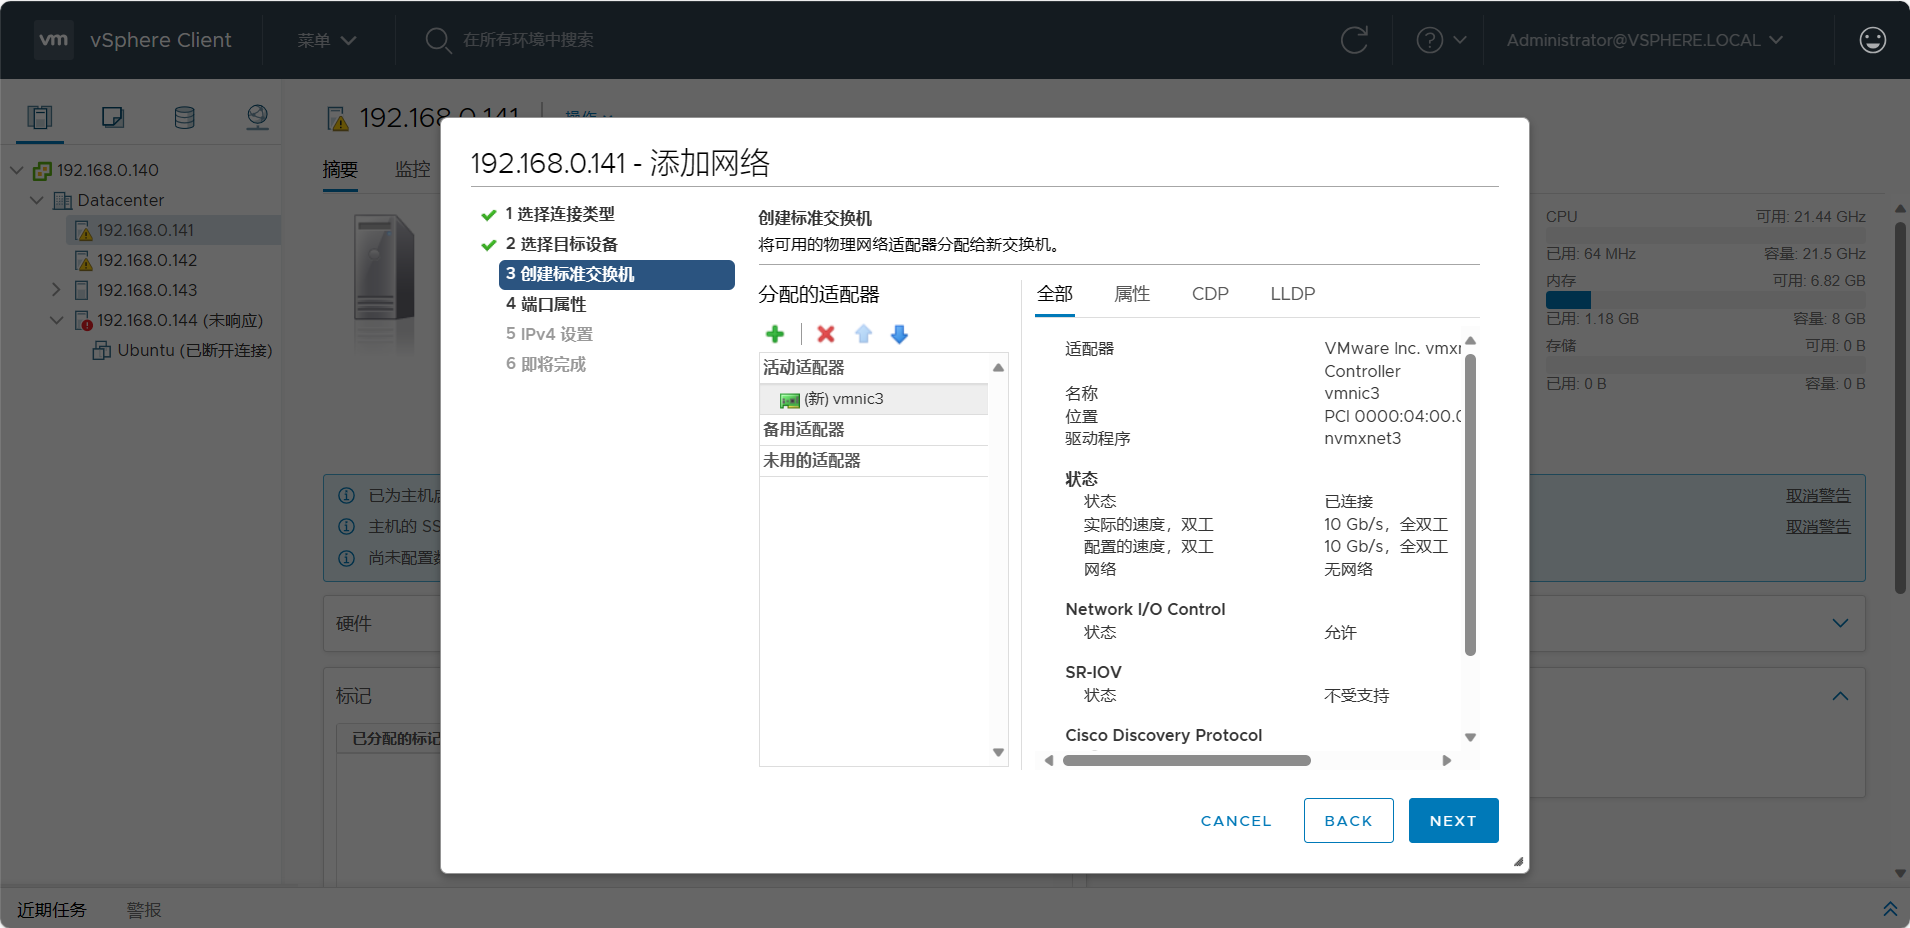
2.虚拟机网络搭建
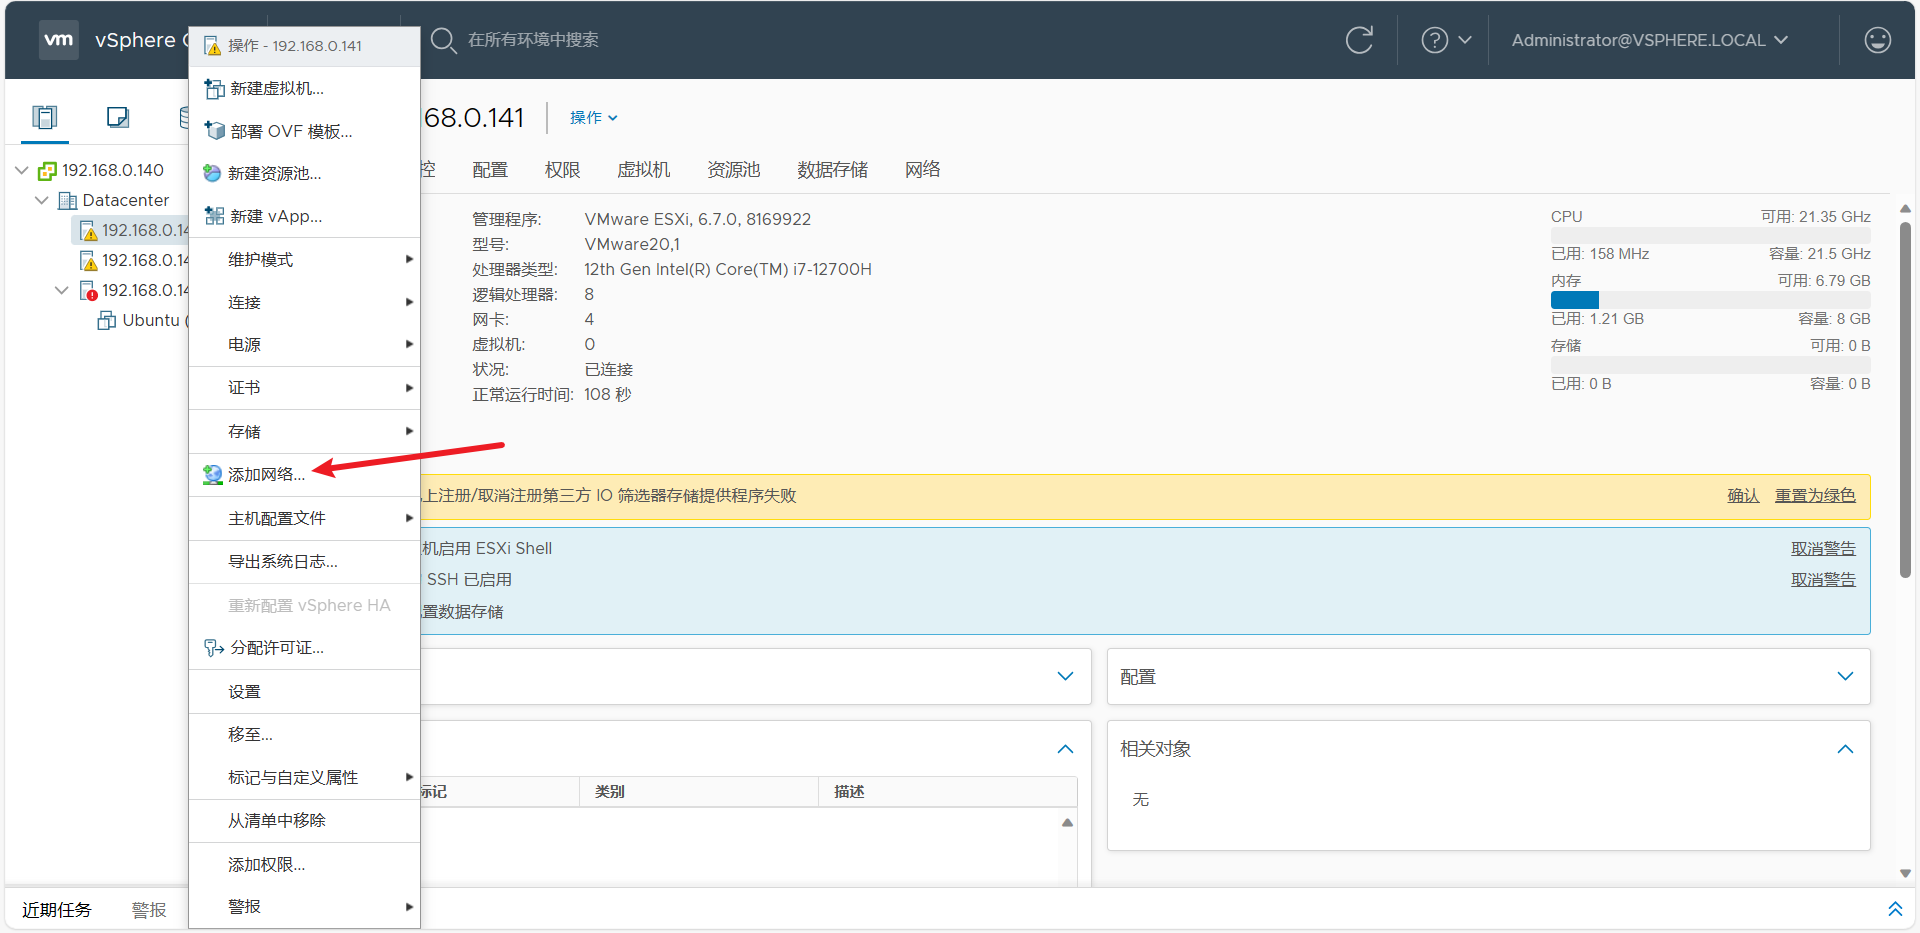
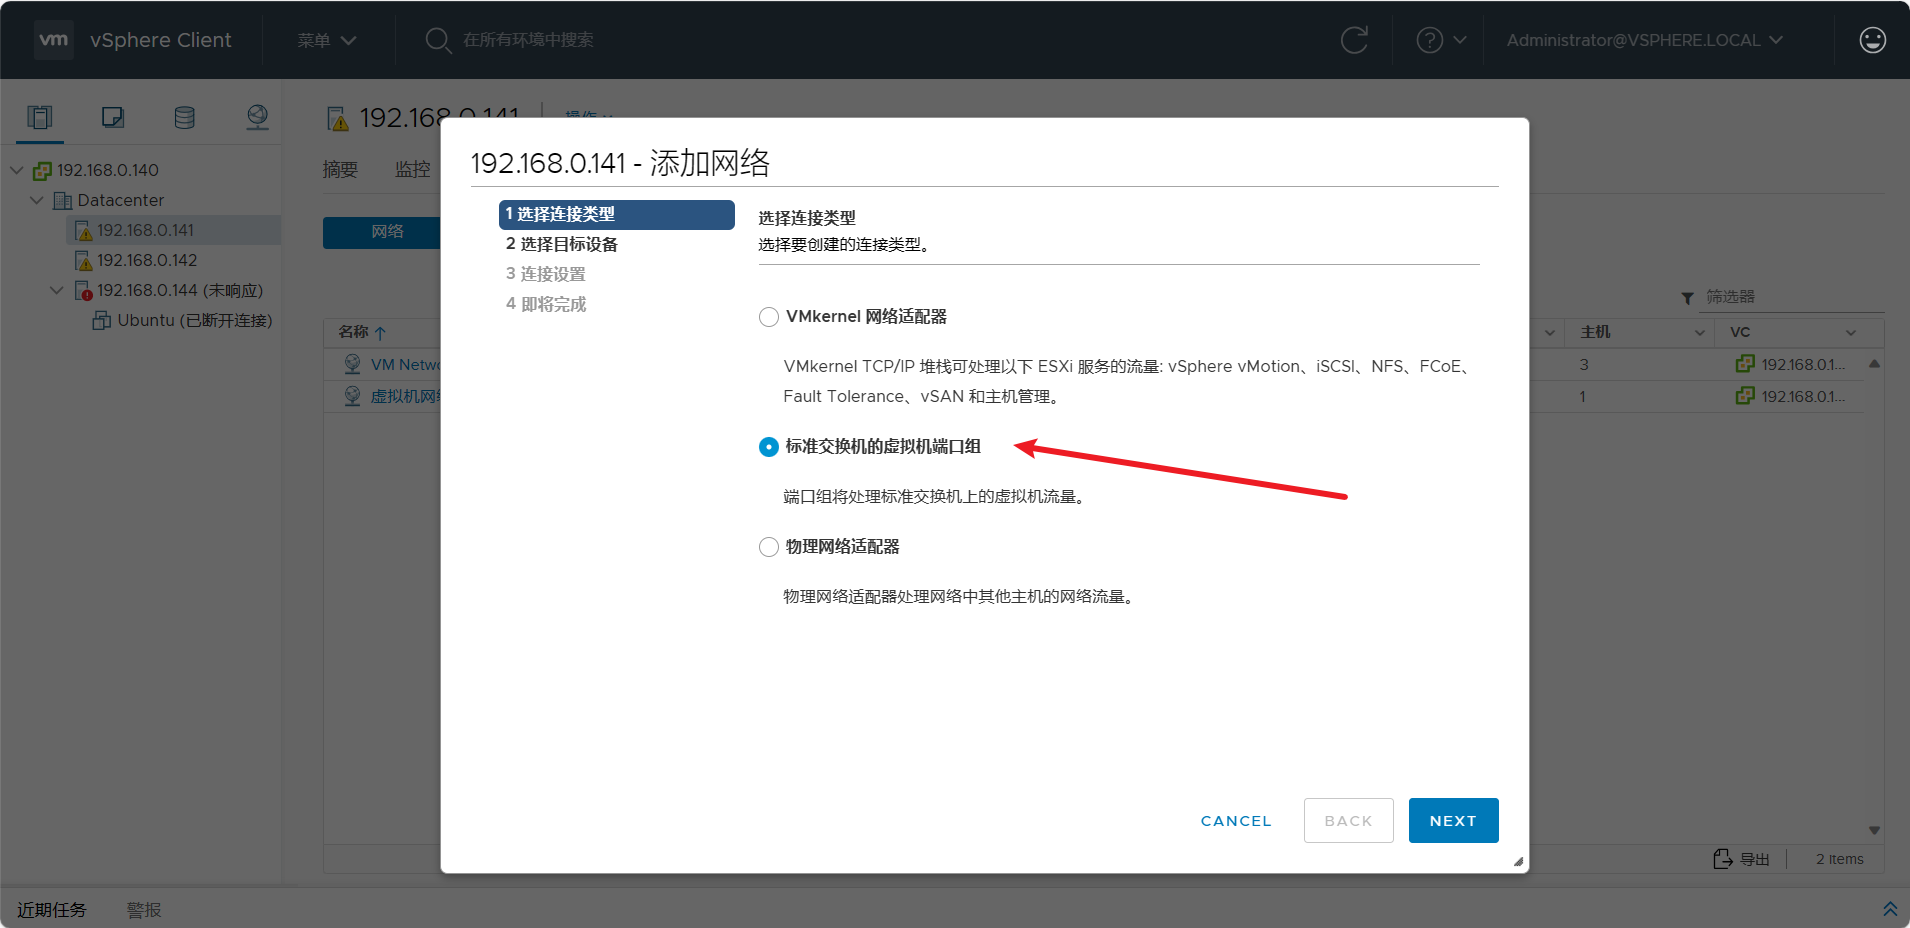
在每台Esxi主机右键选择"添加网络"


3.存储网络
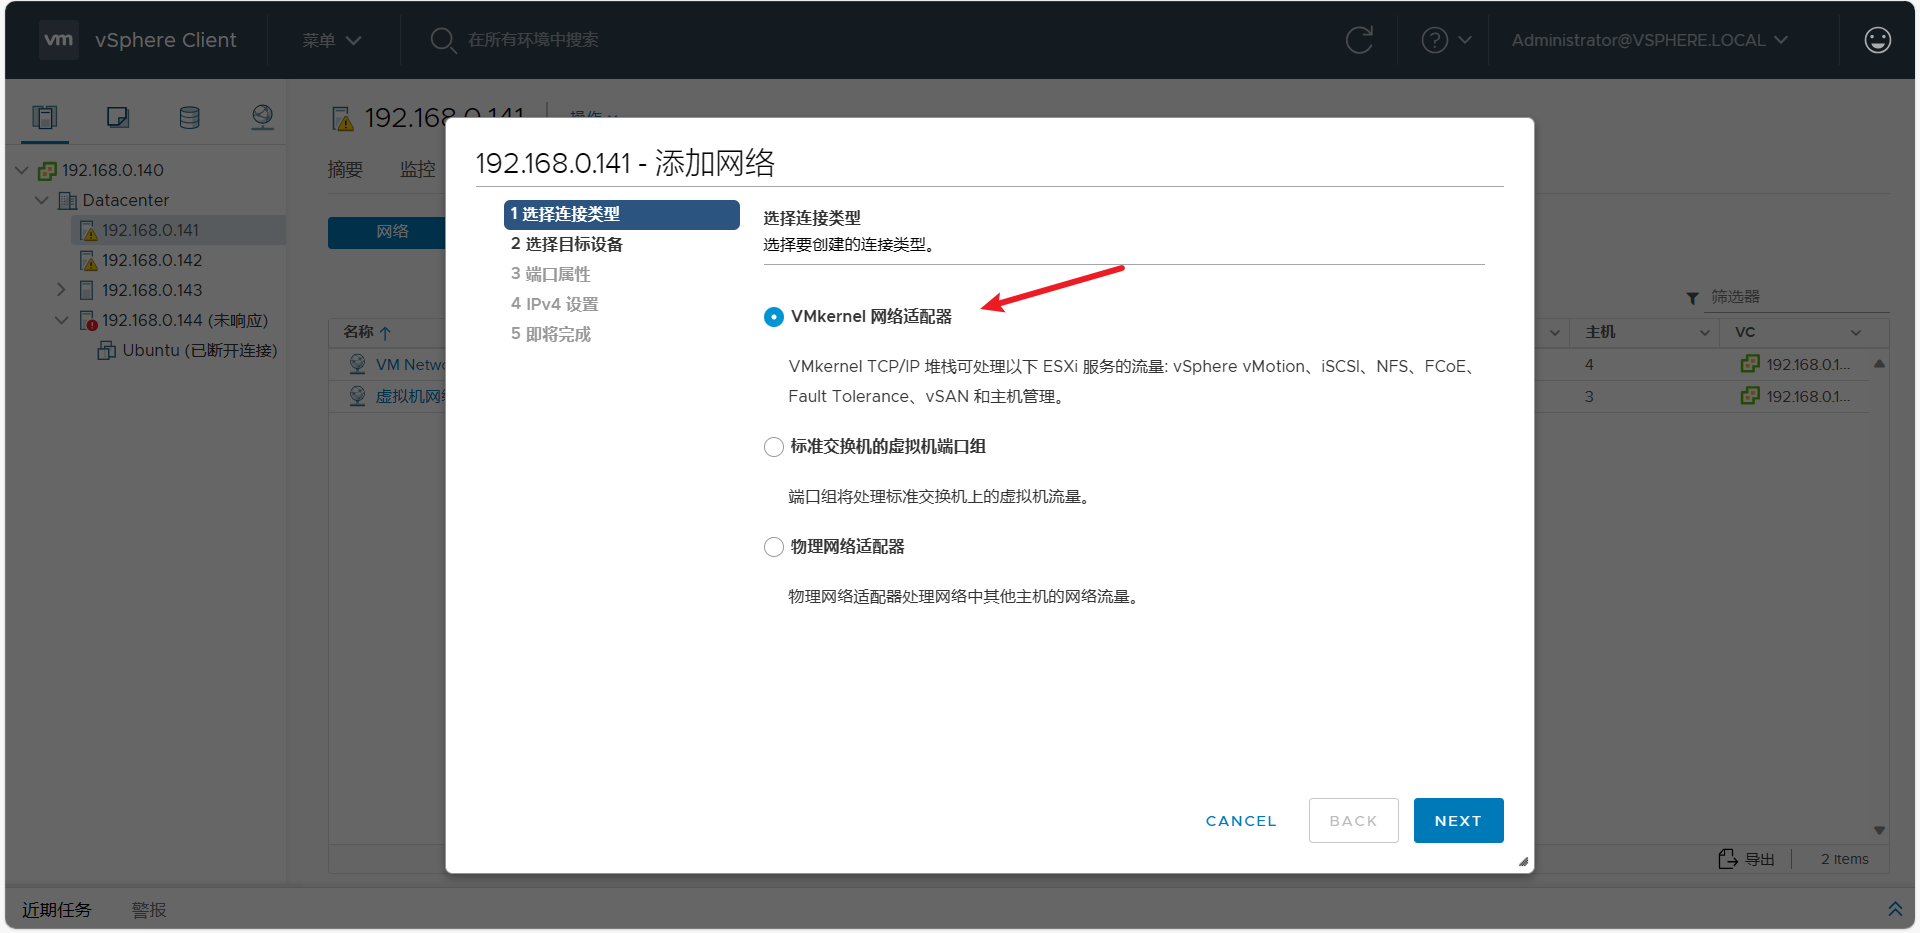
4.vMotion迁移网络搭建
vMotion迁移网络搭建过程与存储网络类似
Comments NOTHING