Zabbix概述
Zabbix 是一款可监控网络的众多参数以及服务器、虚拟机、应用程序、服务、数据库、网站、云等的健康状况和完整性。Zabbix 使用灵活的通知机制,允许用户为几乎任何事件配置基于电子邮件的警报。这允许对服务器问题做出快速反应。Zabbix 基于存储的数据提供报告和数据可视化功能。这使得 Zabbix 成为容量规划的理想选择。
Zabbix是一款能够监控各种网络参数以及服务器健康性和完整性的软件。Zabbix使用灵活的通知机制,允许用户为几乎任何事件配置基于邮件的告警。这样可以快速反馈服务器的问题。基于已存储的数据,Zabbix提供了出色的报告和数据可视化功能。
| ip | 主机名 | 作用 |
|---|---|---|
| 192.168.10.139 | localhost | 主控端 |
| 192.168.10.150 | localhost | 节点端 |
7.1Web环境搭建[主控端]
7.1.1安装LAMP
使用yum安装MariaDB,PHP和httpd
这里需要注意有些教程安装的是php-mysql,但从PHP5起已经被废弃,并别从PHP7开始已经被移除。
这里使用php-mysqlnd,具体区别如下:
MYSQL: 也叫 Original MySQL,PHP4版本的MYSQL扩展,从PHP5起已经被废弃,并别从PHP7开始已经被移除。
MYSQLI: 叫做 “MySQL增强扩展”。
MYSQLND: MYSQL NATIVE DIRVER 叫做MYSQL “官方驱动”或者更加直接点的叫做“原生驱动”
PDO :PHP Data Objects PHP数据对象,是PHP应用中的一个数据库抽象层规范。
yum install mariadb mariadb-server php php-mysqlnd httpd安装完成后会提示
....
Installed:
  apr-1.6.3-12.el8.x86_64                                             apr-util-1.6.1-6.el8.x86_64
  apr-util-bdb-1.6.1-6.el8.x86_64                                     apr-util-openssl-1.6.1-6.el8.x86_64
  centos-logos-httpd-85.8-2.el8.noarch                                httpd-2.4.37-43.module_el8.5.0+1022+b541f3b1.x86_64
  httpd-filesystem-2.4.37-43.module_el8.5.0+1022+b541f3b1.noarch      httpd-tools-2.4.37-43.module_el8.5.0+1022+b541f3b1.x86_64
  mailcap-2.1.48-3.el8.noarch                                         mariadb-3:10.3.28-1.module_el8.3.0+757+d382997d.x86_64
  mariadb-backup-3:10.3.28-1.module_el8.3.0+757+d382997d.x86_64       mariadb-common-3:10.3.28-1.module_el8.3.0+757+d382997d.x86_64
  mariadb-connector-c-3.1.11-2.el8_3.x86_64                           mariadb-connector-c-config-3.1.11-2.el8_3.noarch
  mariadb-errmsg-3:10.3.28-1.module_el8.3.0+757+d382997d.x86_64       mariadb-gssapi-server-3:10.3.28-1.module_el8.3.0+757+d382997d.x86_64
  mariadb-server-3:10.3.28-1.module_el8.3.0+757+d382997d.x86_64       mariadb-server-utils-3:10.3.28-1.module_el8.3.0+757+d382997d.x86_64
  mod_http2-1.15.7-3.module_el8.4.0+778+c970deab.x86_64               nginx-filesystem-1:1.14.1-9.module_el8.0.0+184+e34fea82.noarch
  perl-Carp-1.42-396.el8.noarch                                       perl-DBD-MySQL-4.046-3.module_el8.3.0+419+c2dec72b.x86_64
  perl-DBI-1.641-3.module_el8.3.0+413+9be2aeb5.x86_64                 perl-Data-Dumper-2.167-399.el8.x86_64
  perl-Digest-1.17-395.el8.noarch                                     perl-Digest-MD5-2.55-396.el8.x86_64
  perl-Encode-4:2.97-3.el8.x86_64                                     perl-Errno-1.28-420.el8.x86_64
  perl-Exporter-5.72-396.el8.noarch                                   perl-File-Path-2.15-2.el8.noarch
  perl-File-Temp-0.230.600-1.el8.noarch                               perl-Getopt-Long-1:2.50-4.el8.noarch
  perl-HTTP-Tiny-0.074-1.el8.noarch                                   perl-IO-1.38-420.el8.x86_64
  perl-IO-Socket-IP-0.39-5.el8.noarch                                 perl-IO-Socket-SSL-2.066-4.module_el8.3.0+410+ff426aa3.noarch
  perl-MIME-Base64-3.15-396.el8.x86_64                                perl-Math-BigInt-1:1.9998.11-7.el8.noarch
  perl-Math-Complex-1.59-420.el8.noarch                               perl-Mozilla-CA-20160104-7.module_el8.3.0+416+dee7bcef.noarch
  perl-Net-SSLeay-1.88-1.module_el8.3.0+410+ff426aa3.x86_64           perl-PathTools-3.74-1.el8.x86_64
  perl-Pod-Escapes-1:1.07-395.el8.noarch                              perl-Pod-Perldoc-3.28-396.el8.noarch
  perl-Pod-Simple-1:3.35-395.el8.noarch                               perl-Pod-Usage-4:1.69-395.el8.noarch
  perl-Scalar-List-Utils-3:1.49-2.el8.x86_64                          perl-Socket-4:2.027-3.el8.x86_64
  perl-Storable-1:3.11-3.el8.x86_64                                   perl-Term-ANSIColor-4.06-396.el8.noarch
  perl-Term-Cap-1.17-395.el8.noarch                                   perl-Text-ParseWords-3.30-395.el8.noarch
  perl-Text-Tabs+Wrap-2013.0523-395.el8.noarch                        perl-Time-Local-1:1.280-1.el8.noarch
  perl-URI-1.73-3.el8.noarch                                          perl-Unicode-Normalize-1.25-396.el8.x86_64
  perl-constant-1.33-396.el8.noarch                                   perl-interpreter-4:5.26.3-420.el8.x86_64
  perl-libnet-3.11-3.el8.noarch                                       perl-libs-4:5.26.3-420.el8.x86_64
  perl-macros-4:5.26.3-420.el8.x86_64                                 perl-parent-1:0.237-1.el8.noarch
  perl-podlators-4.11-1.el8.noarch                                    perl-threads-1:2.21-2.el8.x86_64
  perl-threads-shared-1.58-2.el8.x86_64                               php-7.2.24-1.module_el8.2.0+313+b04d0a66.x86_64
  php-cli-7.2.24-1.module_el8.2.0+313+b04d0a66.x86_64                 php-common-7.2.24-1.module_el8.2.0+313+b04d0a66.x86_64
  php-fpm-7.2.24-1.module_el8.2.0+313+b04d0a66.x86_64                 php-mysqlnd-7.2.24-1.module_el8.2.0+313+b04d0a66.x86_64
  php-pdo-7.2.24-1.module_el8.2.0+313+b04d0a66.x86_64                 psmisc-23.1-5.el8.x86_64

Complete!
Apache 2.4.37 , MariaDB 10.3.28 , php7.2.24安装完成
7.1.2.配置SELinux与防火墙
使用root权限打开/etc/selinux/config
vi /etc/selinux/config
....
SELINUX=enforcing 改为SELINUX=disabled
....之后使用reboot重启后,使用getenforce查看是否关闭了selinux
接着开启Apache所需的80端口
firewall-cmd --zone=public --add-port=80/tcp --permanent又或者直接关闭防火墙
systemctl disable firewalld重新加载配置信息
firewall-cmd --reload7.1.3.测试Apache
启动http服务
systemctl start httpd设置开机自启
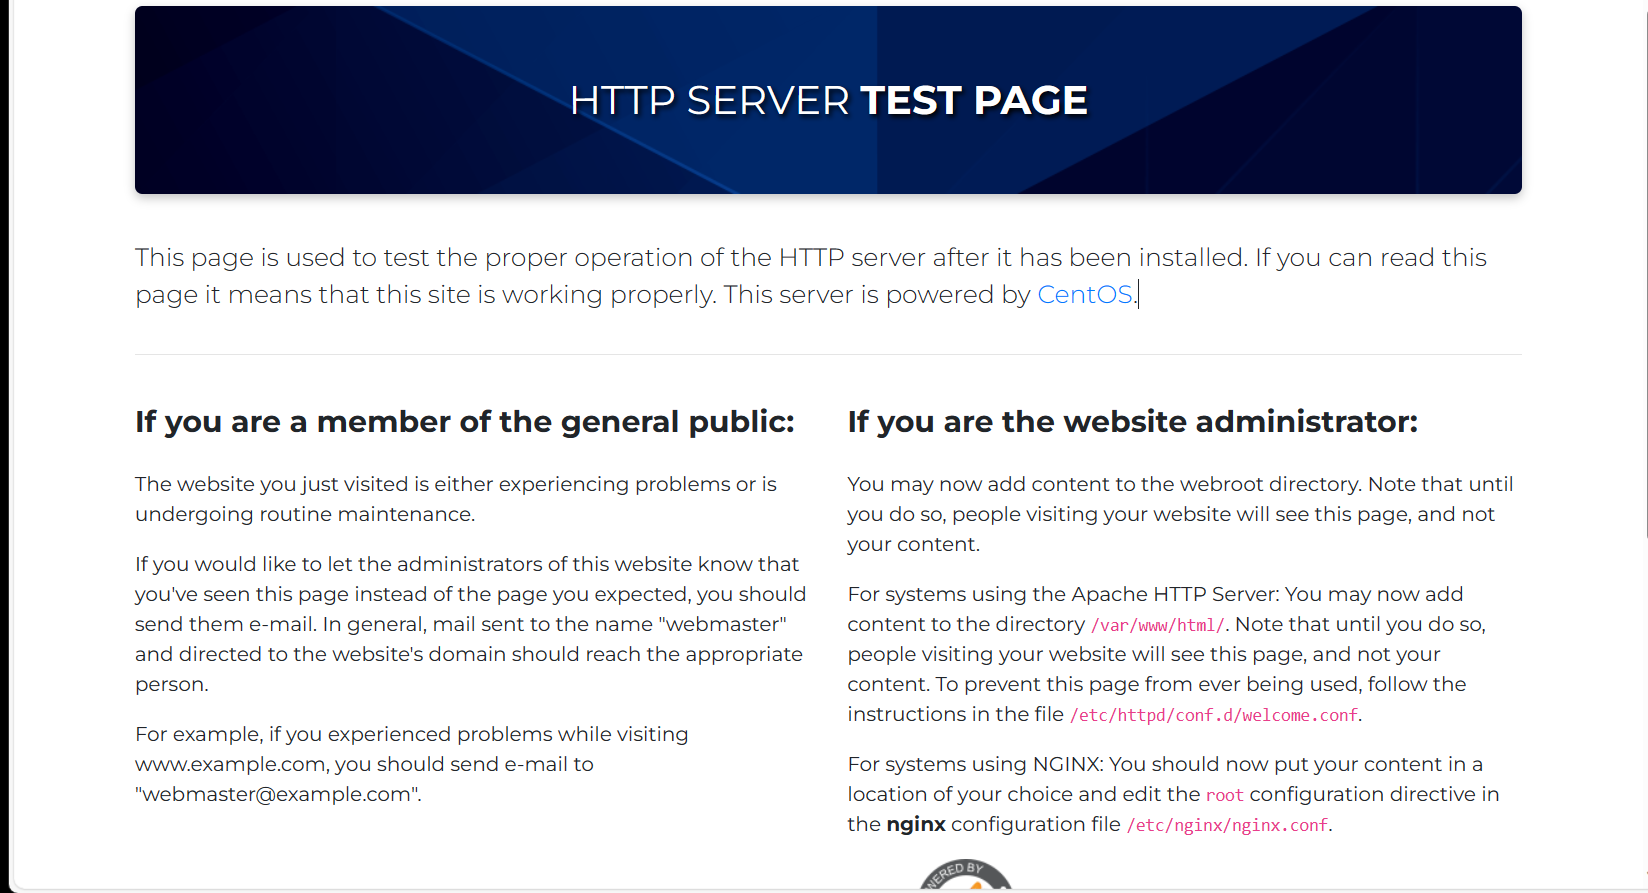
systemctl enable httpd正常启动后,使用浏览器访问虚拟机ip即可看到以下页面
7.1.4.配置数据库
设置数据库服务开机自启并启动
systemctl enable mariadb
systemctl start mariadb
初始化数据库
mysql_secure_installation[root@localhost ~]# mysql_secure_installation
NOTE: RUNNING ALL PARTS OF THIS SCRIPT IS RECOMMENDED FOR ALL MariaDB
SERVERS IN PRODUCTION USE! PLEASE READ EACH STEP CAREFULLY!
In order to log into MariaDB to secure it, we'll need the current
password for the root user. If you've just installed MariaDB, and
you haven't set the root password yet, the password will be blank,
so you should just press enter here.
#输入数据库root用户密码(默认为空,直接回车)
Enter current password for root (enter for none):
OK, successfully used password, moving on...
Setting the root password ensures that nobody can log into the MariaDB
root user without the proper authorisation.
#是否设置root密码
Set root password? [Y/n] y
New password:
Re-enter new password:
Password updated successfully!
Reloading privilege tables..
... Success!
By default, a MariaDB installation has an anonymous user, allowing anyone
to log into MariaDB without having to have a user account created for
them. This is intended only for testing, and to make the installation
go a bit smoother. You should remove them before moving into a
production environment.
#是否移除匿名用户
Remove anonymous users? [Y/n] y
... Success!
Normally, root should only be allowed to connect from 'localhost'. This
ensures that someone cannot guess at the root password from the network.
#是否禁止root远程登录
Disallow root login remotely? [Y/n] n
... skipping.
By default, MariaDB comes with a database named 'test' that anyone can
access. This is also intended only for testing, and should be removed
before moving into a production environment.
#是否删除测试用数据库和权限
Remove test database and access to it? [Y/n] y
- Dropping test database...
... Success!
- Removing privileges on test database...
... Success!
Reloading the privilege tables will ensure that all changes made so far
will take effect immediately.
#是否重新加载权限表
Reload privilege tables now? [Y/n] y
... Success!
Cleaning up...
All done! If you've completed all of the above steps, your MariaDB
installation should now be secure.
Thanks for using MariaDB!7.1.5创建Zabbix数据库及用户
1.创建Zabbix数据库
创建有两种方法:
(1)在命令行中使用mysql命令的-e选项调用数据库操作命令完成创建
[root@localhost ~]# mysql -u root -p -e "create database zabbix default character set utf8 collate utf8_bin;"
Enter password:
[root@localhost ~]#
(2)进入数据库,在数据库内进行操作(本教程跳过)
2.创建Zabbix用户
创建Zabbix普通用户,并赋予其操作数据库zabbix权限
[root@localhost ~]# useradd zabbix
[root@localhost ~]# passwd zabbix
Changing password for user zabbix.
New password: #设置zabbix用户密码
Retype new password:
passwd: all authentication tokens updated successfully.
[root@localhost ~]#
赋予其操作数据库zabbix权限
[root@localhost ~]# mysql -u root -p -e "grant all on zabbix.* to 'zabbix'@'%' identified by '这里填zabbix用户密码';"
Enter password: #这里输入数据库root用户密码
[root@localhost ~]#
3.测试zabbix用户
测试该用户是否能正常连接到MariaDB数据库
[root@localhost ~]# mysql -u zabbix -p
Enter password:
Welcome to the MariaDB monitor.  Commands end with ; or \g.
Your MariaDB connection id is 29
Server version: 10.3.28-MariaDB MariaDB Server

Copyright (c) 2000, 2018, Oracle, MariaDB Corporation Ab and others.

Type 'help;' or '\h' for help. Type '\c' to clear the current input statement.

MariaDB [(none)]> show databases;
+--------------------+
| Database           |
+--------------------+
| information_schema |
| zabbix             |
+--------------------+
2 rows in set (0.001 sec)

MariaDB [(none)]>exit
Bye
[root@localhost ~]#
7.2 Server端配置[主控端]
7.2.1软件包安装
先获取yum源
[root@localhost ~]# rpm -ivh https://repo.zabbix.com/zabbix/5.0/rhel/8/x86_64/zabbix-release-5.0-1.el8.noarch.rpm
Retrieving https://repo.zabbix.com/zabbix/5.0/rhel/8/x86_64/zabbix-release-5.0-1.el8.noarch.rpm
warning: /var/tmp/rpm-tmp.wDTA2z: Header V4 RSA/SHA512 Signature, key ID a14fe591: NOKEY
Verifying...                          ################################# [100%]
Preparing...                          ################################# [100%]
    package zabbix-release-5.0-1.el8.noarch is already installed
换源
换为阿里云的源
[root@localhost ~]# sed -i '3c baseurl=http://mirrors.aliyun.com/zabbix/zabbix/5.0/rhel/8/$basearch/' /etc/yum.repos.d/zabbix.repo安装软件包
yum install zabbix-server-mysql zabbix-web-mysql zabbix-apache-conf zabbix-agent zabbix-get7.2.2配置数据库
1.导入表结构
[root@localhost ~]# cd /usr/share/doc/zabbix-server-mysql/
[root@localhost zabbix-server-mysql]# ls
AUTHORS  ChangeLog  COPYING  create.sql.gz  double.sql  NEWS  README
[root@localhost zabbix-server-mysql]# zcat create.sql.gz |mysql -u zabbix -p zabbix
Enter password:

[root@localhost zabbix-server-mysql]#
2.修改配置文件zabbix_server.conf
[root@localhost ~]#cd /etc/zabbix/
[root@localhost zabbix]# vim zabbix_server.conf
[root@localhost zabbix]# ls
"'"   web   zabbix_agentd.conf   zabbix_agentd.d   zabbix_server.conf
[root@localhost zabbix]#
将该配置文件的修改信息改为以下内容
DBHost=localhost
DBName=zabbix
DBUser=zabbix
DBPassword=自己设置的数据库zabbix用户密码
3.修改zabbix.conf
编辑文件 /etc/php-fpm.d/zabbix.conf,添加上海时区
sed -i '$a php_value[date.timezone] = Asia/Shanghai' /etc/php-fpm.d/zabbix.conf修改后可查看/etc/php-fpm.d/zabbix.conf,最后一行将改为上海时区
[zabbix]
user = apache
group = apache

listen = /run/php-fpm/zabbix.sock
listen.acl_users = apache,nginx
listen.allowed_clients = 127.0.0.1

pm = dynamic
pm.max_children = 50
pm.start_servers = 5
pm.min_spare_servers = 5
pm.max_spare_servers = 35
pm.max_requests = 200

php_value[session.save_handler] = files
php_value[session.save_path]    = /var/lib/php/session

php_value[max_execution_time] = 300
php_value[memory_limit] = 128M
php_value[post_max_size] = 16M
php_value[upload_max_filesize] = 2M
php_value[max_input_time] = 300
php_value[max_input_vars] = 10000
; php_value[date.timezone] = Europe/Riga
php_value[date.timezone] = Asia/Shanghai
之后记得重启php
[root@localhost php-fpm.d]# systemctl restart php-fpm4.启动服务
systemctl restart zabbix-server
systemctl enable zabbix-server
7.2.3 Zabbix访问测试
重启一下Apache,以重载配置
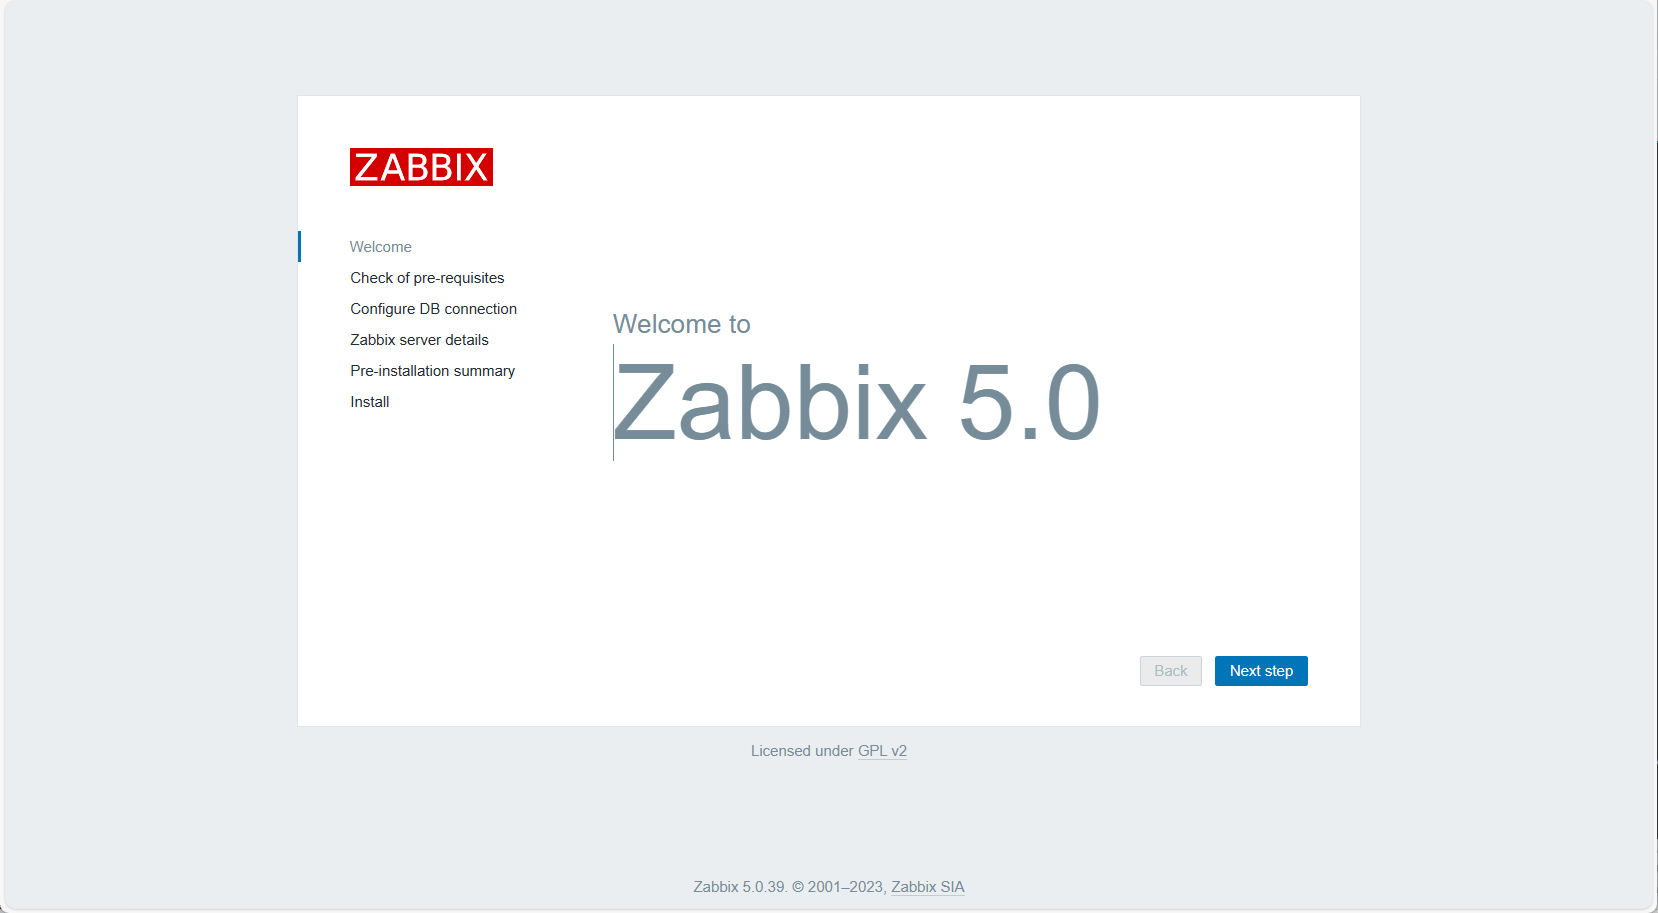
systemctl restart httpd随后浏览器访问http://ip地址/zabbix/setup.php即可出现该画面
7.2.4 配置web页面
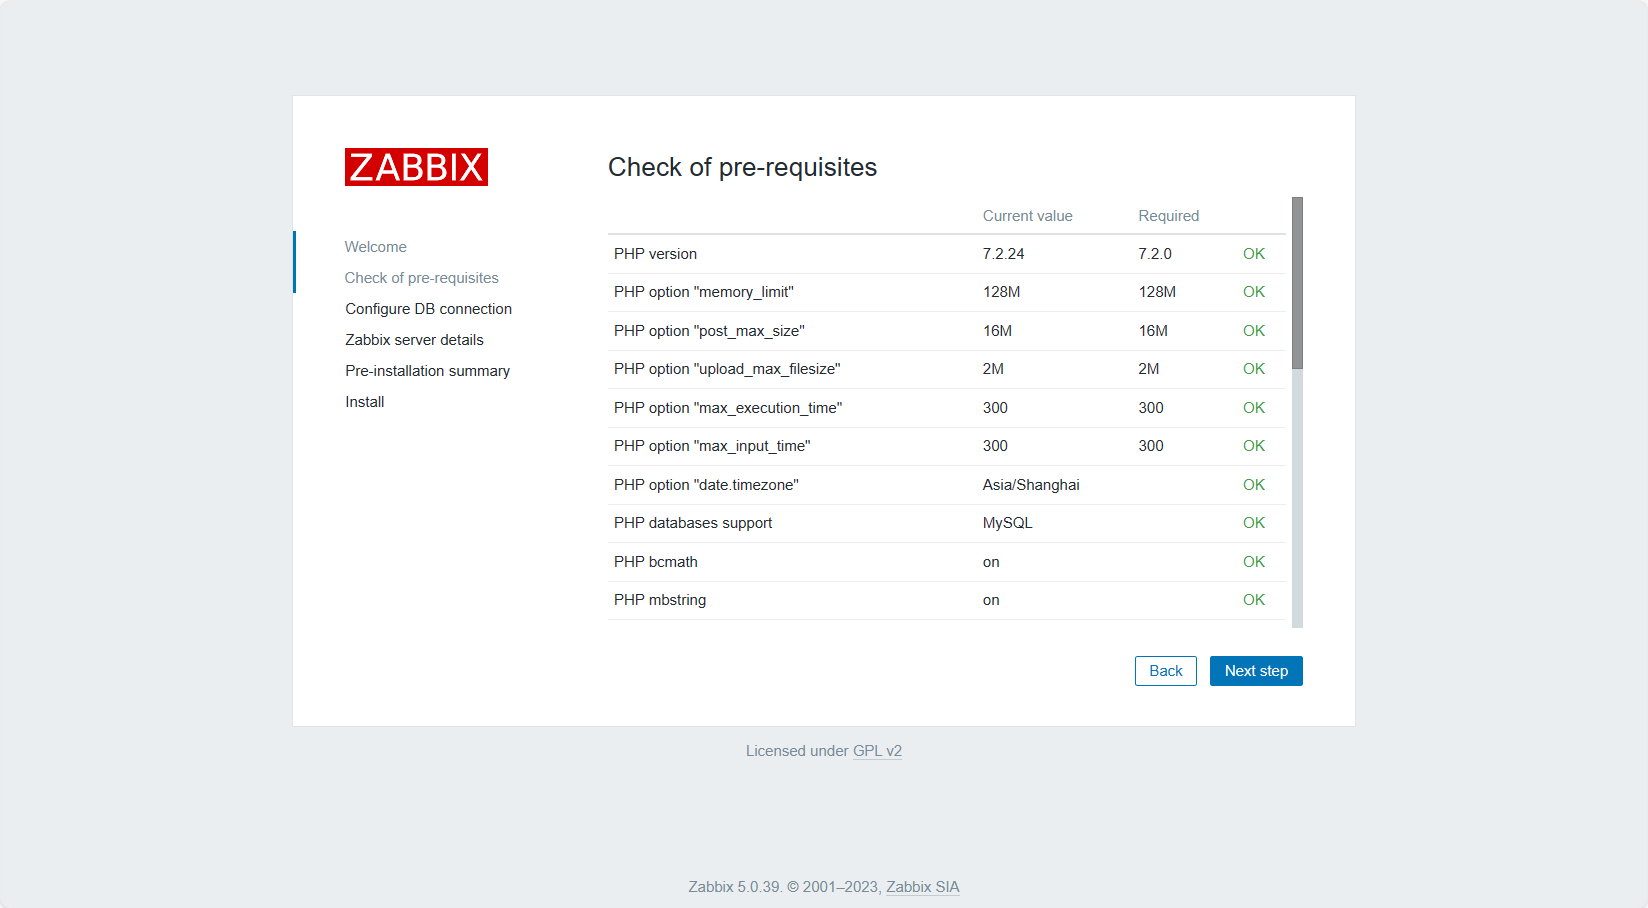
自动监测环境是否满足,全绿通过后下一步
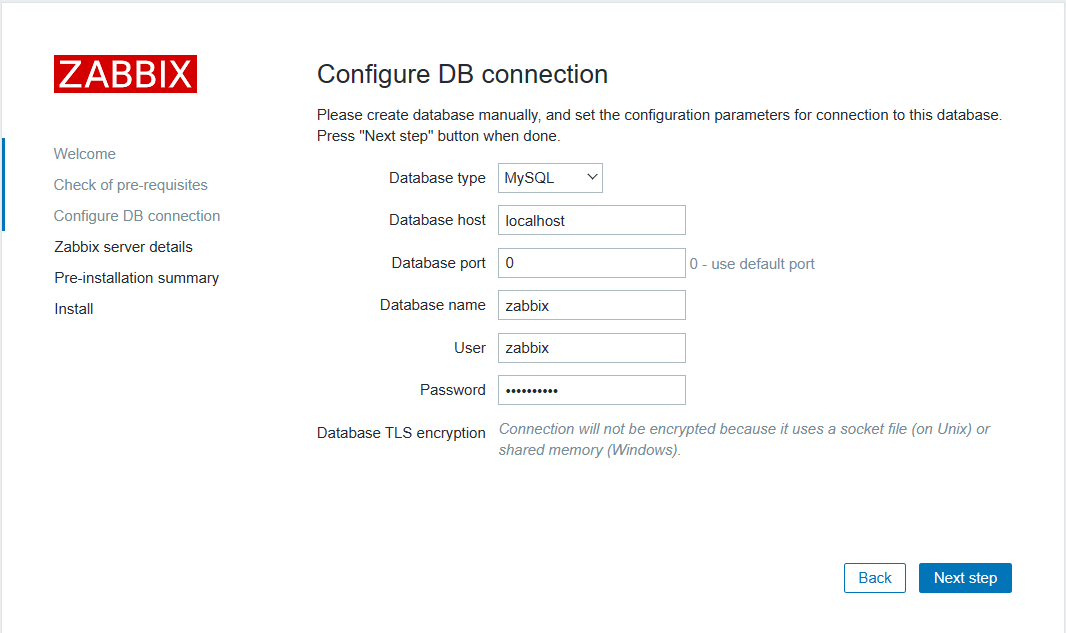
配置数据库信息
服务器配置(默认即可,下一步)
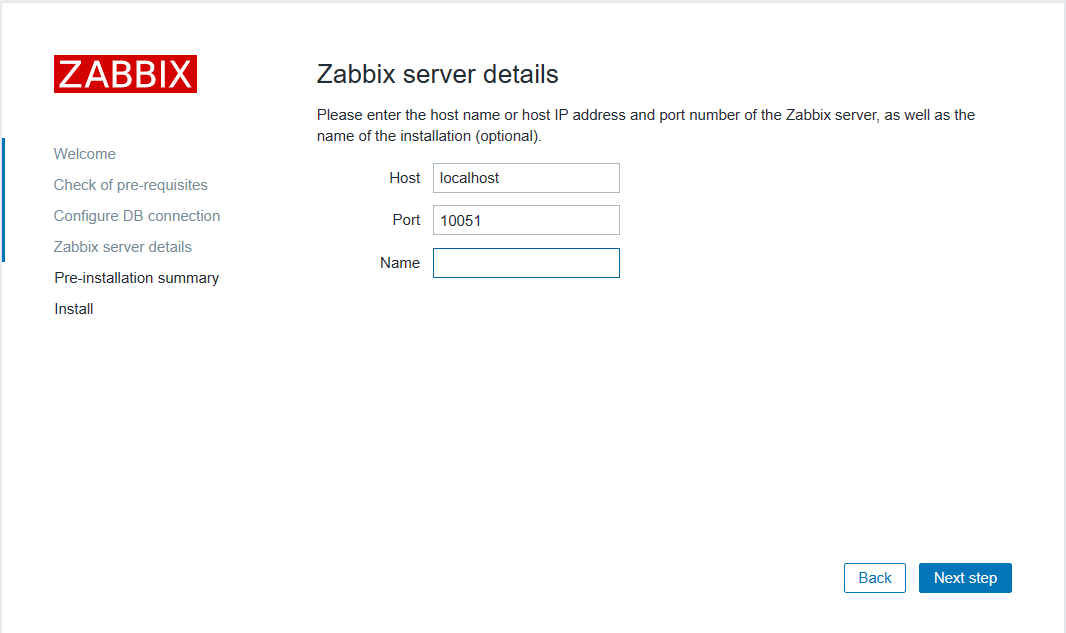
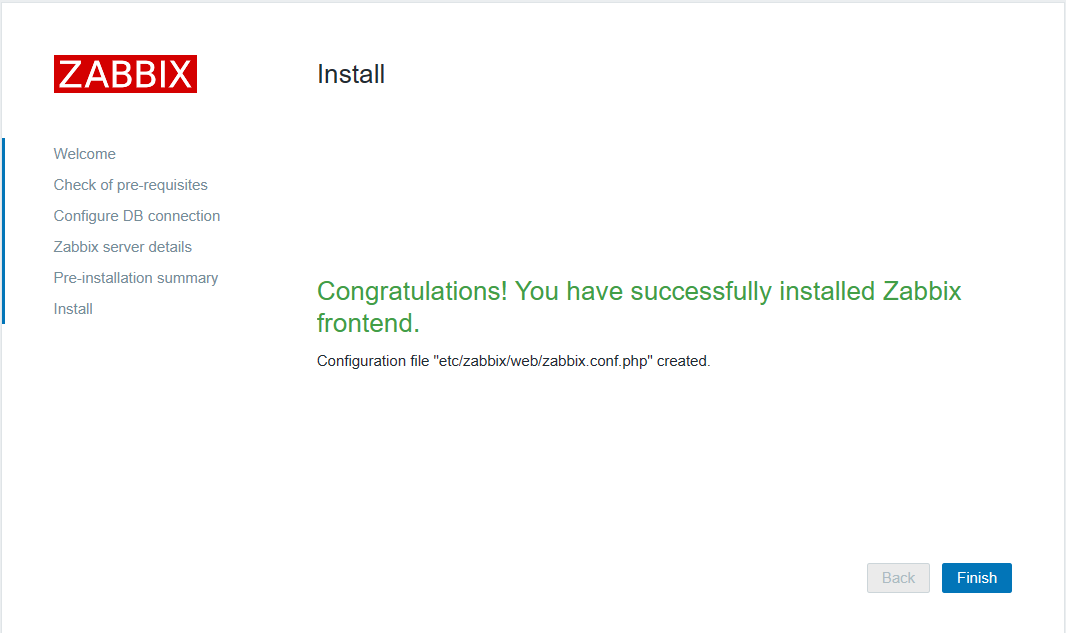
安装完成
提示配置信息已保存在/etc/zabbix/web/zabbix.conf.php中,后续有需要可以自行查看
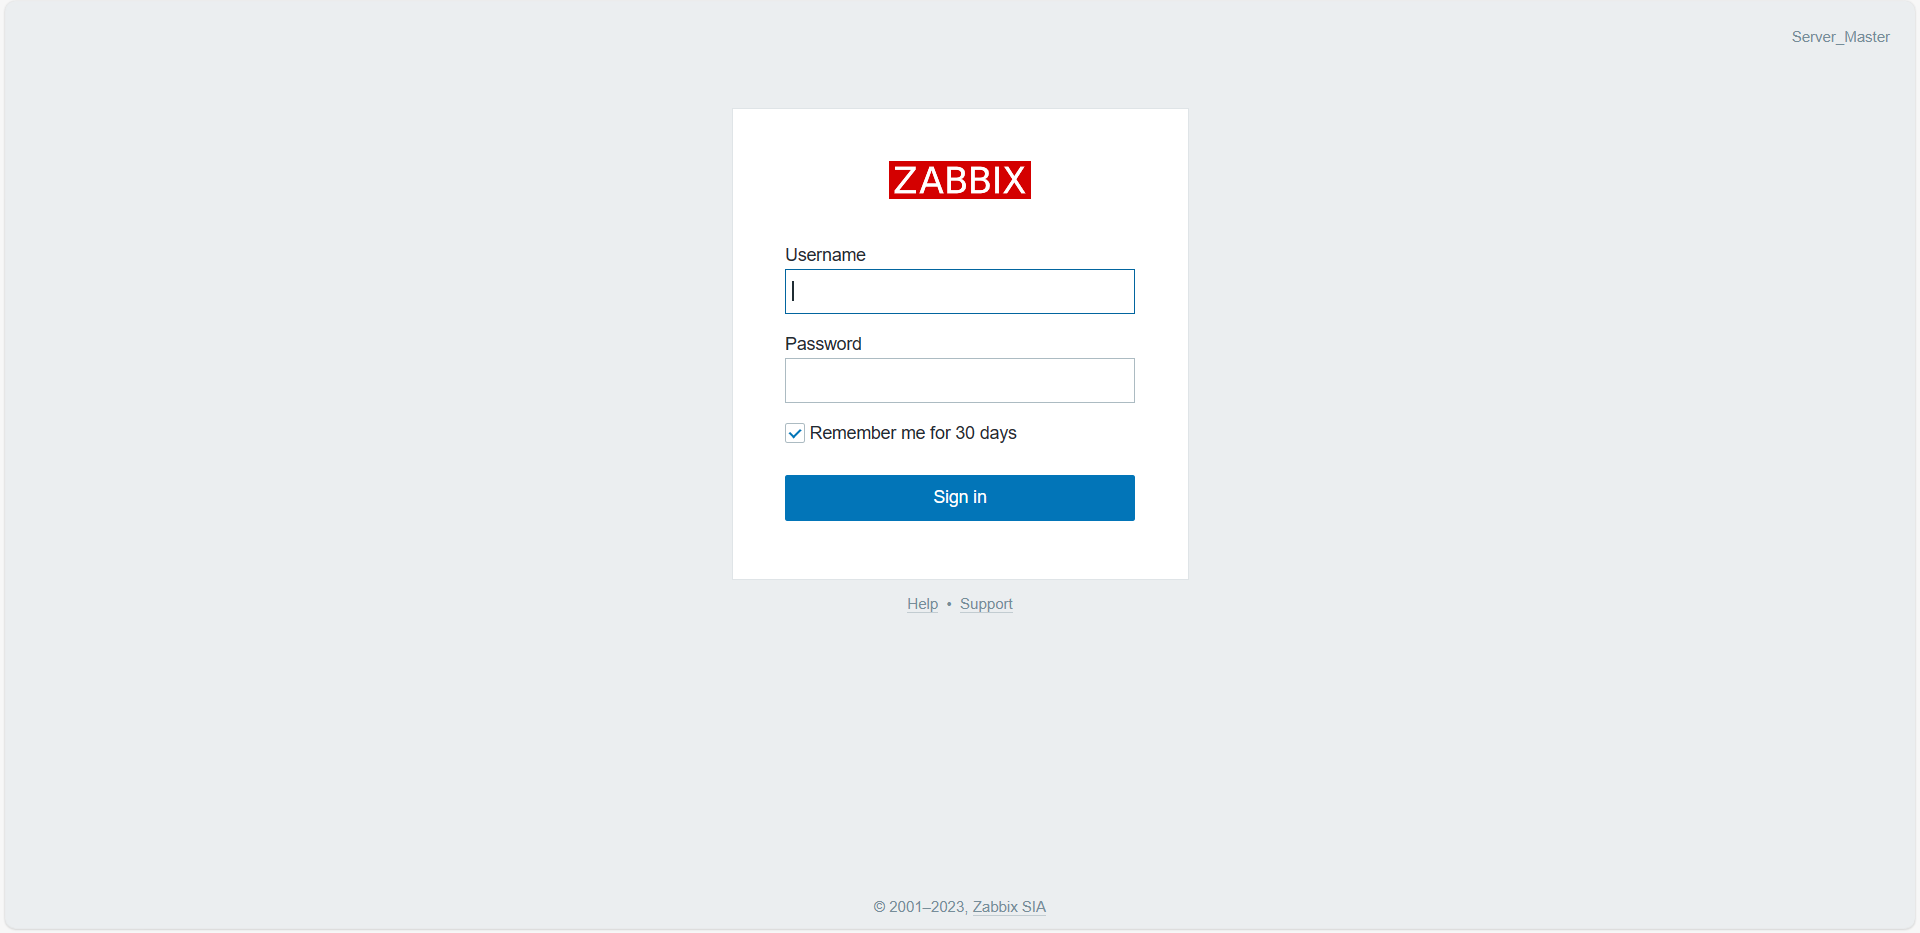
接下来访问http://ip地址/zabbix/index.php即可登录
默认初始账户Admin密码zabbix
登录后界面如下
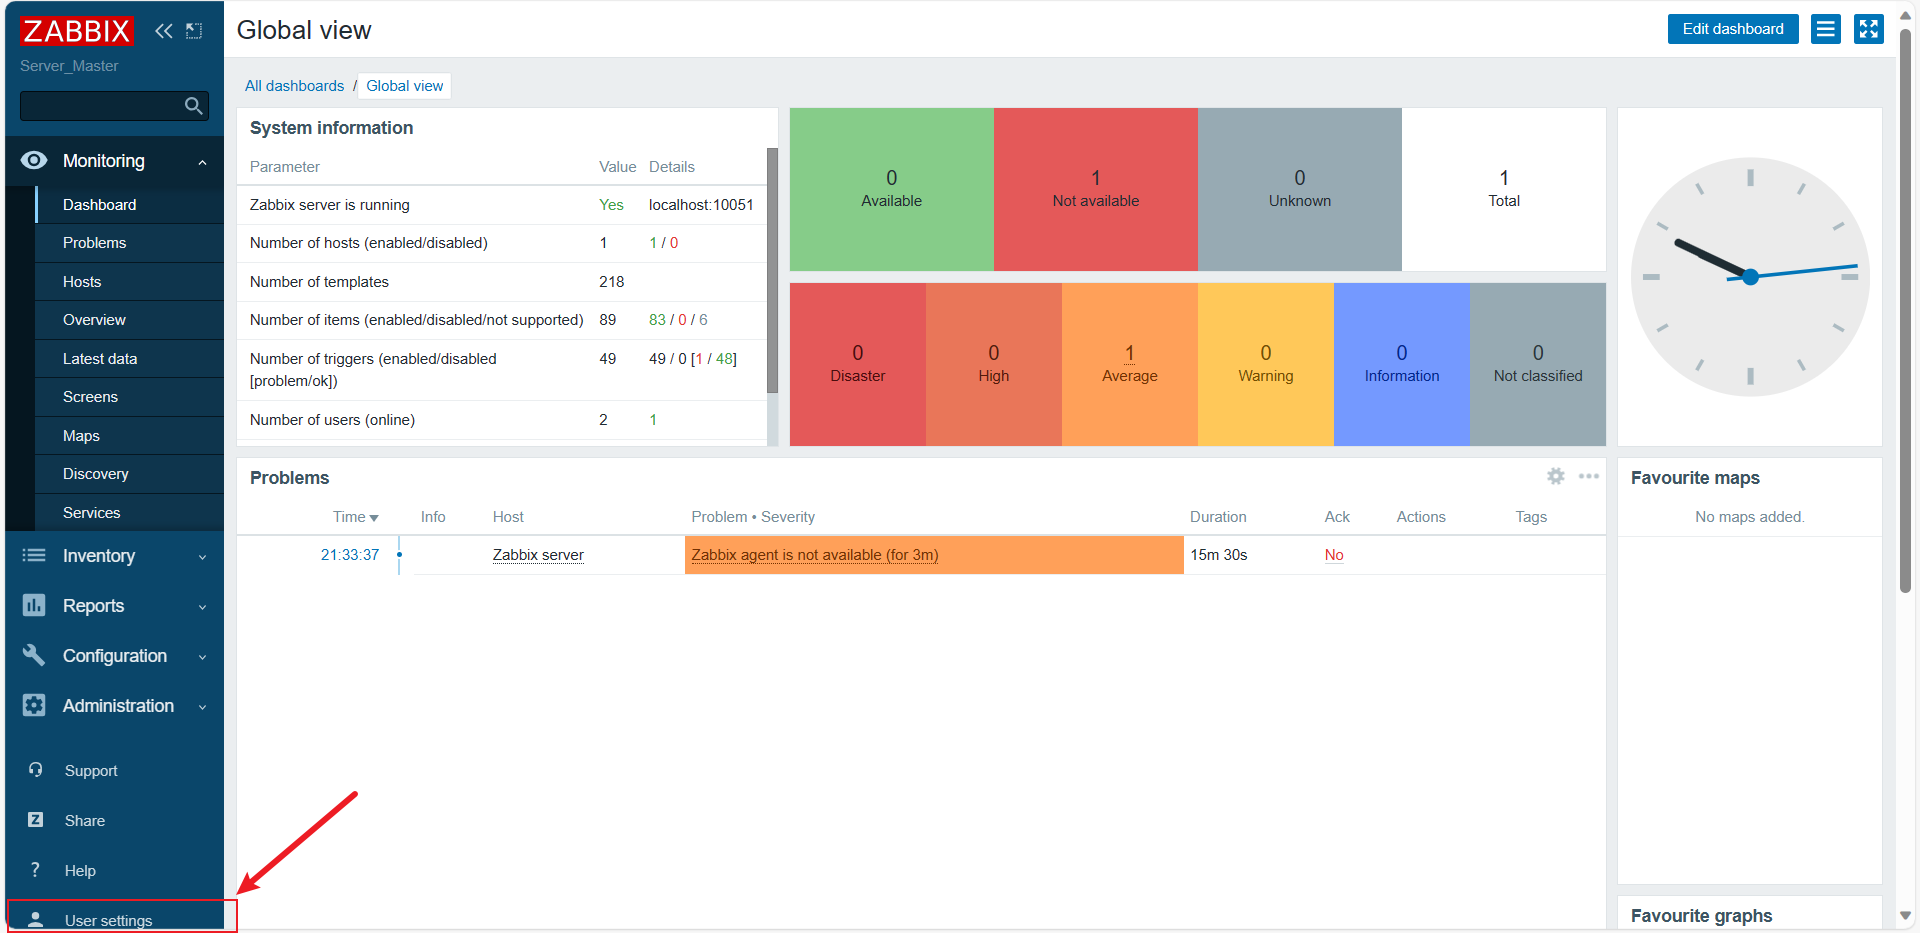
点击左下角的User settings,将Language改成中文Chinese。
PS:如果提示未安装字体,使用以下安装
yum reinstall glibc-common
yum install langpacks-zh_CN.noarch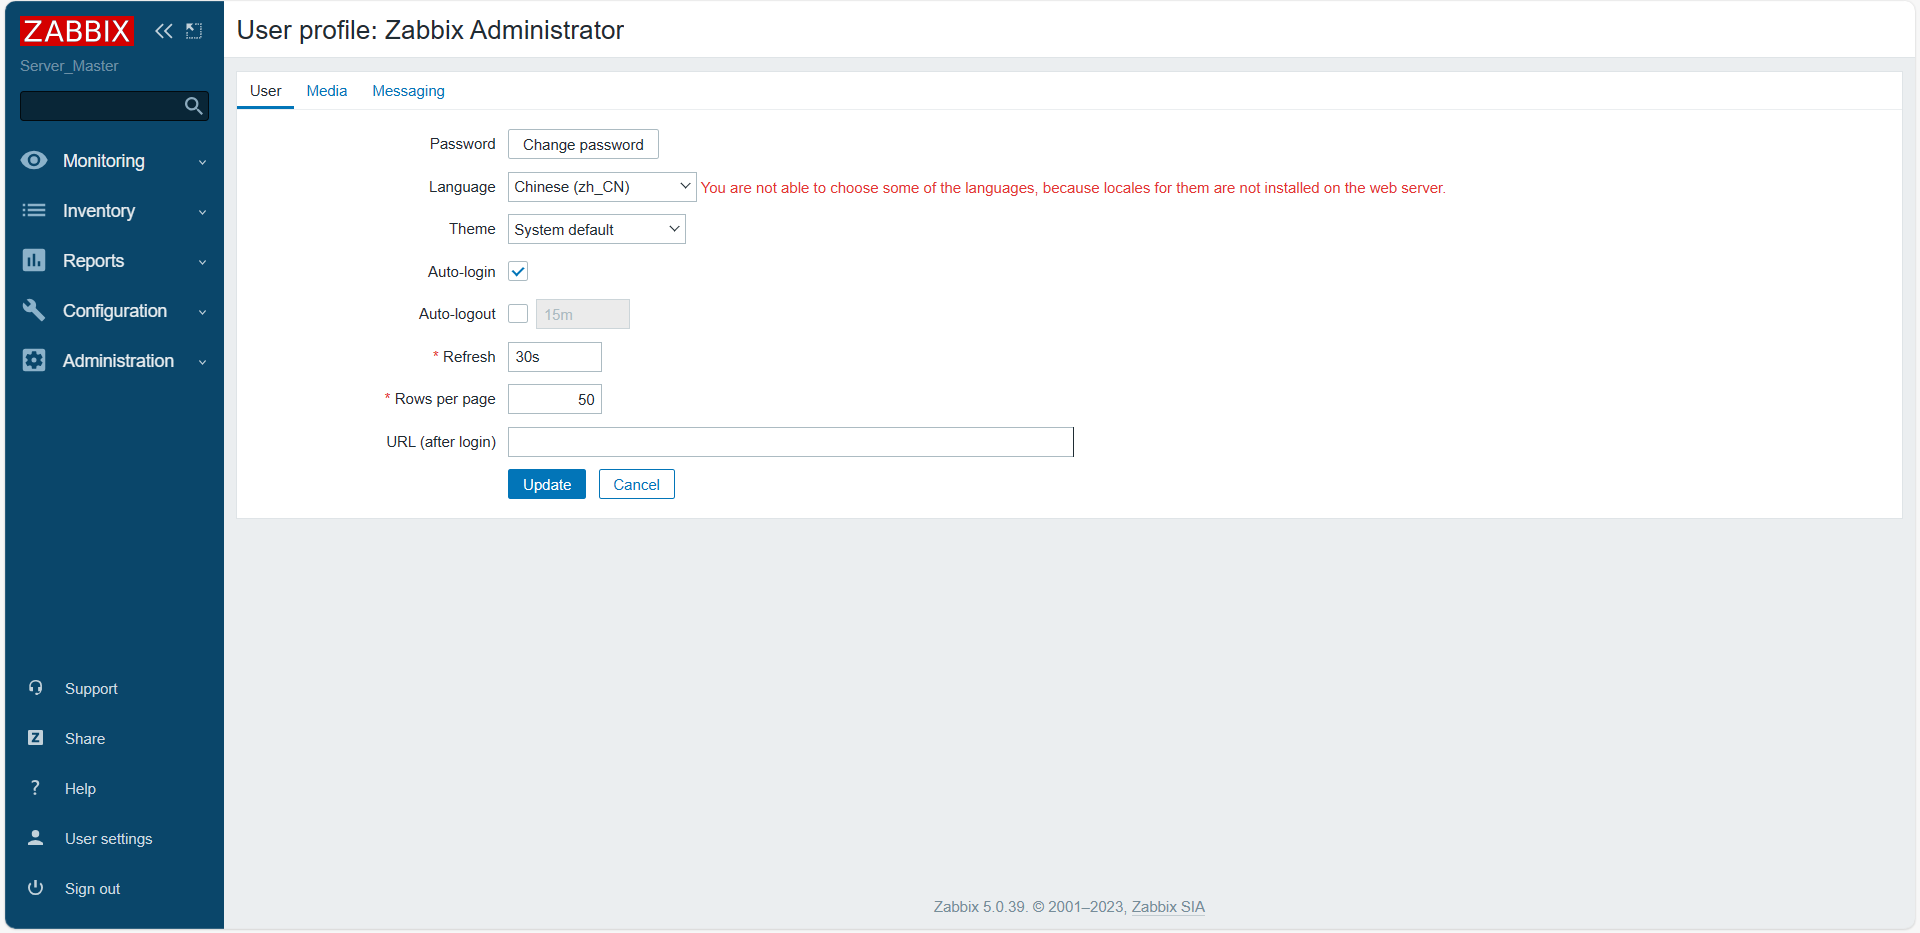
7.3 Agent端安装配置[节点端]
7.3.1安装zabbix-agent
yum install zabbix-agent7.3.2配置zabbix-agent
[root@bogon ~]# vi /etc/zabbix/zabbix_agentd.conf 修改以下几个参数
Server=192.168.10.139 #主控端ip
ServerActive=192.168.10.139
Hostname=192.168.10.150
PS:注意主控端也需要安装zabbix-agent,并配置该文件,配置示例如下
Server=192.168.10.139 #主控端ip
ServerActive=192.168.10.139
Hostname=192.168.10.139
7.3.3启动zabbix-agent
[root@bogon ~]# systemctl start zabbix-agent
[root@bogon ~]# systemctl enable zabbix-agent
7.3.4配置防火墙与SELinux
被控端:
开放10050端口
firewall-cmd --zone=public --add-port=1050/tcp --permanent关闭SELinux
可参考7.1.2.配置SELinux与防火墙,此处跳过
7.4连通性测试
在主控端测试
[root@localhost ~]# zabbix_get -s 192.168.10.150 -k system.uname
Linux bogon 4.18.0-348.7.1.el8_5.x86_64 #1 SMP Wed Dec 22 13:25:12 UTC 2021 x86_64


Comments NOTHING